
Doing a stereo installation for a friend
 Jun 1, 2006, 10:20 AM
#61
Evolving Member
Thread Starter

Join Date: May 2006
Location: OC
Posts: 103
Likes: 0
Received 0 Likes
on
0 Posts
Been really busy so I haven't been able to work on the car much...
Finally got the plastics in. Test fitting the pieces.
Painted two of the trim pieces.
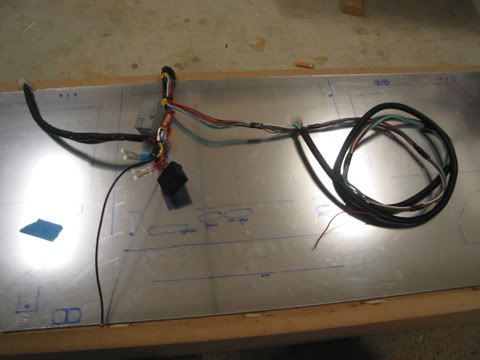
Soldered and cleaned up the wire harness.
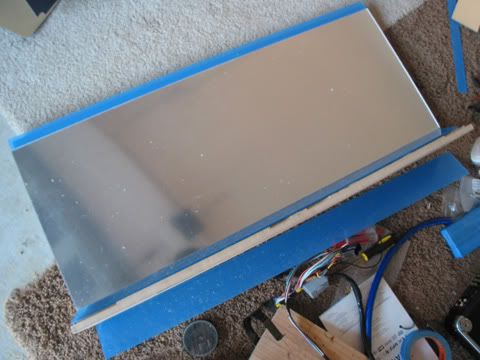
Also, spent a couple hours drawing the final measurements onto the mirror. It took a while because the original measurements were for 4 awg wire, which is much easier to bend.
That took most of yesterday. I did a lot of brainstorming and planning as well. I have the general idea for the system in my head, but I have to do the planning as I go along.
Finally got the plastics in. Test fitting the pieces.
Painted two of the trim pieces.
Soldered and cleaned up the wire harness.
Also, spent a couple hours drawing the final measurements onto the mirror. It took a while because the original measurements were for 4 awg wire, which is much easier to bend.
That took most of yesterday. I did a lot of brainstorming and planning as well. I have the general idea for the system in my head, but I have to do the planning as I go along.

 Jun 8, 2006, 09:18 AM
#65
Evolving Member
Thread Starter
Join Date: May 2006
Location: OC
Posts: 103
Likes: 0
Received 0 Likes
on
0 Posts
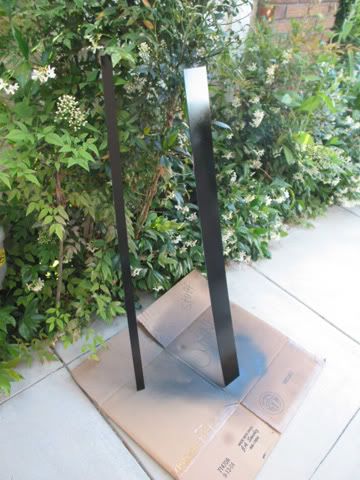
Two days of Dremeling...
A bunch of router-ing (or is it routing?) and Dremeling and silicone glue. I had a little too much fun w/ the glue.
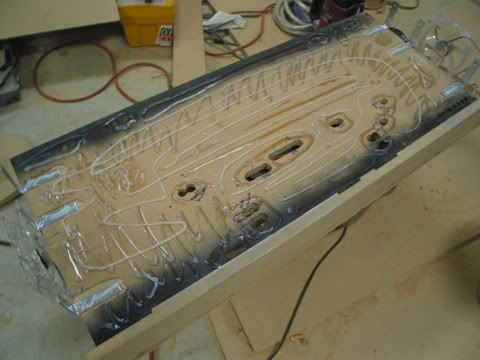
Starting to look like something.
A bunch of router-ing (or is it routing?) and Dremeling and silicone glue. I had a little too much fun w/ the glue.
Starting to look like something.
Jun 12, 2006, 10:53 PM
#66
Evolving Member
Thread Starter
Join Date: May 2006
Location: OC
Posts: 103
Likes: 0
Received 0 Likes
on
0 Posts
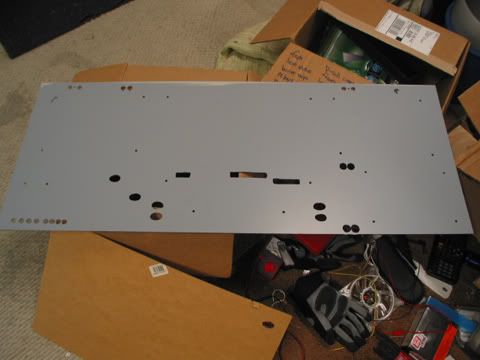
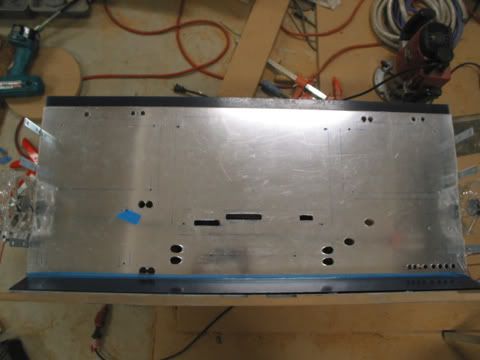
Finally took the protective tape off!
Started mounting stuff. Cap and distribution block are mounted, starting to run wires. I accidently stripped the threads on one of the ring terminals so I have to wait for a new one in the mail now...
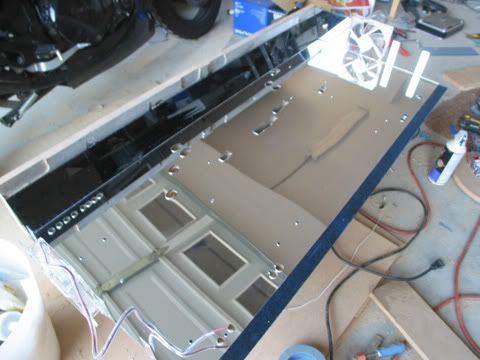
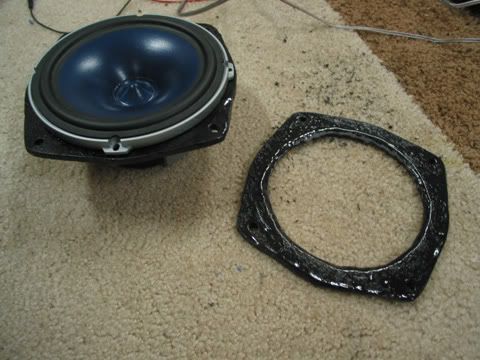
So I worked on installing the speakers. Rear brackets made of 1/4" hardboard, coated in fiberglass resin to help them withstand wear and tear.
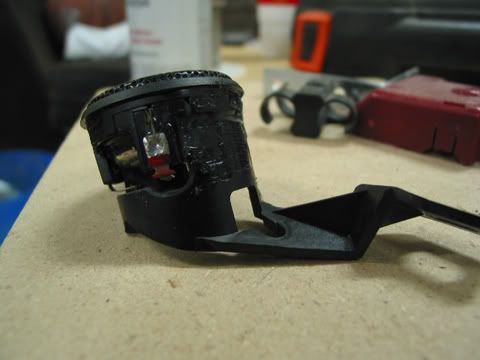
Mounted the rear tweeters on the stock grilles. Ugly location, but the mounting cup was pretty deep and had to clear the woofer's excursion. I would've liked to put them in the lower corner of each grille. I guess a plus from this location would be better imaging... lol.

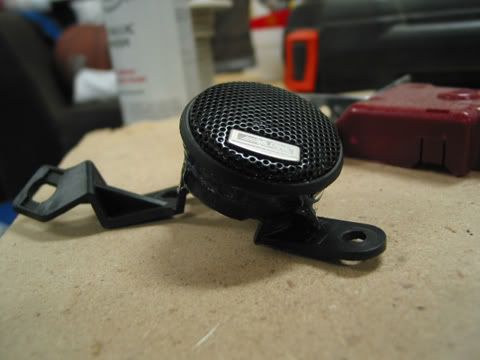
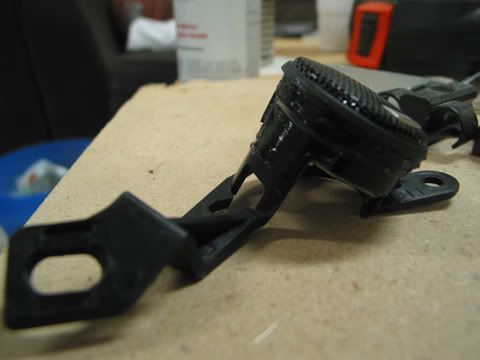
Mounted the front tweets on the stock bracket. Surprisingly, they fit really well with a little trimming.
Started mounting stuff. Cap and distribution block are mounted, starting to run wires. I accidently stripped the threads on one of the ring terminals so I have to wait for a new one in the mail now...
So I worked on installing the speakers. Rear brackets made of 1/4" hardboard, coated in fiberglass resin to help them withstand wear and tear.
Mounted the rear tweeters on the stock grilles. Ugly location, but the mounting cup was pretty deep and had to clear the woofer's excursion. I would've liked to put them in the lower corner of each grille. I guess a plus from this location would be better imaging... lol.
Mounted the front tweets on the stock bracket. Surprisingly, they fit really well with a little trimming.

 Jun 14, 2006, 09:27 AM
#71
Evolving Member
Thread Starter
Join Date: May 2006
Location: OC
Posts: 103
Likes: 0
Received 0 Likes
on
0 Posts
Thanks for the kind words!
I think it's 4 gauge, but I could be wrong. Never hurts to put in thicker wire though...
Yeah, he brought the gauge pod. He gave it to my roommate, who kept it in his trunk for a while. This thing looks expensive, and easy to damage... There's no mounting hardware though.
What's the bag of exhaust parts for? If you want to change those out, you should have the crazy russian bring his jackstands. Have him bring his jack too if he can.
Originally Posted by EvoIXMR
hey - nic job. Quck question to help me out - Is the stock negative terminal 2ire 4 gauge or 6 gauge? I want to extend it a little, please let me know! Thanks!
Yeah, he brought the gauge pod. He gave it to my roommate, who kept it in his trunk for a while. This thing looks expensive, and easy to damage... There's no mounting hardware though.
What's the bag of exhaust parts for? If you want to change those out, you should have the crazy russian bring his jackstands. Have him bring his jack too if he can.
Jun 14, 2006, 10:37 AM
#72
Evolved Member
iTrader: (2)

Join Date: Sep 2005
Location: Central Mass
Posts: 776
Likes: 0
Received 0 Likes
on
0 Posts
OT: Tell him to clean the engine bay
http://i10.photobucket.com/albums/a1...o/IMG_5496.jpg
Why the hell is the valve cover black?
http://i10.photobucket.com/albums/a1...o/IMG_5496.jpg
Why the hell is the valve cover black?
Jun 14, 2006, 02:23 PM
#73
jdub, the mounting hardware for the gauge pod should have arrived with the pod, but our russkie friend probably left them in his car. I guess we'll have to make another trip down to your place. 
I'm surprised that you were the first to notice it. The spring bolt to the downpipe shot out when i hit a pothole, so I've been waiting for TurboXS to send me the spring bolts so that i can reinstall the dp. Hence, the bag of exhaust parts that jdub is talking about. Don't worry out the mess, all that will be squeaky clean by the time I'm done with this car.
Originally Posted by DanJ
OT: Tell him to clean the engine bay
http://i10.photobucket.com/albums/a1...o/IMG_5496.jpg
Why the hell is the valve cover black?
http://i10.photobucket.com/albums/a1...o/IMG_5496.jpg
Why the hell is the valve cover black?
Jun 14, 2006, 04:28 PM
#74
Evolved Member
Join Date: Feb 2006
Location: Long Beach, CA
Posts: 685
Likes: 0
Received 0 Likes
on
0 Posts
Hey man! Do you happen to have any good sources for the gray trunk carpet for Evo's? I recently yanked out the SSL sub and the stock carpet which to save $0.05, mitsubishi trimmed it so it goes around the SSL sub....
I ended up getting some quality plywood and using my jig saw to build a new floor for my trunk which i can bolt my sub box down to so it doesn't slide around. But right now its bare wood and i'm hoping to not have to spend $75 on the carpet piece from Mitsubishi for the non-SSL package and do it myself.
Either that or i'm sure i can find a totaled Evo in a junk yard (because i'm sure there are tons considering my insurance rates) and take the carpet from one of them.
Anyways... if you know where i can get carpet, please let me know.
Thanks,
Andrew
Jun 14, 2006, 10:25 PM
#75
Originally Posted by Andrew LB
Hey man! Do you happen to have any good sources for the gray trunk carpet for Evo's? I recently yanked out the SSL sub and the stock carpet which to save $0.05, mitsubishi trimmed it so it goes around the SSL sub....
I ended up getting some quality plywood and using my jig saw to build a new floor for my trunk which i can bolt my sub box down to so it doesn't slide around. But right now its bare wood and i'm hoping to not have to spend $75 on the carpet piece from Mitsubishi for the non-SSL package and do it myself.
Either that or i'm sure i can find a totaled Evo in a junk yard (because i'm sure there are tons considering my insurance rates) and take the carpet from one of them.
Anyways... if you know where i can get carpet, please let me know.
Thanks,
Andrew
I ended up getting some quality plywood and using my jig saw to build a new floor for my trunk which i can bolt my sub box down to so it doesn't slide around. But right now its bare wood and i'm hoping to not have to spend $75 on the carpet piece from Mitsubishi for the non-SSL package and do it myself.
Either that or i'm sure i can find a totaled Evo in a junk yard (because i'm sure there are tons considering my insurance rates) and take the carpet from one of them.
Anyways... if you know where i can get carpet, please let me know.
Thanks,
Andrew
You should be able to goto any crafts store and get it. Here at work, we order everything through the install bay. That includes our duraglass, rage gold, carpet, resin, etc. They have everything for installations.
I have been very busy as well and havent been able to get the time to snap the pictures of the finished product. I am a little dissappointed we did not do a fiberglass box, but hey, if mitsu doesn't want to sell the system with the car, then a glass box will be a pain, not to mention everything else to remove. Racked up with the audio stuff in the vehicle, is about $8000 in product alone.
Glad to see you have been making progress on your install. Looking good so far, be careful with the glass, tweeter location in the rear is not the greatest in terms of SQL, but serves its purpose. As far as the rings go for the doors and such you did good on the mounts. Factory tweeter mounts with aftermarket tweeters is also right on cue.
Want to go crazier? Glass the a pillers, flush the tweeter in and making a triple pillar pod for gauges. I am getting off cue here, as you could then glass the doors, glass the rear pillars for tweeters, glass the dash...i'll just stop.
Good job so far!
