
JohnBradley's 2.2 long rod build

 Nov 1, 2009, 11:40 AM
#107
Evolved Member
iTrader: (17)
Join Date: Jun 2009
Location: San Antonio
Posts: 601
Likes: 0
Received 0 Likes
on
0 Posts
There dont seem to be any write ups, but basically you spin the bearings in the front shaft galley so the oil feeds dont line up and then reinstall the shaft with no belt. Some DSMers will tell you its half assing it, but it keeps alot of the oiling issues that you would otherwise face at bay.

 Nov 2, 2009, 07:26 PM
#111
Well if I dont, its not because we havent given it hell  My goal is actually a little less than that but we'll see where the wind takes us.
Tranny and fuel system are the on the list tomorrow. We might be done right before SEMA which will give me enough time to start it and try to put 50 miles on it. I spose I can drive all night if I want and sleep on the plane
Thanks mang...its about to get interesting I think. More interesting than its been for awhile.
My goal is actually a little less than that but we'll see where the wind takes us.Tranny and fuel system are the on the list tomorrow. We might be done right before SEMA which will give me enough time to start it and try to put 50 miles on it. I spose I can drive all night if I want and sleep on the plane
Thanks mang...its about to get interesting I think. More interesting than its been for awhile.
Last edited by JohnBradley; Nov 2, 2009 at 07:29 PM.
Nov 2, 2009, 08:03 PM
#114

Originally Posted by rolly1818
did u try the MIVEC cam gear customisation on this project?
The thread I started was around this car in particular. After having talked to a few people about this that also have modified gears I think in the future I will be going back and modding it some more most likely.
Nov 2, 2009, 08:06 PM
#115
DISCLAIMER: Do not do this unless you understand how to set your cams up, clay the motor, and properly implement this in whatever ECU you are using. If you are unable to do any of these things please leave this to professionals. I make no guarantees, warranties, either expressed or implied, campaign promises, baby kissing, etc. There is always potential for failure even when everything is "planned out" so please keep this mind.
Tech:
Pretty simple actually, you have your MIVEC cam gear here:
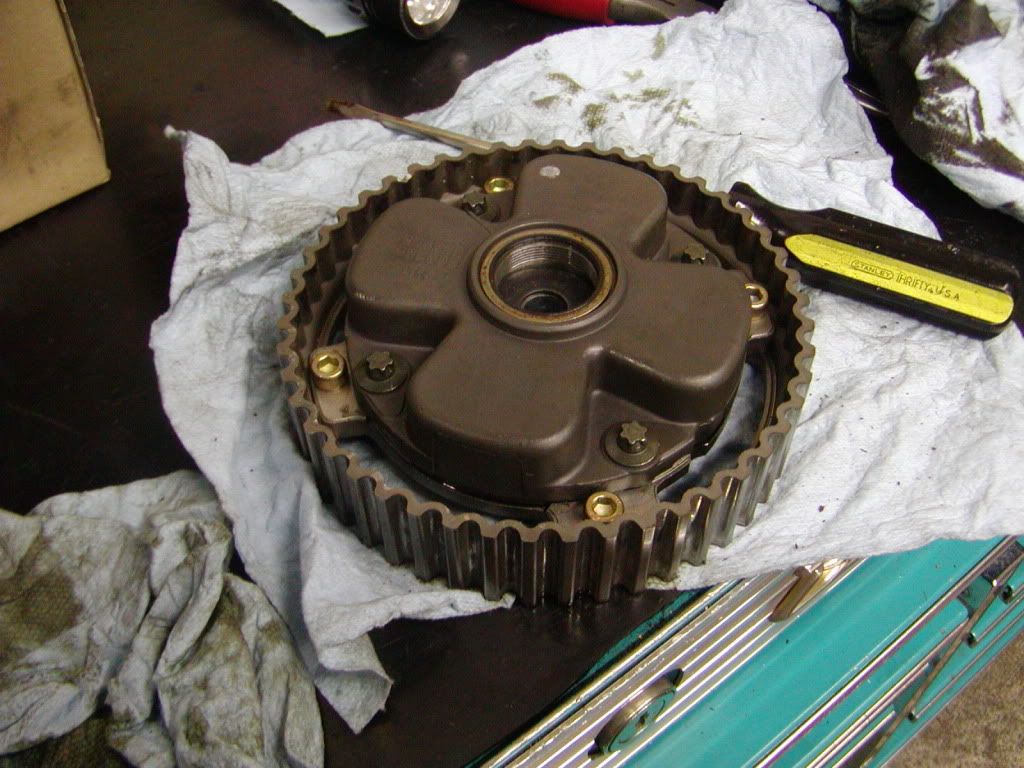
You undo the inverted torx (they're not tight) with hopefully the right tool. Or if you are like me a 1/4 6pt got it done in a pinch.
It then looks like this:
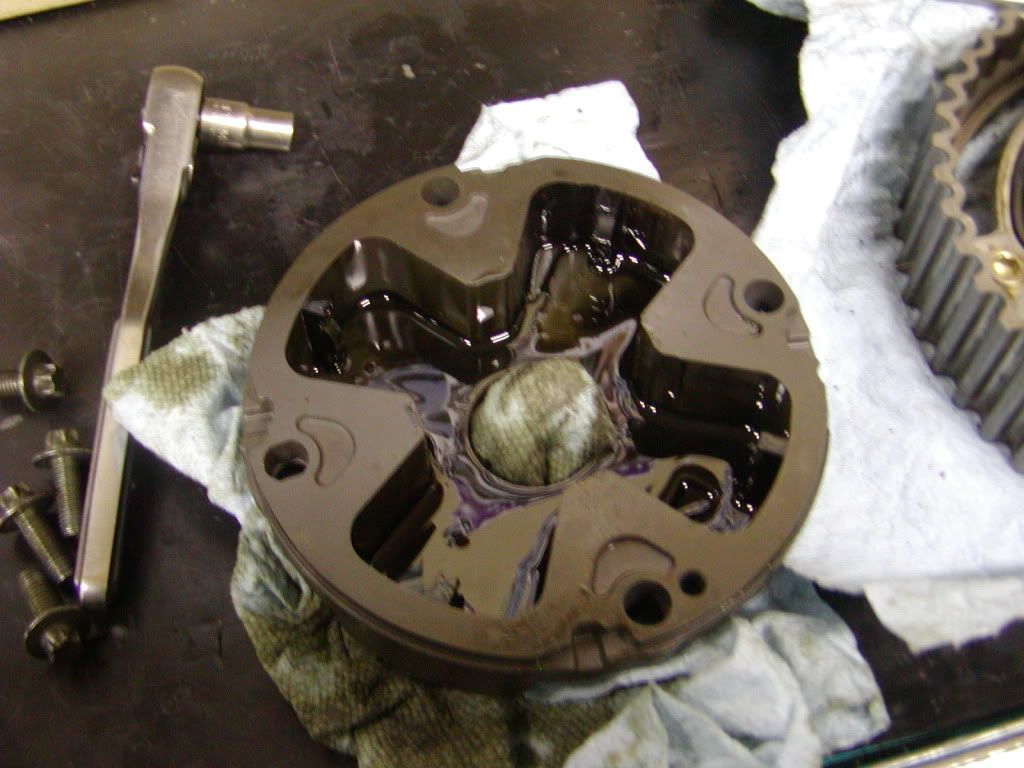
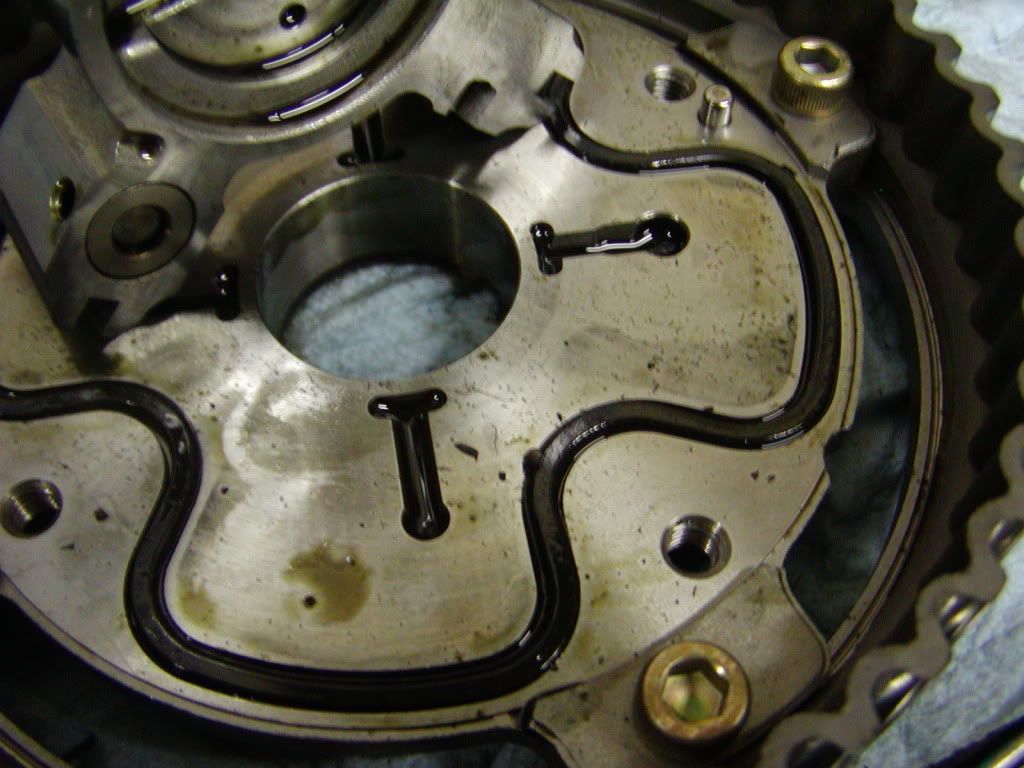
The rotor has apex seals which will most likely stay in the housing (see the first 2 pix and you'd see them in the housing) and that fine. It looks like this stock:
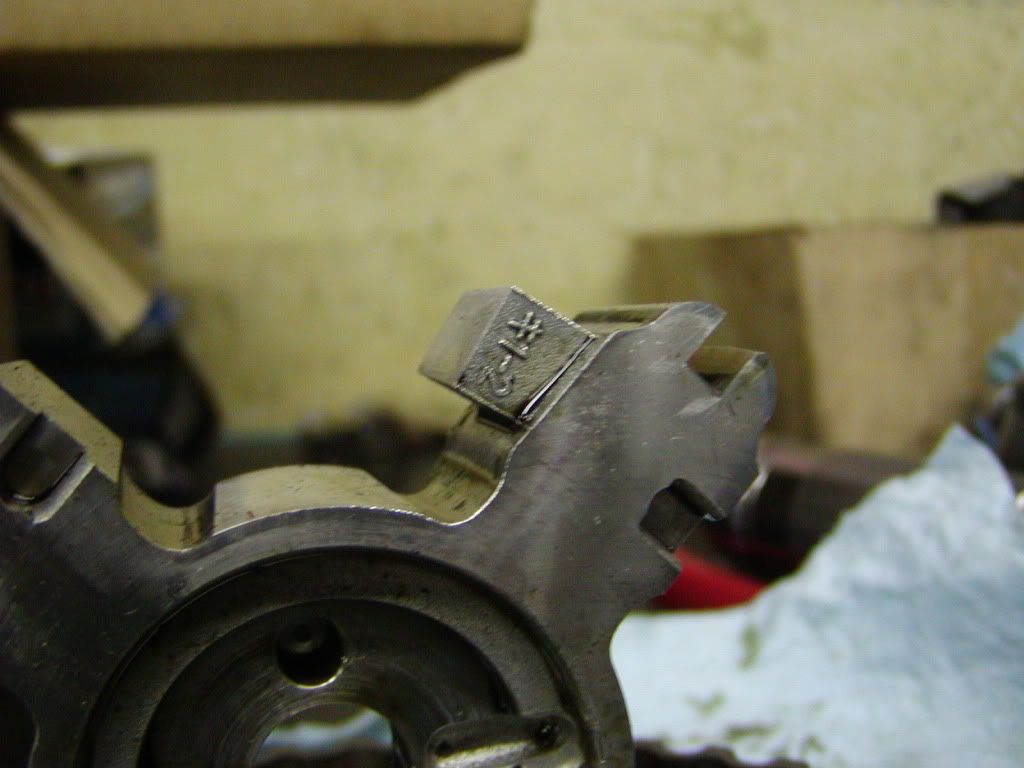
Grind it down a touch. The easiest way is to make sure that you take a little at a time and test fit. You end up taking it down to just about the dash between the 1-2.
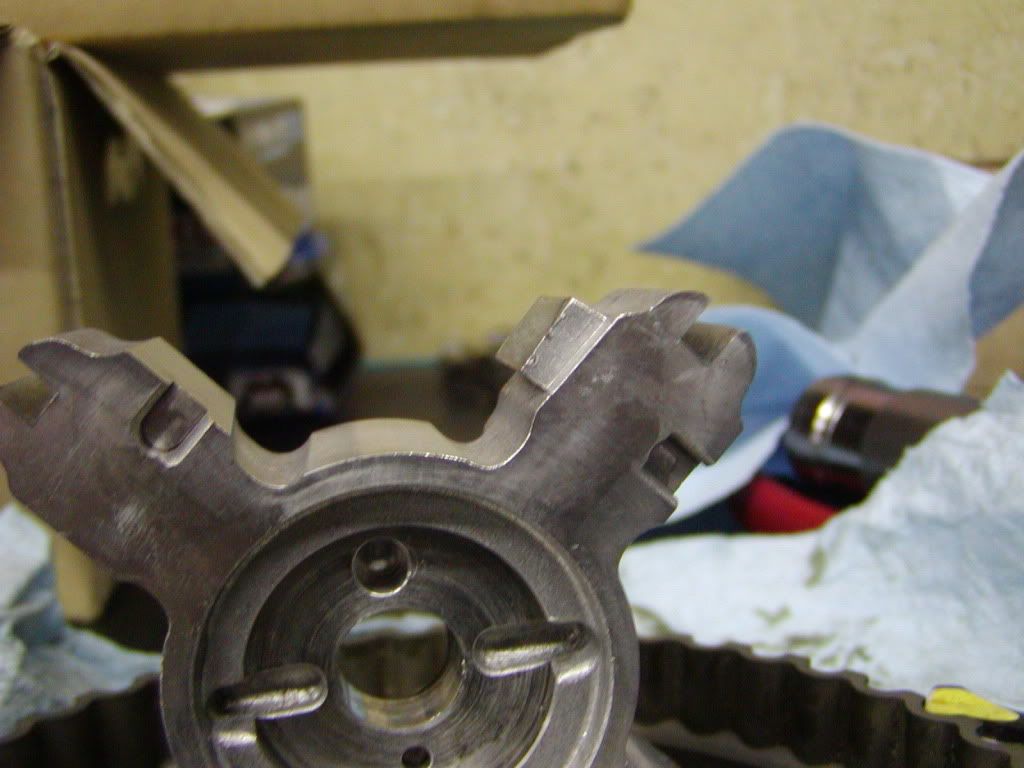
Thoroughly clean it one last time, install the apex seals (they'll chill but you can knock the springs out if you're not careful), and then reinsert in the housing:
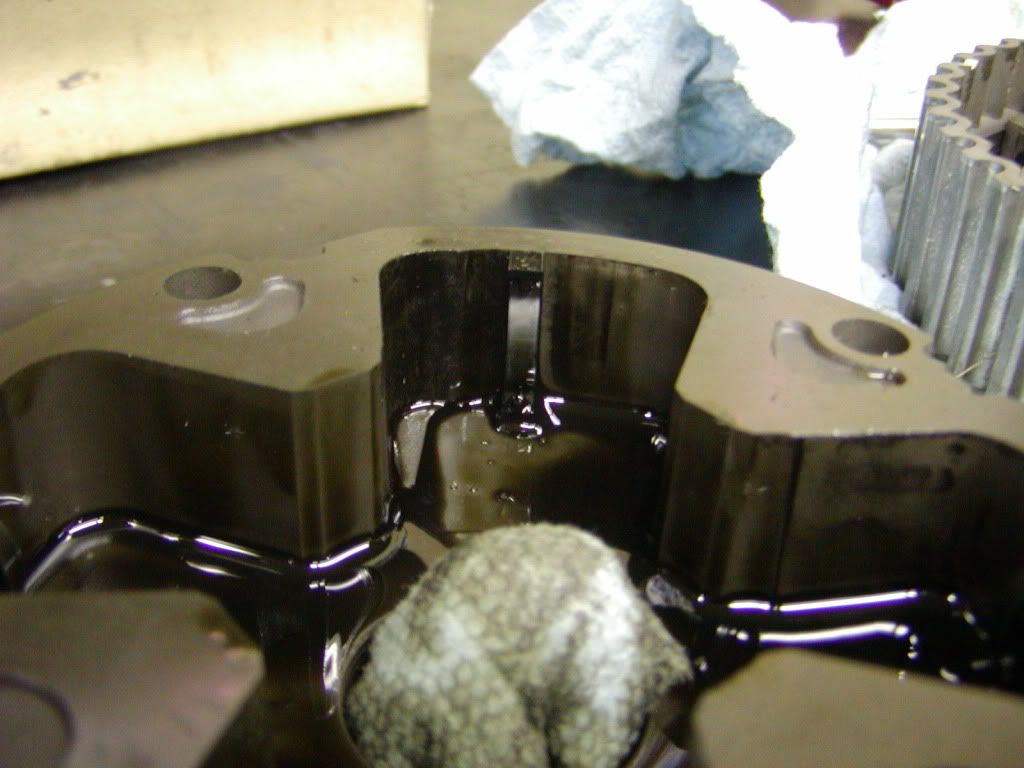
You have successfully added 6* of motion. Degree everything to make sure you installed it correctly, and remember doublechecking is your friend. Its simple to do the math when you know what direction you want to go to make it all line up. There are a few ways to go about it, but the easiest is to go off a tooth and then over advance the cam in your MIVEC map to keep it even (remembering you are tring to achieve 3.5* or so to compensate for the 6mm deck height increase). I am not going to say one way is right or not, nor how I am doing it. If you cant figure it out on your own this is something you do not want to be doing in the first place (reread disclaimer).
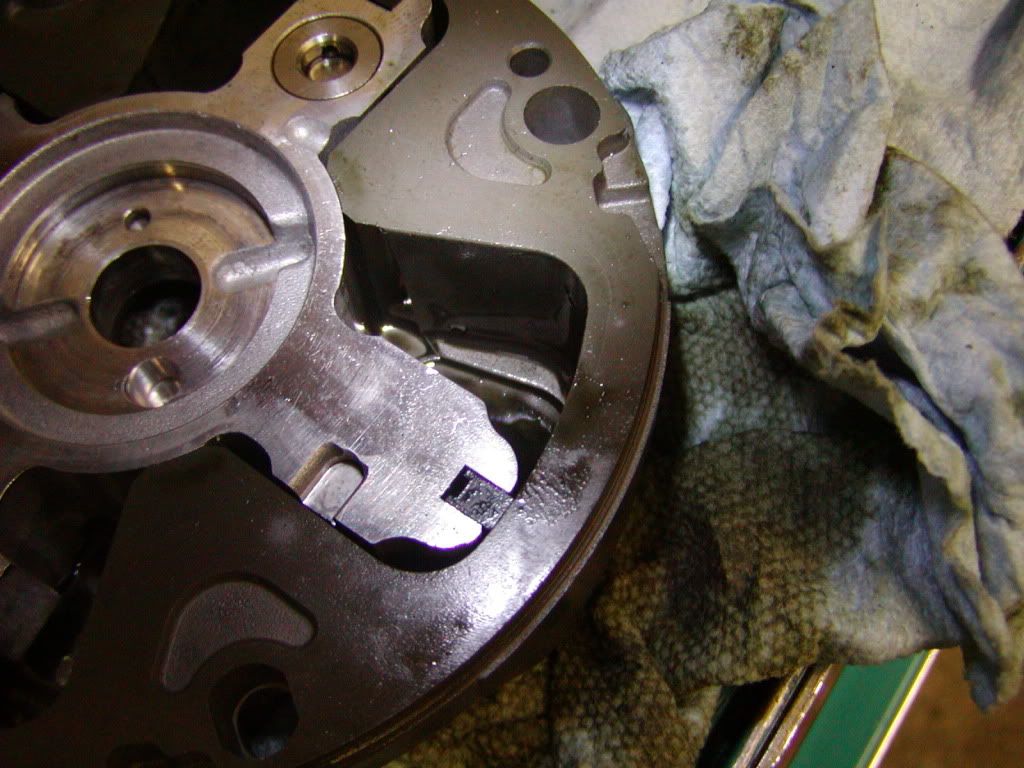
Notice the edge of the housing has a lip though. The only way to remove that is is with a table mill. Once that is gone you will open up about another 8*-10* of motion (for a total of 44-46). You can all thank Grocmax for the math on that one (also dont argue with him, when he says something he isnt guessing).
The reason I did this was to add back the full range of motion since I used a tall deck block with my 2.2l. On the exhaust side I added a cam gear as is common practice but on the MIVEC side I needed to be inventive.
Tech:
Pretty simple actually, you have your MIVEC cam gear here:
You undo the inverted torx (they're not tight) with hopefully the right tool. Or if you are like me a 1/4 6pt got it done in a pinch.
It then looks like this:
The rotor has apex seals which will most likely stay in the housing (see the first 2 pix and you'd see them in the housing) and that fine. It looks like this stock:
Grind it down a touch. The easiest way is to make sure that you take a little at a time and test fit. You end up taking it down to just about the dash between the 1-2.
Thoroughly clean it one last time, install the apex seals (they'll chill but you can knock the springs out if you're not careful), and then reinsert in the housing:
You have successfully added 6* of motion. Degree everything to make sure you installed it correctly, and remember doublechecking is your friend. Its simple to do the math when you know what direction you want to go to make it all line up. There are a few ways to go about it, but the easiest is to go off a tooth and then over advance the cam in your MIVEC map to keep it even (remembering you are tring to achieve 3.5* or so to compensate for the 6mm deck height increase). I am not going to say one way is right or not, nor how I am doing it. If you cant figure it out on your own this is something you do not want to be doing in the first place (reread disclaimer).
Notice the edge of the housing has a lip though. The only way to remove that is is with a table mill. Once that is gone you will open up about another 8*-10* of motion (for a total of 44-46). You can all thank Grocmax for the math on that one (also dont argue with him, when he says something he isnt guessing).
The reason I did this was to add back the full range of motion since I used a tall deck block with my 2.2l. On the exhaust side I added a cam gear as is common practice but on the MIVEC side I needed to be inventive.
Nov 2, 2009, 08:14 PM
#116
Thanks man. Sorry I didnt answer the other night...bad seafood left me wrecked for the entire weekend

Mikey
Nov 3, 2009, 02:32 AM
#117
Registered User

Thanks man. Sorry I didnt answer the other night...bad seafood left me wrecked for the entire weekend
Yes in fact I did The thread I started was around this car in particular. After having talked to a few people about this that also have modified gears I think in the future I will be going back and modding it some more most likely.
Yes in fact I did
The thread I started was around this car in particular. After having talked to a few people about this that also have modified gears I think in the future I will be going back and modding it some more most likely.
 Nov 3, 2009, 05:57 PM
#119
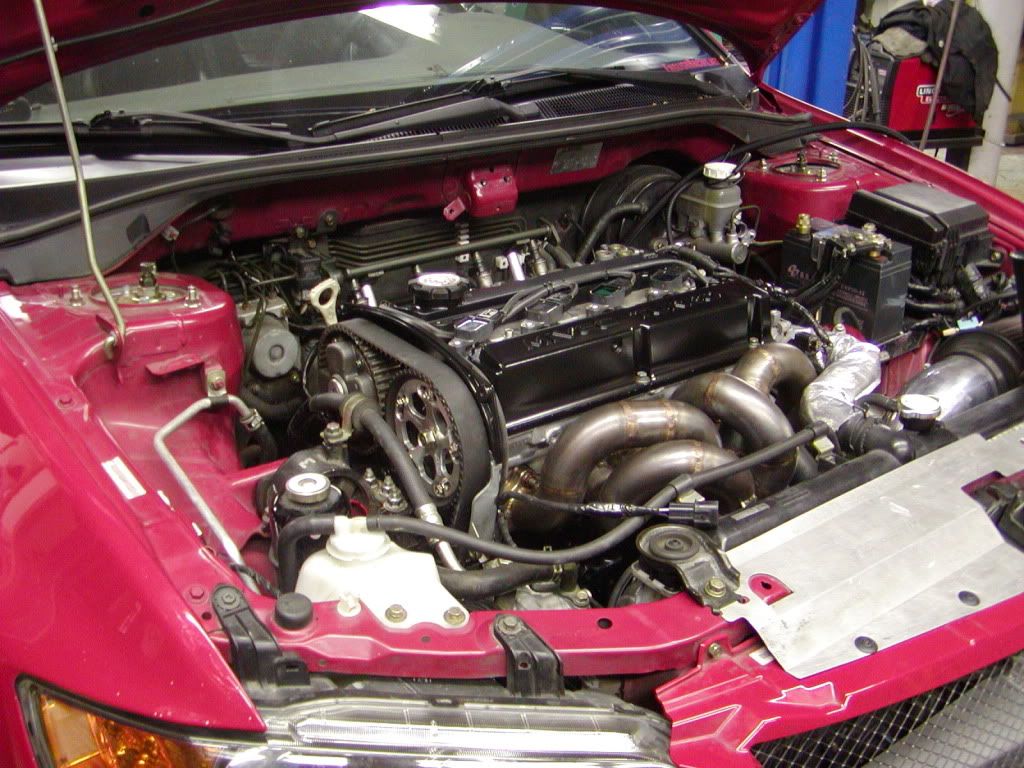
Motor and tranny are in, turbo kit is back on, radiator is all filled up ready to go:

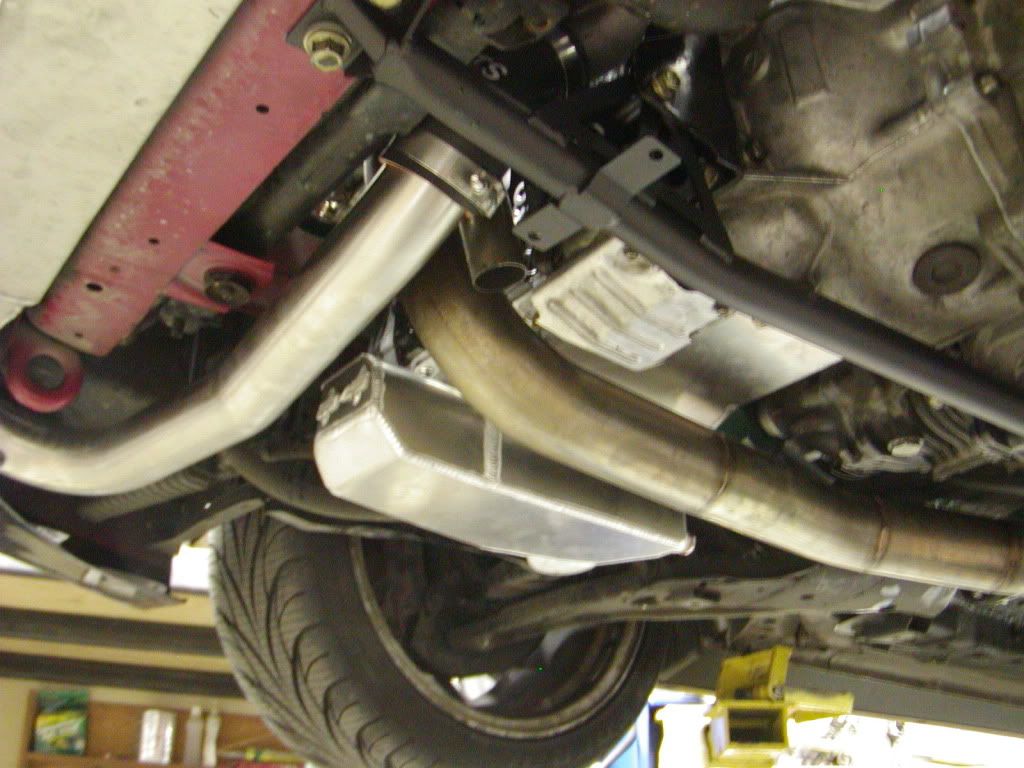
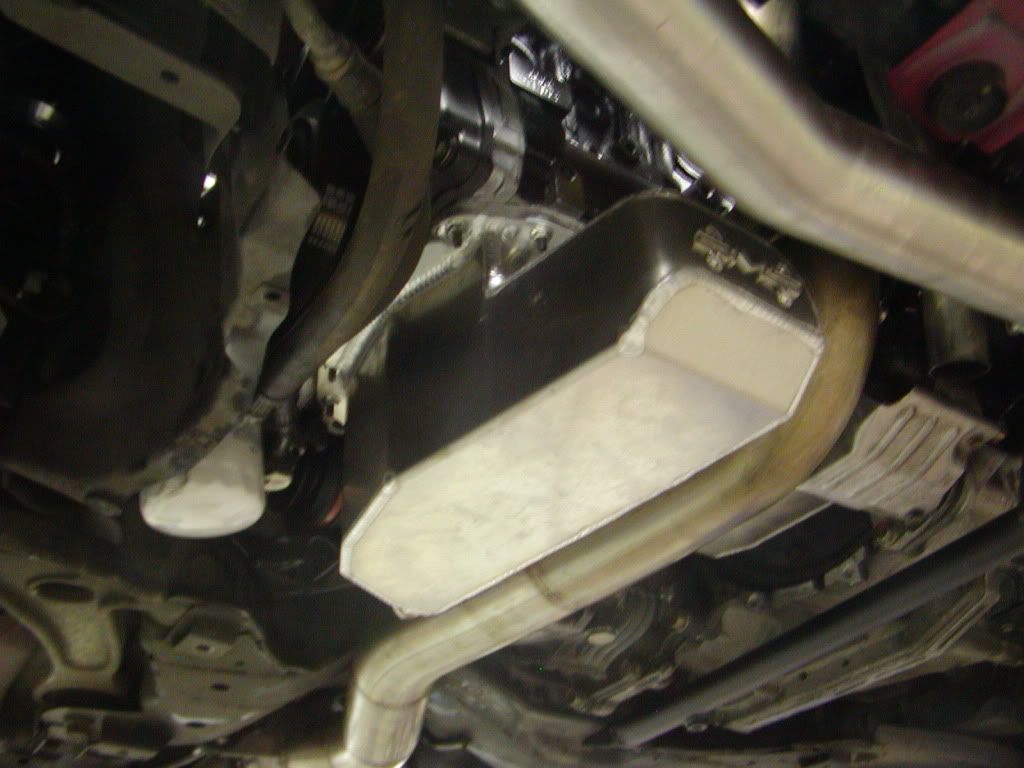
Some of the underside shots of the AMS oilpan and AMS lightweight crossmember hanging out. Really I cant say enough about how well those pieces went on, cleaned it up, and in the case of the cross member dropped weight:
Started on the fuel system today as well. The Magnafuel 625 Pro Tuner pumps 5.3gpm...thats 318gph or 1200lph. Hopefully that will keep the FIC2150s in enough fuel to keep the 3586 fed.
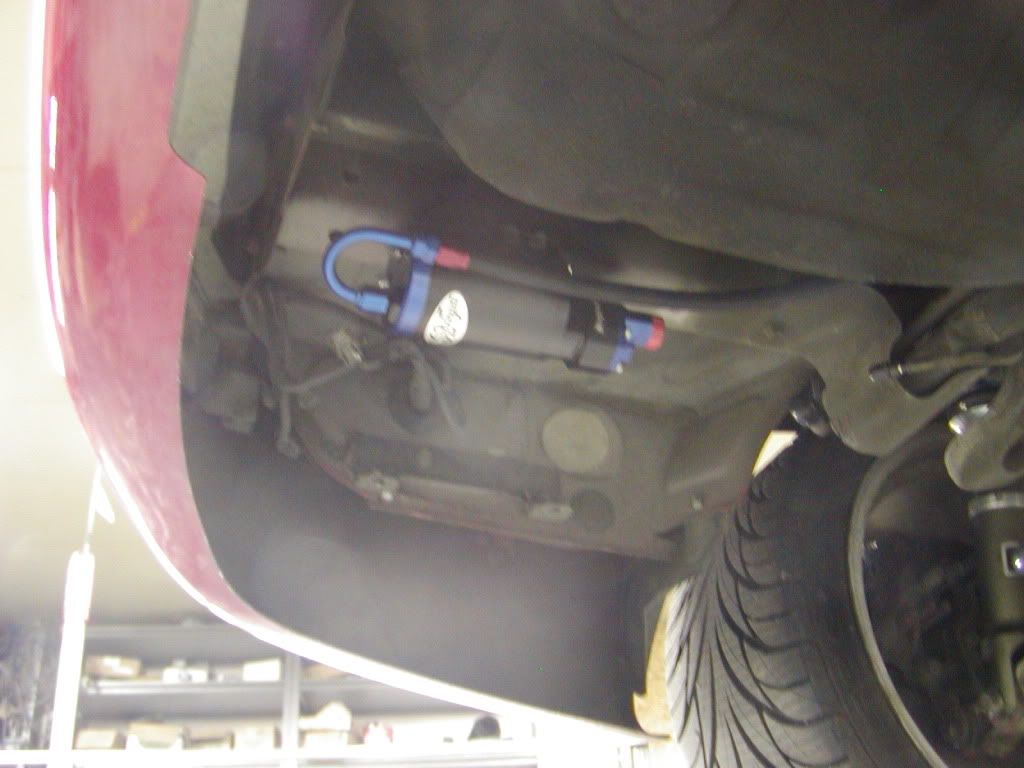
I am sure it will be loud even though it is fuel cooled and insulated but I wanted it as far back away from the cabin as possible. Since the Evap stuff is no longer needed (and more weight reduction) what better place to put it than right there. I am going to take the Evap "cage" apart and put it back on to armor it and hide it all at the same time.
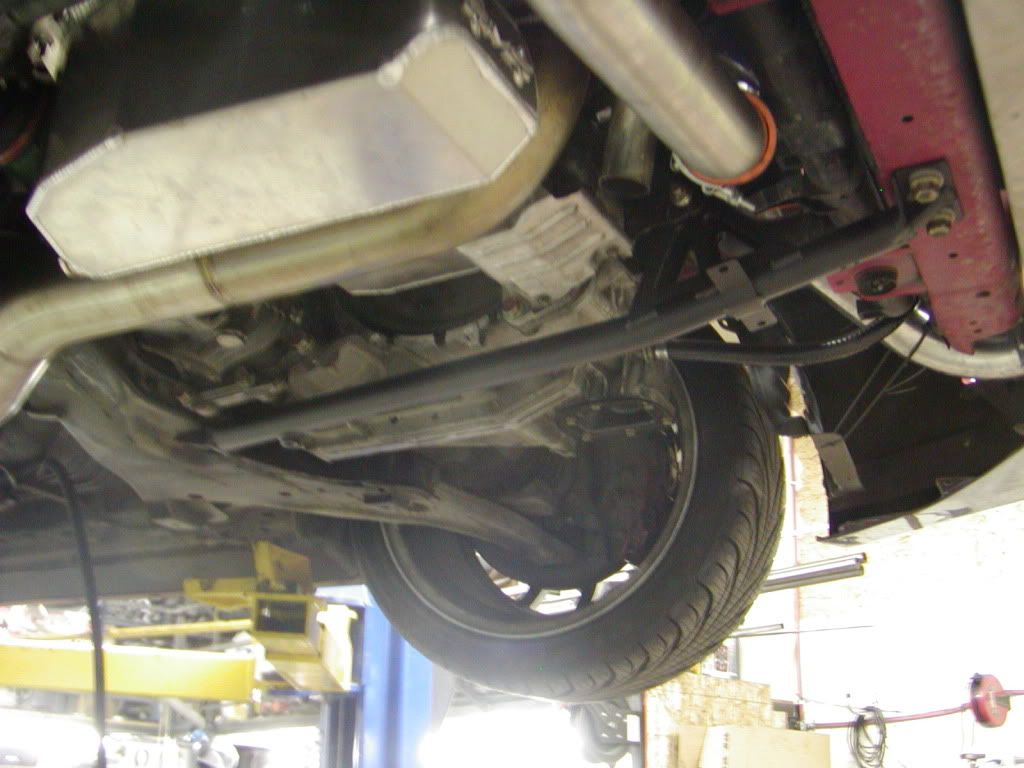
New swaybar to replace the noisy and lackluster H&R 27mm that had been in there:
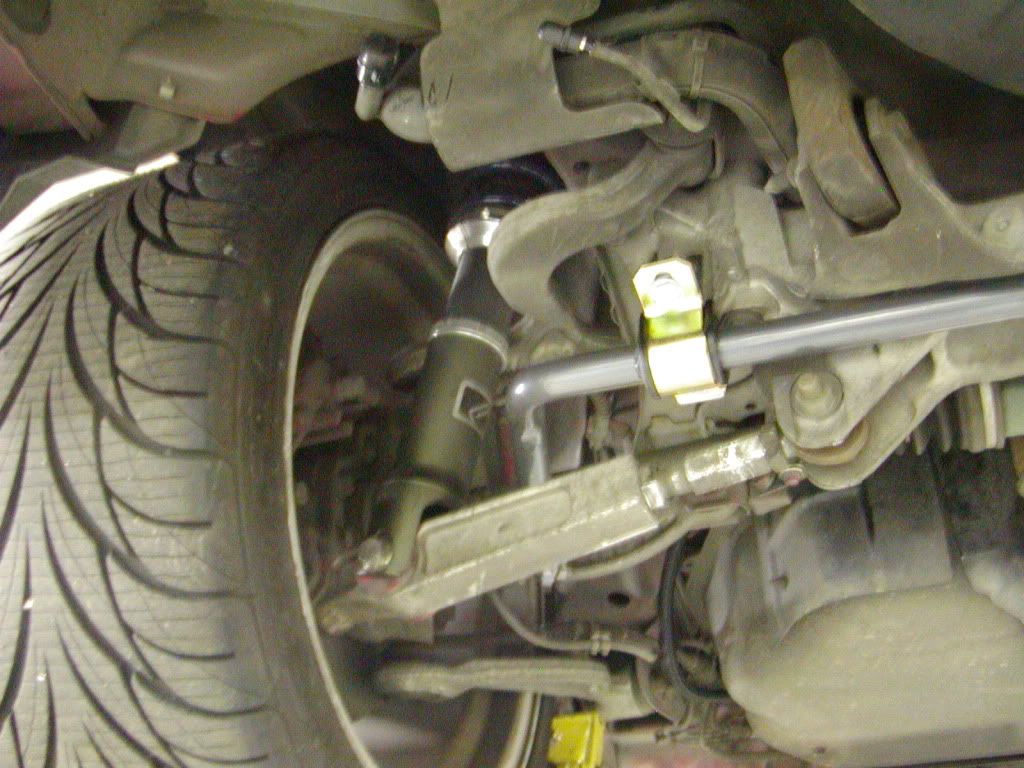
This is the Progress bar which is very very very similar to the Perrin. My AMR coilovers are making a cameo as well
Some of the underside shots of the AMS oilpan and AMS lightweight crossmember hanging out. Really I cant say enough about how well those pieces went on, cleaned it up, and in the case of the cross member dropped weight:
Started on the fuel system today as well. The Magnafuel 625 Pro Tuner pumps 5.3gpm...thats 318gph or 1200lph. Hopefully that will keep the FIC2150s in enough fuel to keep the 3586 fed.
I am sure it will be loud even though it is fuel cooled and insulated but I wanted it as far back away from the cabin as possible. Since the Evap stuff is no longer needed (and more weight reduction) what better place to put it than right there. I am going to take the Evap "cage" apart and put it back on to armor it and hide it all at the same time.
New swaybar to replace the noisy and lackluster H&R 27mm that had been in there:
This is the Progress bar which is very very very similar to the Perrin. My AMR coilovers are making a cameo as well