
Forced Performance Turbos - Compressor Cover Leak Notice


 Nov 29, 2009, 07:48 AM
#17
The two turbos that Ted B. has identified are Garrett based turbos, not Mitsubishi based turbos.
His observations on two Garrett turbos would not translate into assumptions about Greens, Reds, or Blacks, and may not translate into conclusions about Garretts, either.
It never hurts to check any part carefully before you put it on the car, though.
His observations on two Garrett turbos would not translate into assumptions about Greens, Reds, or Blacks, and may not translate into conclusions about Garretts, either.
It never hurts to check any part carefully before you put it on the car, though.
Nov 29, 2009, 10:02 AM
#19
Evolving Member
iTrader: (21)

Join Date: Mar 2009
Location: New York
Posts: 462
Likes: 0
Received 0 Likes
on
0 Posts
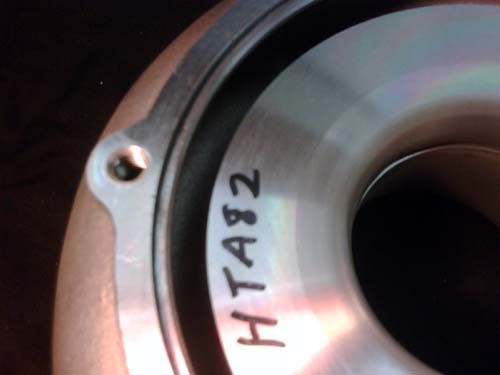
I just boost leak tested my HTA 3582r up to 20psi and no leak from the compressor cover...I guess I will turn the boost up to 25-30psi and see if I get a leak from where Ted B. has posted about. If I do then I will post up here as well. My HTA 3582r does not have an o-ring sealing the compressor cover to the backplate...thx for the heads up!


 Nov 29, 2009, 12:23 PM
#24

Ted - You sure have had to fix a number of problems with your setup (sorry). I guess one of the nice things of an OEM setup is that the reliability, QC, tolerances, and product robustness are much better than aftermarket. The trade-offs between power and reliability / streetability I guess.....
Nov 29, 2009, 08:47 PM
#25
Most of the issues that have plagued me are due to aftermarket parts that aren't doing what they're supposed to do.
Anyway, here are a few pics:
BEFORE you remove the compressor cover, get a Sharpie and put a couple alignment marks so you won't cry later (see them at the screw holes) because you misaligned it. The dark residue is epoxy that I used in a vain attempt to seal the leak without removing the turbo. Don't try it. Sealing one area just forces the leak to a different area.
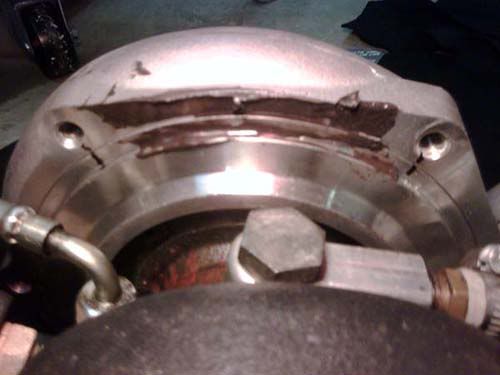
When you peel apart the compressor housing, you see a step machined around the periphery of the center section.
That step mates with the groove machined around the periphery of the compressor cover.
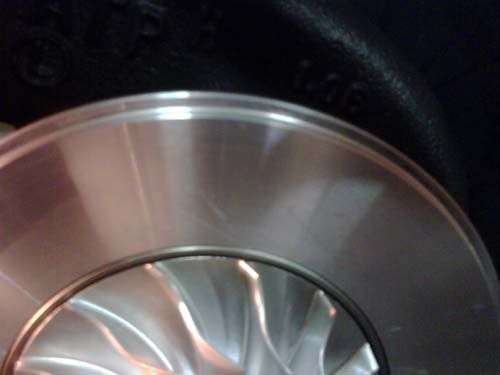
The problem with this is it did not create a proper seal in my car or Drifto's car. Another issue is that since there is no step machined at the edge of the intake barrel on the compressor cover, it is difficult to perform a pressure test above 20 psi. I can get about 25 psi if I double the clamps, but getting it to hold more pressure requires hair spray, skateboard tape, etc.
Anyway, the fix is to apply a bead of gasket sealer around the mating edge of the compressor cover as shown here.
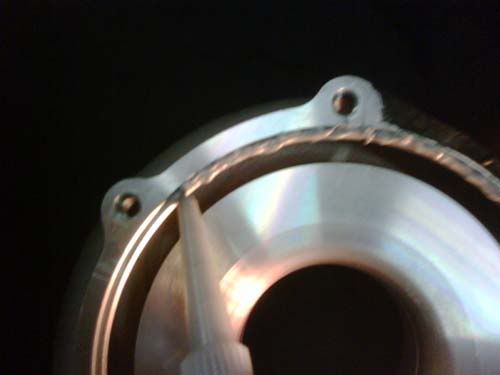
I'll pressure test it tomorrow (24 hr curing time), but that should do it.
Anyway, here are a few pics:
BEFORE you remove the compressor cover, get a Sharpie and put a couple alignment marks so you won't cry later (see them at the screw holes) because you misaligned it. The dark residue is epoxy that I used in a vain attempt to seal the leak without removing the turbo. Don't try it. Sealing one area just forces the leak to a different area.
When you peel apart the compressor housing, you see a step machined around the periphery of the center section.
That step mates with the groove machined around the periphery of the compressor cover.
The problem with this is it did not create a proper seal in my car or Drifto's car. Another issue is that since there is no step machined at the edge of the intake barrel on the compressor cover, it is difficult to perform a pressure test above 20 psi. I can get about 25 psi if I double the clamps, but getting it to hold more pressure requires hair spray, skateboard tape, etc.
Anyway, the fix is to apply a bead of gasket sealer around the mating edge of the compressor cover as shown here.
I'll pressure test it tomorrow (24 hr curing time), but that should do it.
Nov 30, 2009, 06:32 AM
#26
Former Sponsor
iTrader: (5)

Join Date: Feb 2006
Location: Indy
Posts: 1,214
Likes: 0
Received 0 Likes
on
0 Posts
I don't use rear that much rtv bro, just a small bit in the corner will do.
Here is a pic of the o-ring for referance.
Fathouse
Here is a pic of the o-ring for referance.
Fathouse
Last edited by IB Chandak; Mar 1, 2013 at 10:00 AM.
Nov 30, 2009, 06:37 AM
#27
Evolved Member
Join Date: Jan 2007
Location: MI
Posts: 611
Likes: 0
Received 0 Likes
on
0 Posts
Garrett turbos all have some leak at that location, they have an 'acceptable' tolerance level from the factory...the housing is a Garrett housing and the backplate is a Garrett backplate - it's nothing FP would have done
Nov 30, 2009, 06:46 AM
#28
FWIW, I wipe the bead before I sandwich the covers back together.
As far as the leak itself, let me clarify something. I'm cannot claim this to be unique to FP turbos, as I would expect that it would be a possibility with any cover that uses a 'seal' of similar design. In this instance, the first time I've encountered this were coincidentally with two FP turbos. IF this is a result of a design modification from Garrett, then let everyone who buys a newer Garrett be advised accordingly.
More importantly, what I am advising is that anyone who buys a turbo, from whatever source, where this sort of arrangement is used, would be for the wiser to address it before it could become a problem as it did in my case.
Nov 30, 2009, 08:52 AM
#30
I don't expect it would be much different than TIAL's response. It's an issue related to the mating aspects of two GARRETT parts, not modified by FP.
The issue would be the same for anyone who sold a stock GARRETT turbo, or a modified GARRETT turbo in which those two parts were not changed.
The issue would be the same for anyone who sold a stock GARRETT turbo, or a modified GARRETT turbo in which those two parts were not changed.