Installing Beatrush Propeller Shaft Bushings In your Garage
 May 15, 2007, 04:23 PM
#31
Evolved Member
Thread Starter
iTrader: (23)

Join Date: Mar 2006
Location: IL
Posts: 2,315
Likes: 0
Received 0 Likes
on
0 Posts
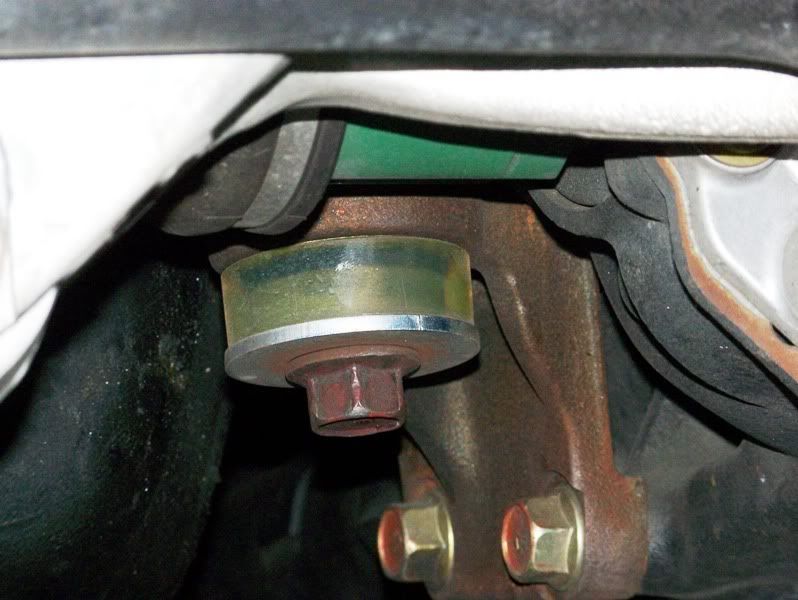
Well, they hold up the drive shaft, so it is directly under neath you. There are 8 pieces total, 2 pieces make one bushing. There are 4 bushings to replace. You can't miss em once you're under there. And yes, one set is located close to the converter/TP.


 May 16, 2007, 05:00 PM
#38
Evolved Member
Thread Starter
iTrader: (23)
Join Date: Mar 2006
Location: IL
Posts: 2,315
Likes: 0
Received 0 Likes
on
0 Posts
If you are looking to get rid of the "clunk", the rear diff bushings will rid you of that problem, even though I believe, ( please do not mis construe this statement) that better driving technique also helps.
I really never got that clunking noise too often to begin with. I am changing out what ever bushings I can on my Evo and applying as many braces as I can to the car to stiffen everything up.
I really never got that clunking noise too often to begin with. I am changing out what ever bushings I can on my Evo and applying as many braces as I can to the car to stiffen everything up.


 Jun 20, 2008, 11:07 PM
#44
Evolved Member
iTrader: (7)
Join Date: Nov 2006
Location: Pittsburgh
Posts: 772
Likes: 0
Received 0 Likes
on
0 Posts
I have these in as well as the poly rears courtesy of the energy suspension kit. The poly kit was one of the first things I bought to rid the car of the clunk when I bought it. The prop shaft bushings I did to keep my exhaust from rattling off the drive shaft mount. Turned out to have other benefits as mentioned. (I also did kart boy poly hangers)
It is unbelieveable how treacherously crappy the stock d/s bushings are.
Great small mod thats easy to overlook, but well worth the effort.
A side note to the installation procedure. As I also did mine on my back- is to make sure you have some sand paper handy. Something coarse like 220<
My bushings would simply NOT just "go" in. And this will complicate trying to balance the top ring / hold the drive shaft, and manage to get a 5th arm to tighten nuts.
Take the mounts apart one section at a time. Do not drop all 4. Roll the sand paper into a small roll, and twist it into the d/s mount hole. This will allow you to simply pop the BR bushing right in. A quick tap from a hammer works nice too. I inserted the bottom & top bushings and then just pushed the mount in place. It may get hung up on the studs, but its easier than trying to balance the top ring and draw the bottom one thru if its a tight fit situation. Sometimes the mounts require a little side to side twist to reinstall, but they WILL go in even with the bushings fully installed.
I did not drop the exhaust either, and used the same wiggle extension pictured.