
EVO VIII Wing Deconstructed(MANY Pics)
 Mar 16, 2008, 12:15 AM
#1
Newbie
Thread Starter
iTrader: (2)
Join Date: Jun 2004
Location: Schaumburg, IL
Posts: 42
Likes: 0
Received 0 Likes
on
0 Posts
EVO VIII Wing Deconstructed(MANY Pics)
So, long story...even longer.......
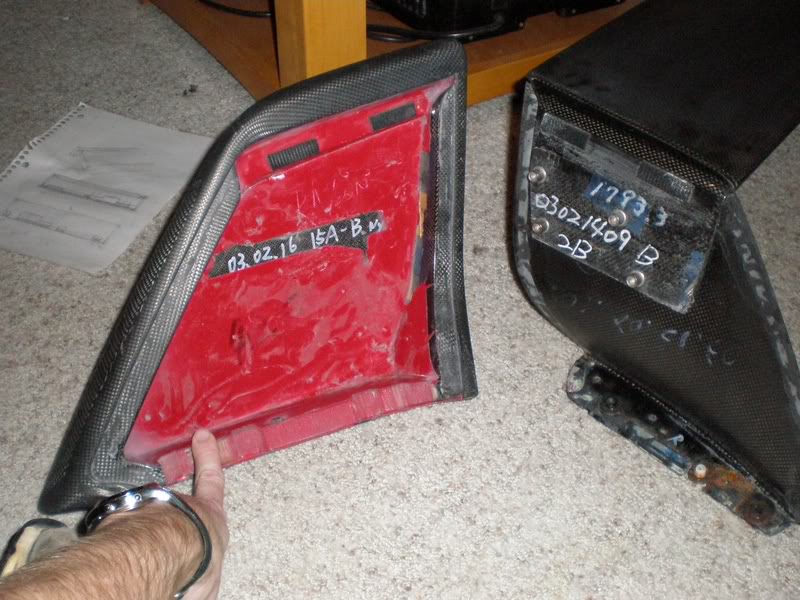
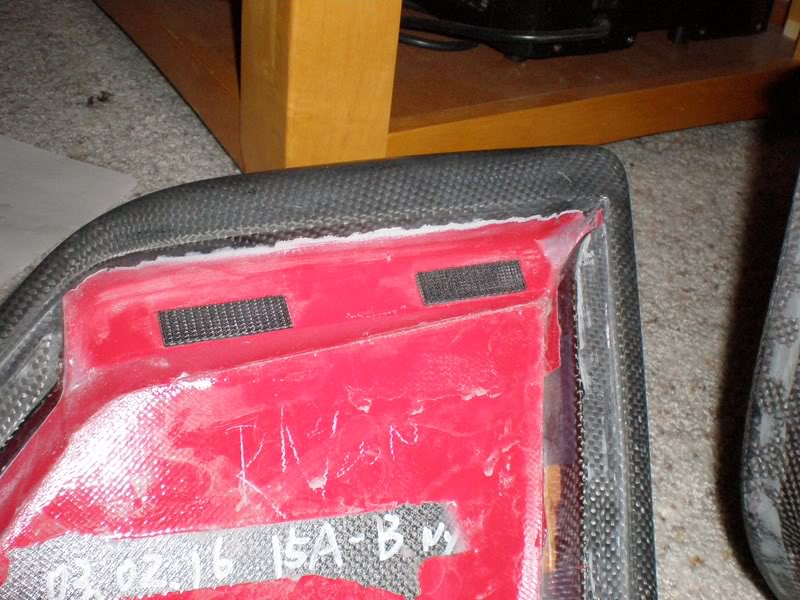
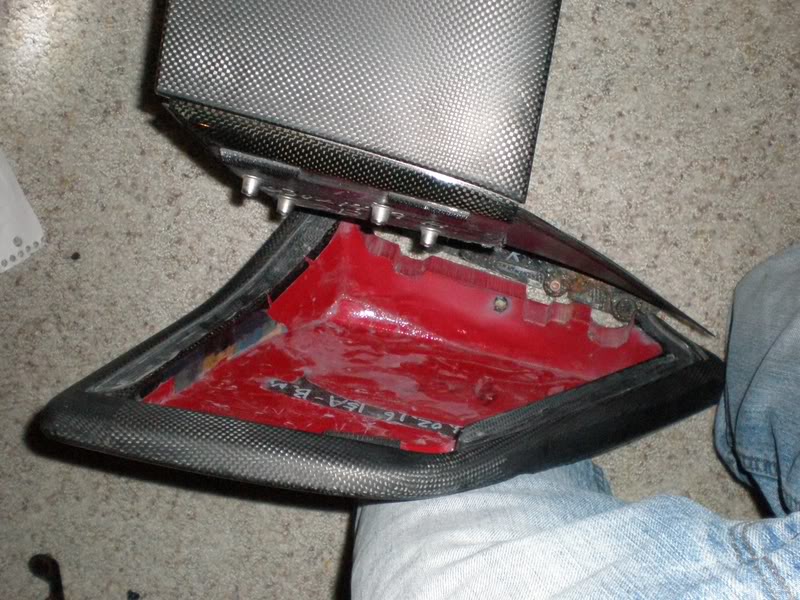
My wing is peeling and want to refinish it... interestied in redoing the outer peices also... figure it's near impossible to remove paint from wing with wing and side peices attached... try to find info on here... no luck... though there is a rumor of the wing being held together with velcro(hard to believe)... decide to take wing apart to find out for once and for all.
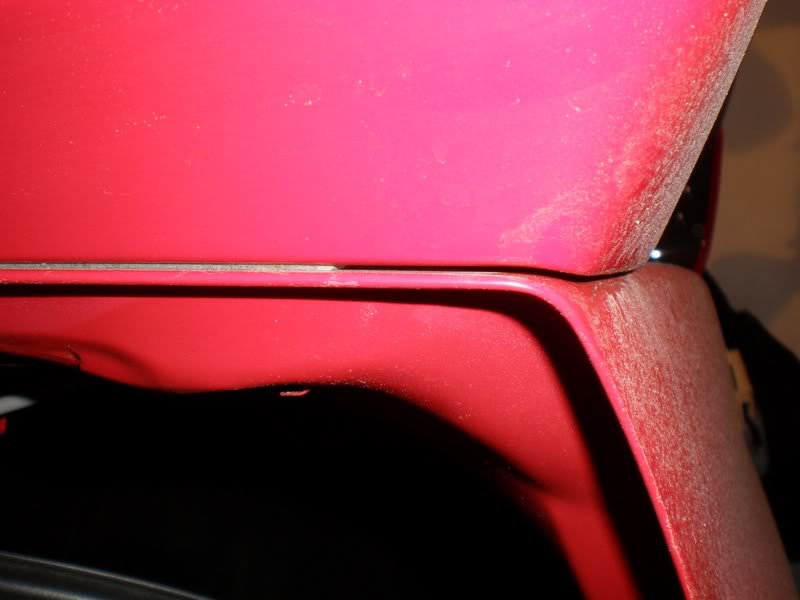
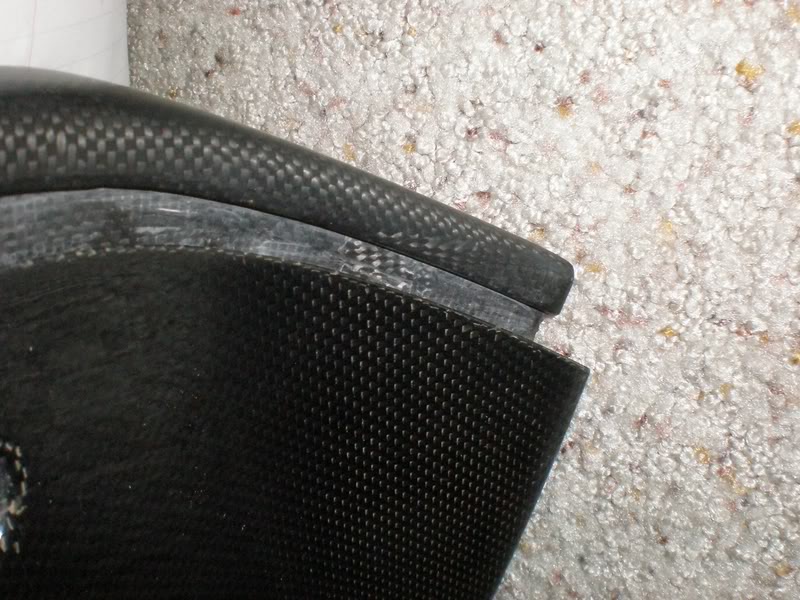
Well, getting the wing off the trunk was a chore in itself, but eventually it came off. It took less time to get the damn thing off the trunk than it took to get the damn adhesive off the trunk. I did use goo-gone, but it was still a PITA.
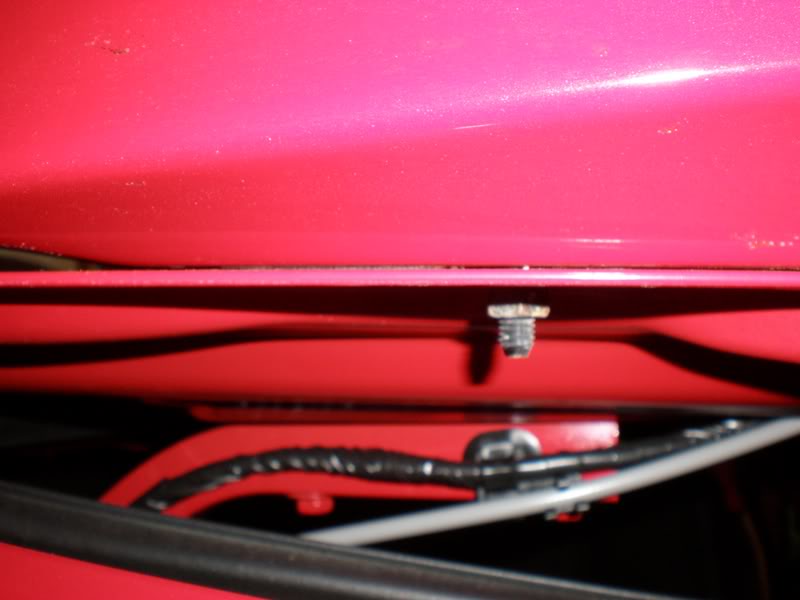
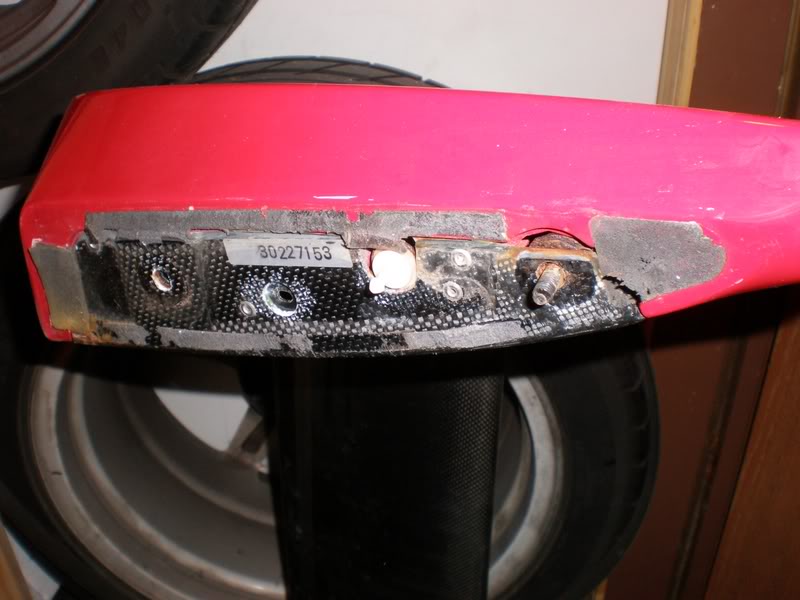
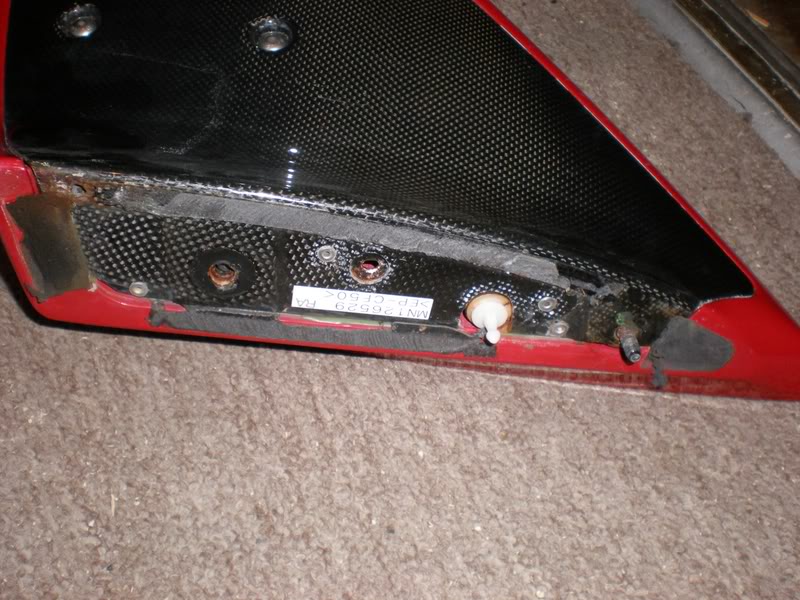
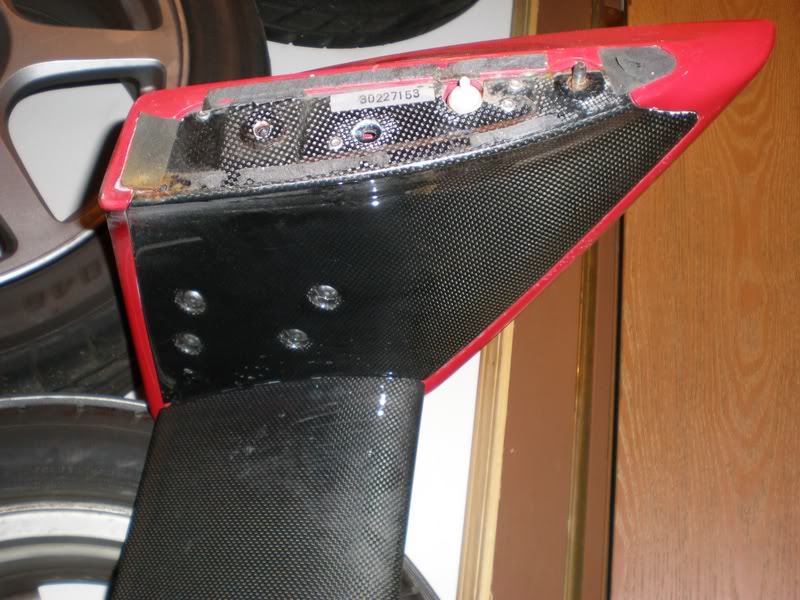
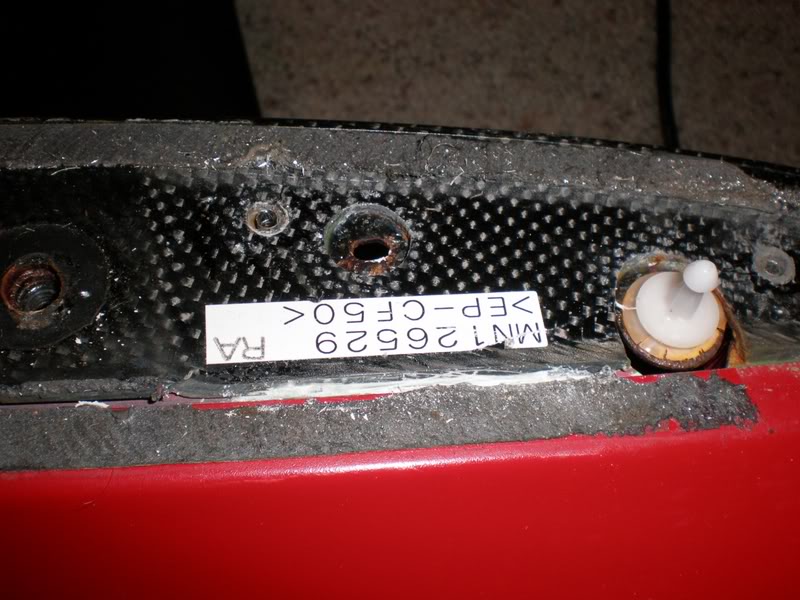
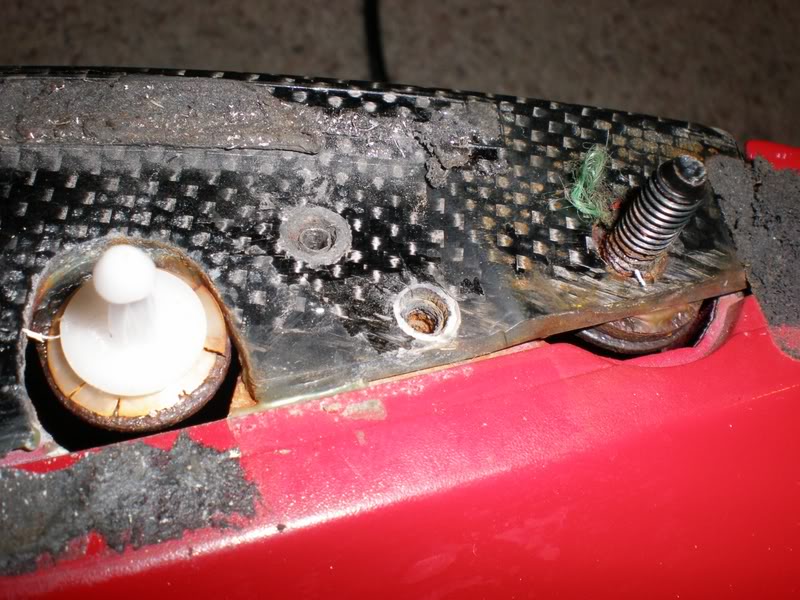
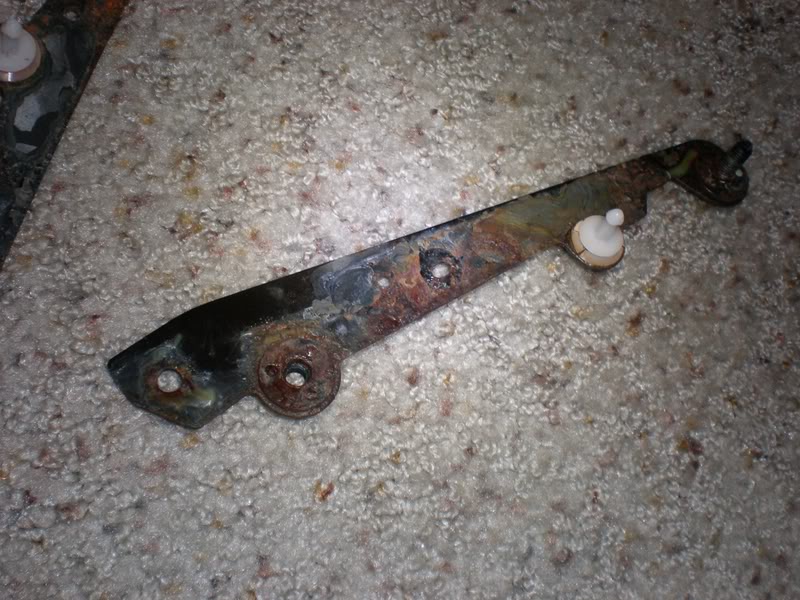
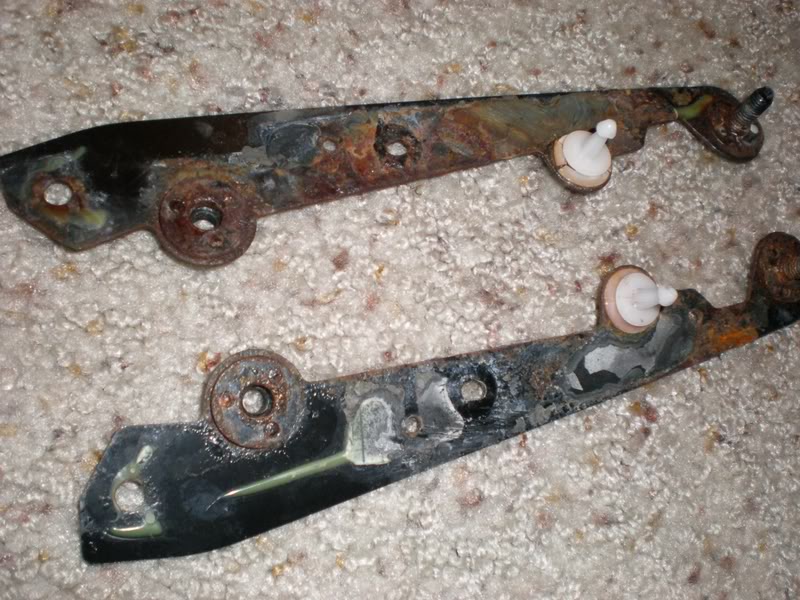
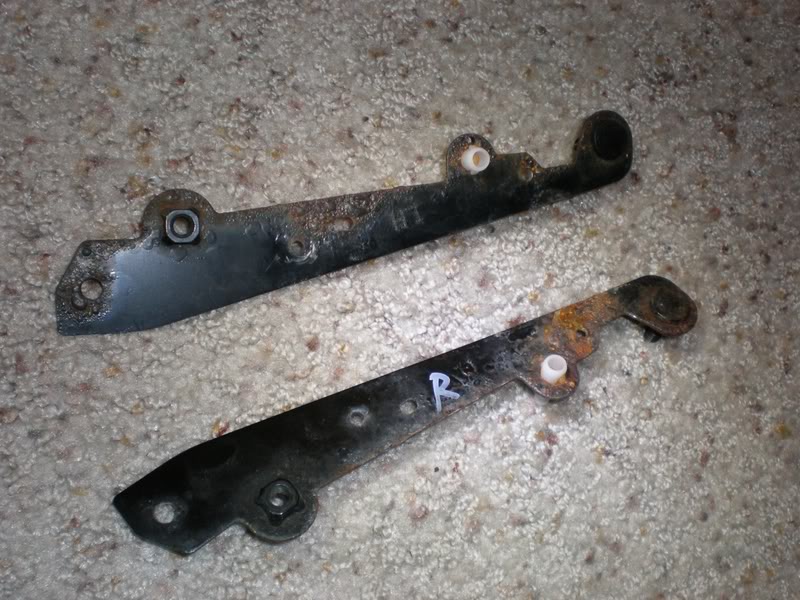
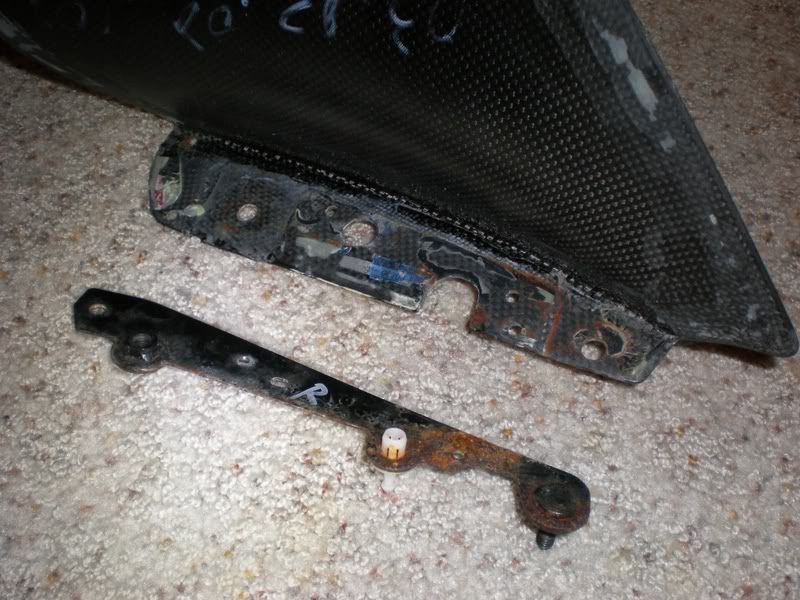
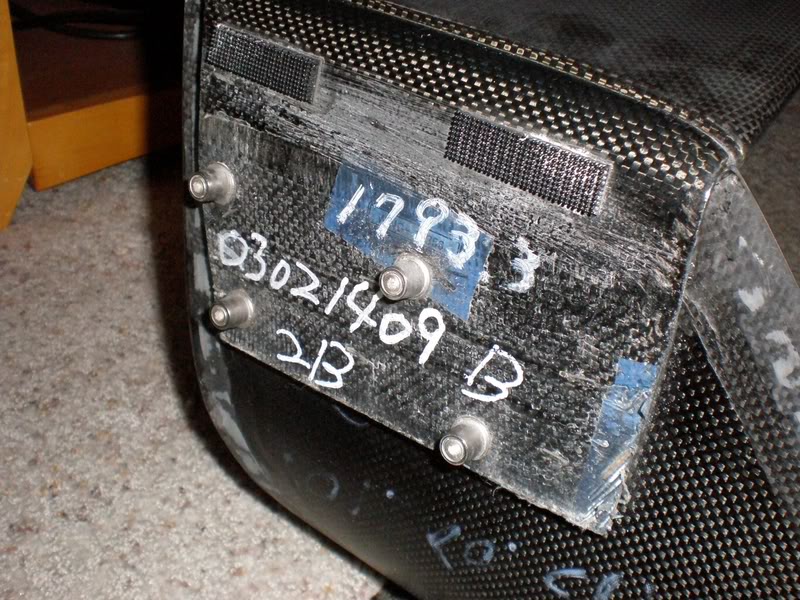
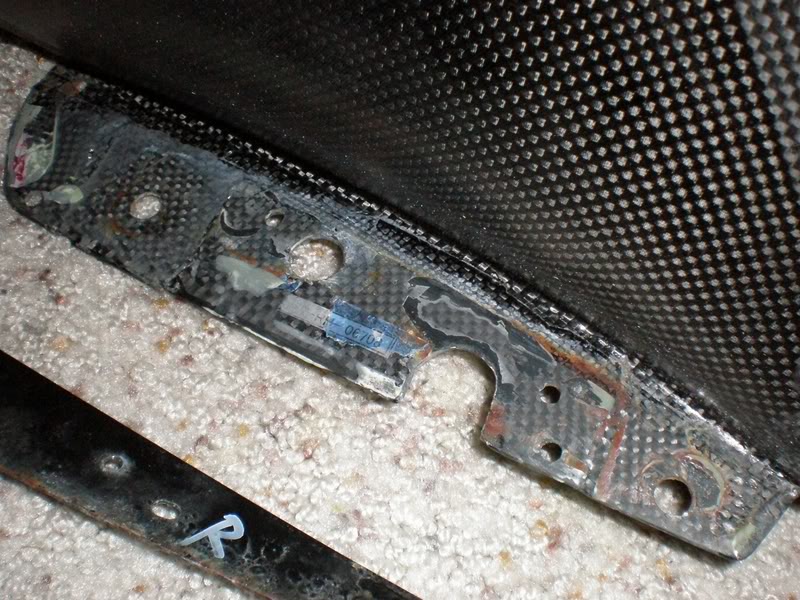
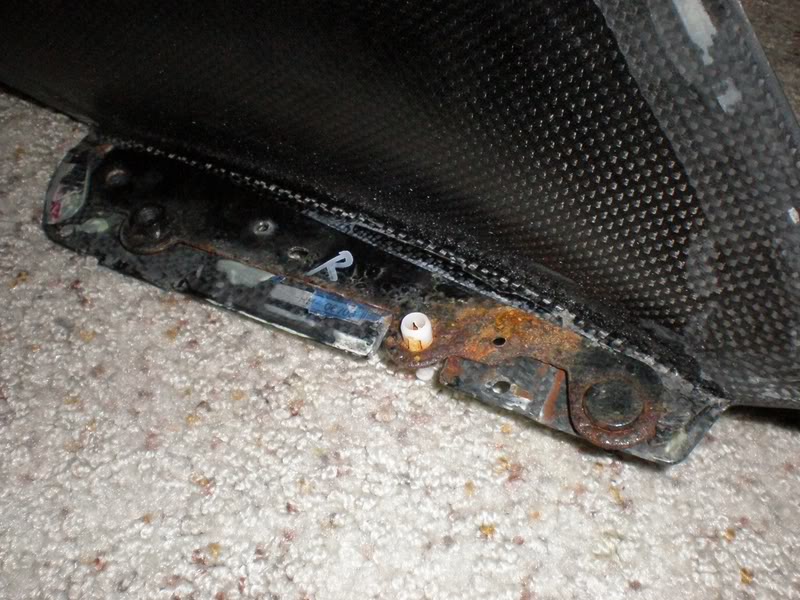
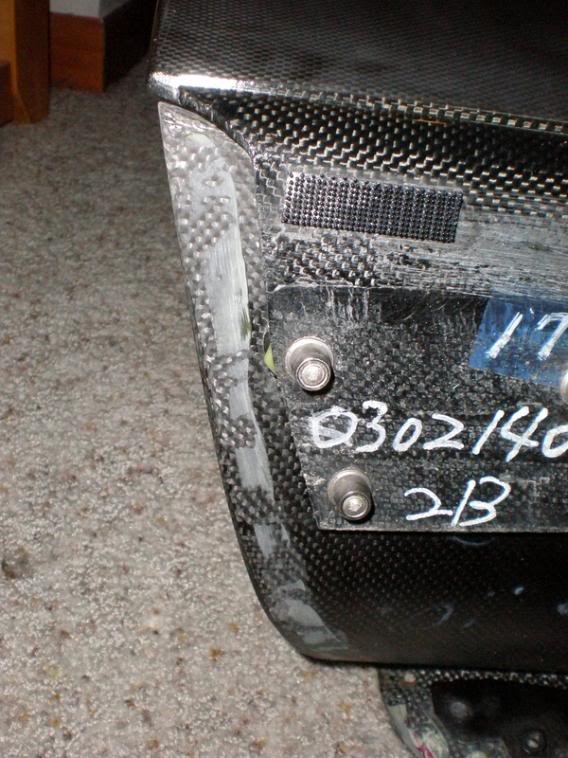
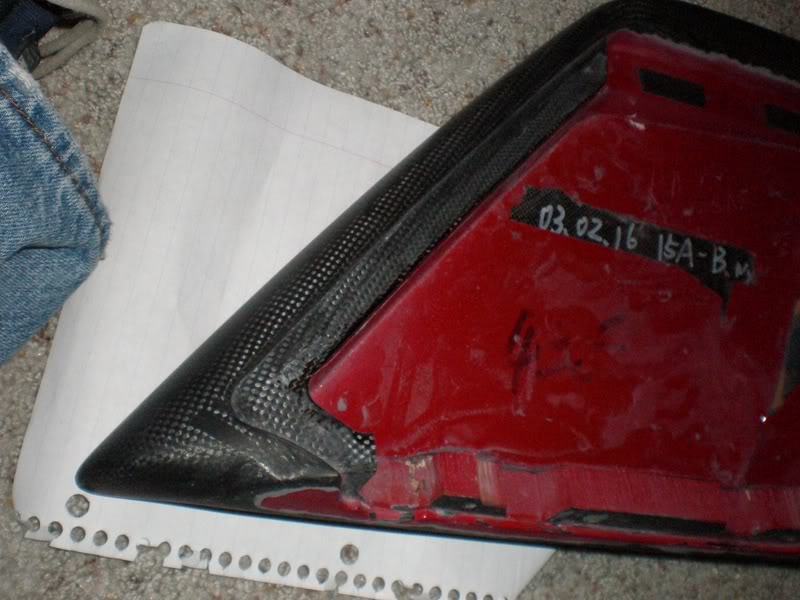
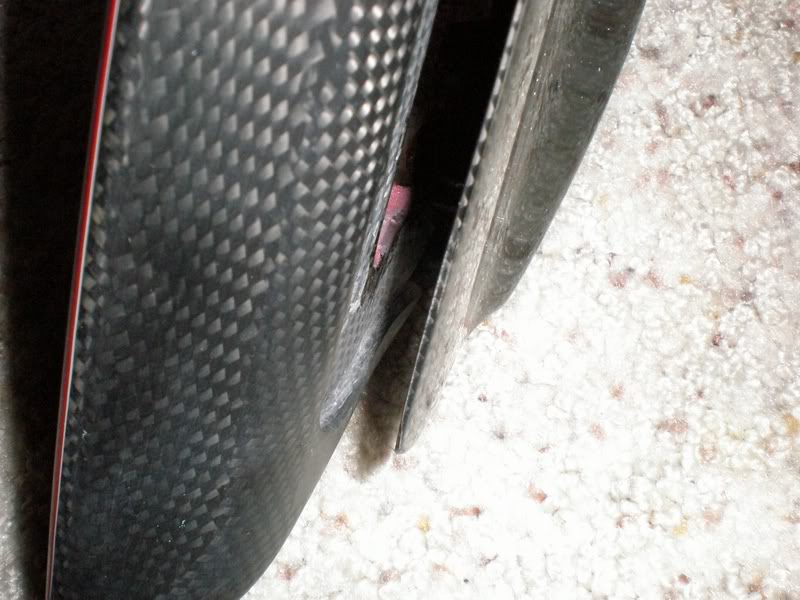
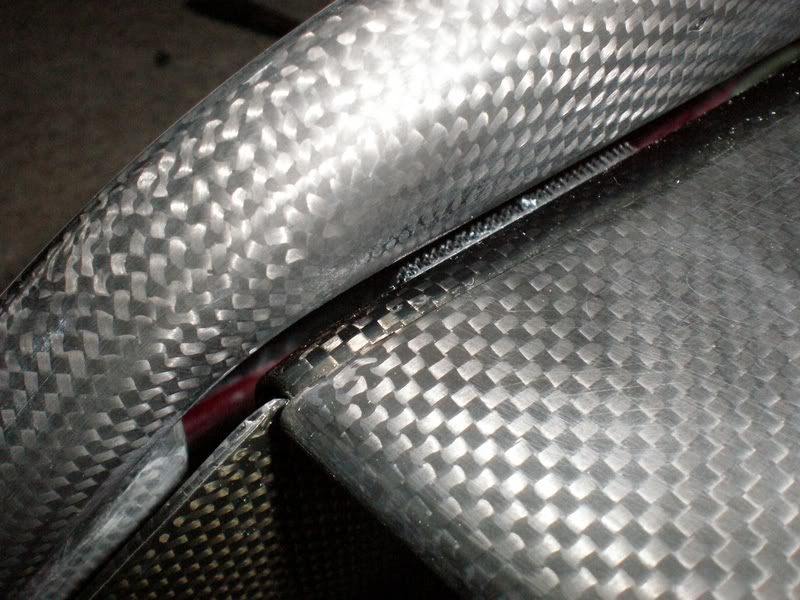
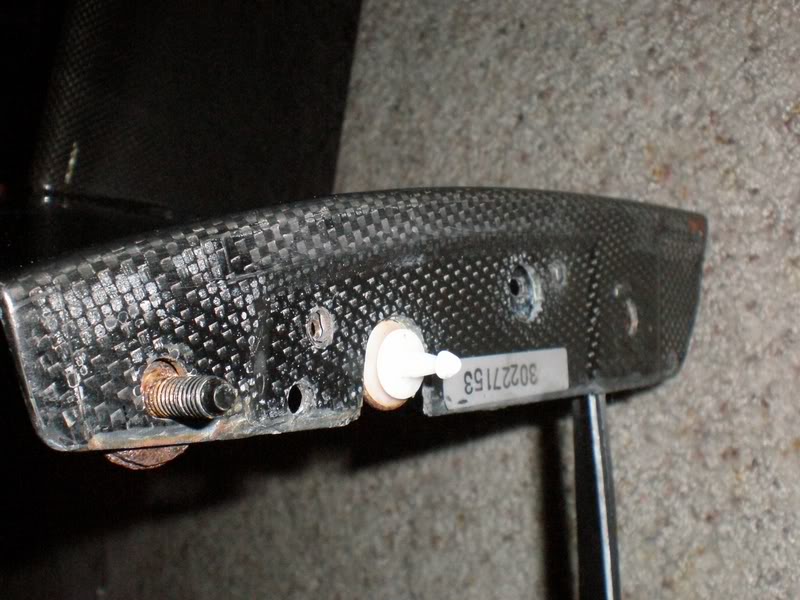
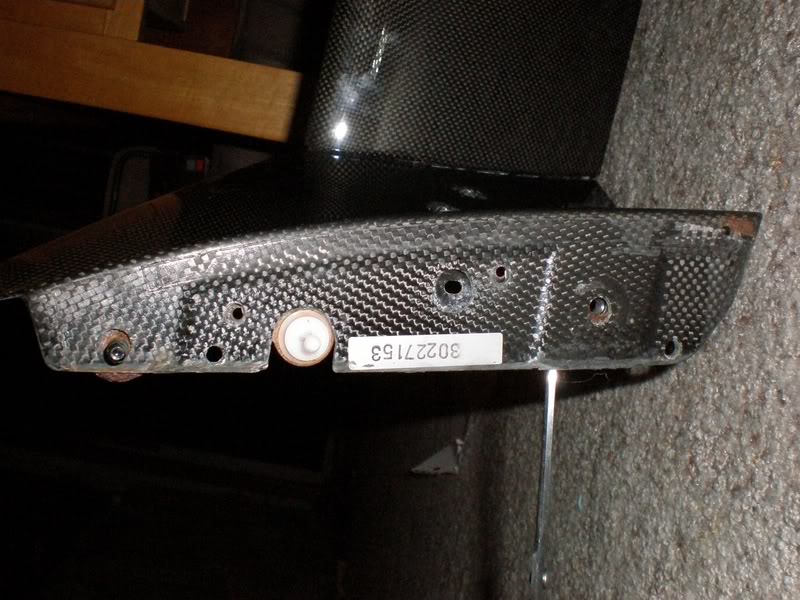
There are four rivets in the bottom that need to be drilled out, two hold the metal bracket to the CF upright and two hold the side piece to the CF upright.
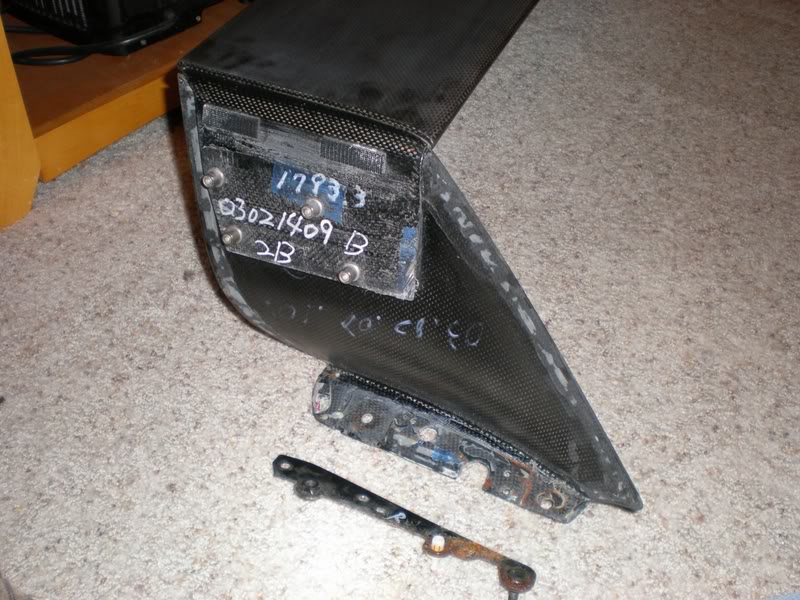
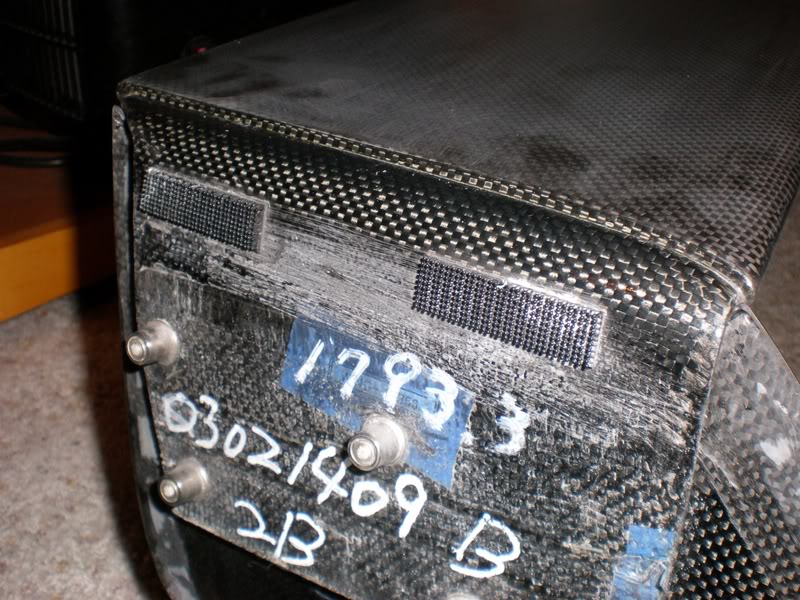
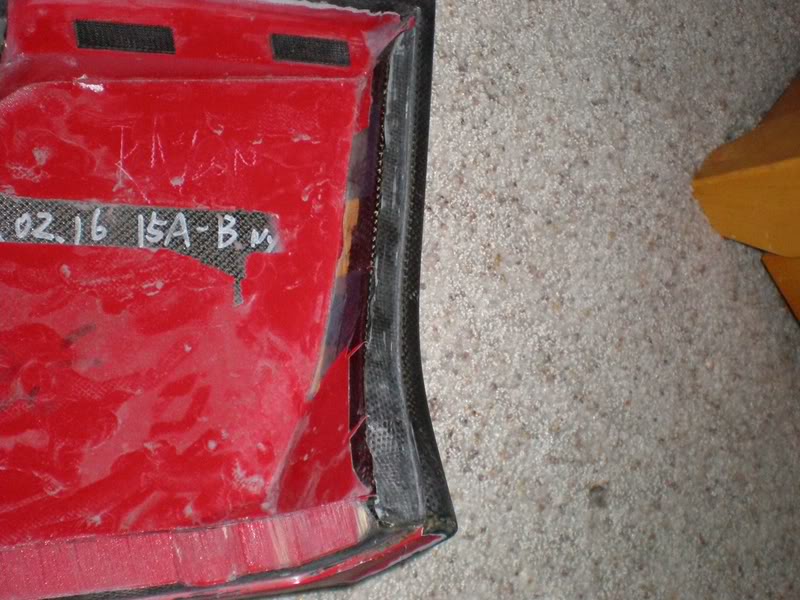
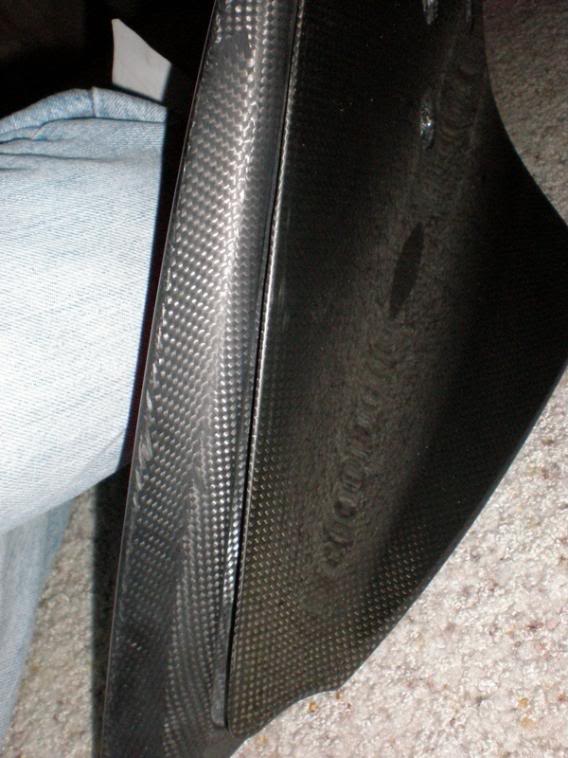
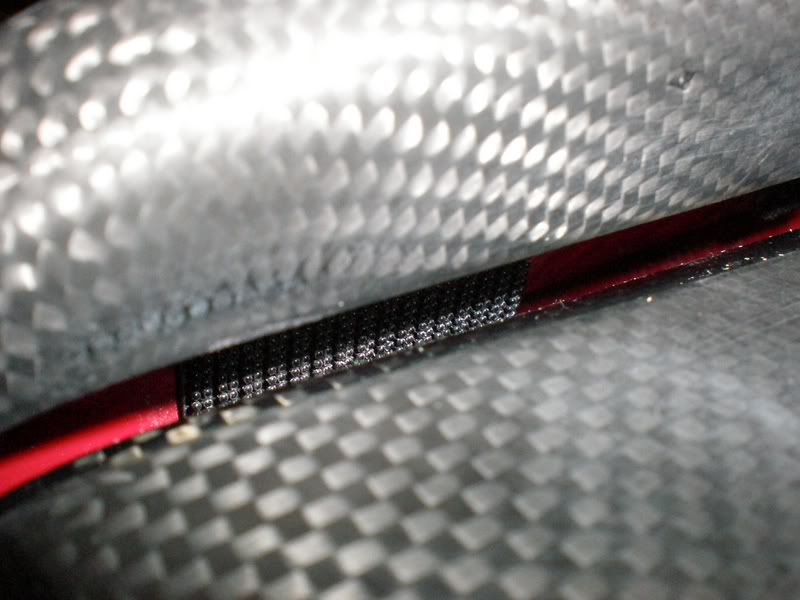
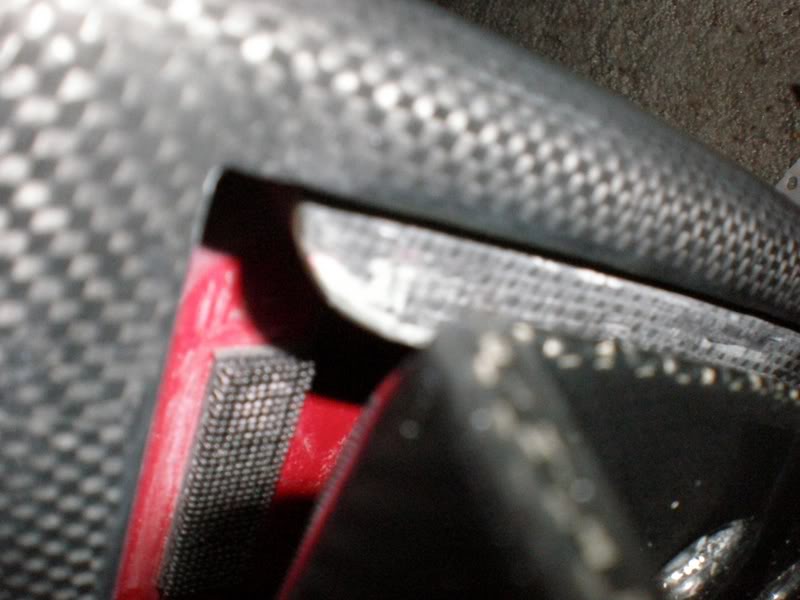
The side pieces are actually glued to the CF uprights along the sides and the bottom, there ARE velcro strips at the top of the side pieces.
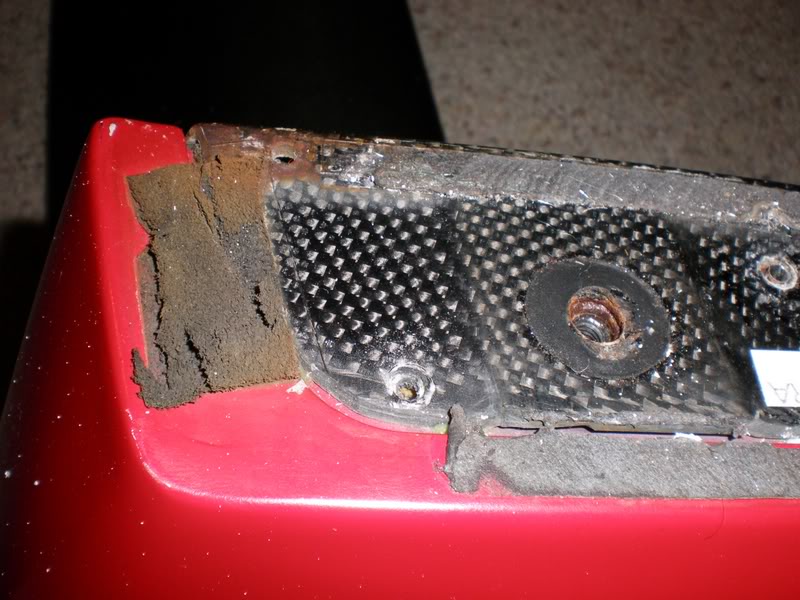
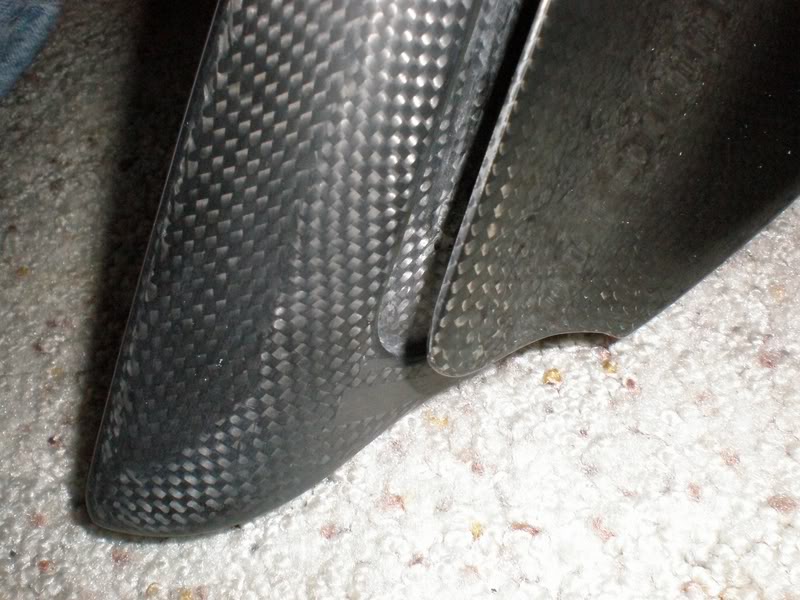
I started with the bottom, prying the two pieces apart.
THESE ARE SERIOUSLY GLUED TOGETHER, AND YOU WILL PROBABLY F-UP YOUR WING(I was lucky and did not), SO BE WARNED, THIS IS A SLOW AND EASY(ok,not easy) PROCESS, BE CAREFUL.
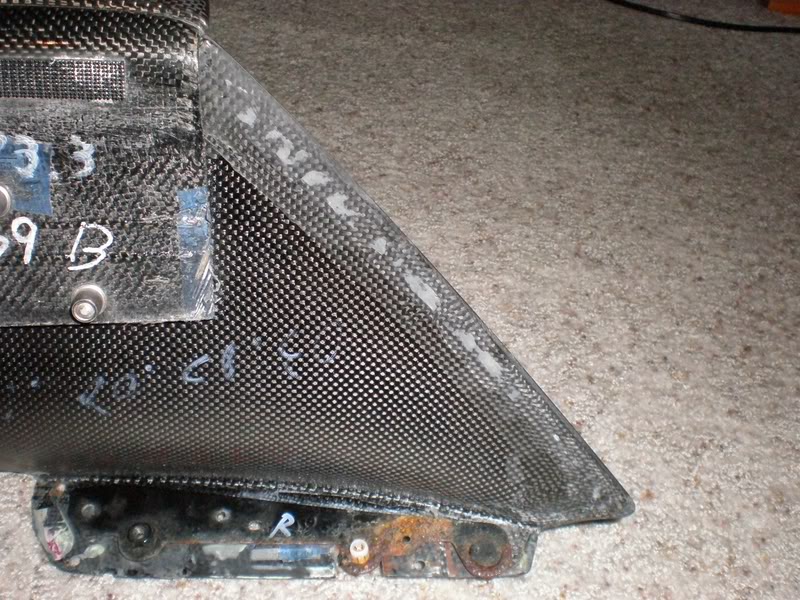
I am posting 36 pictures(=36,000 words) so you can see for yourself.
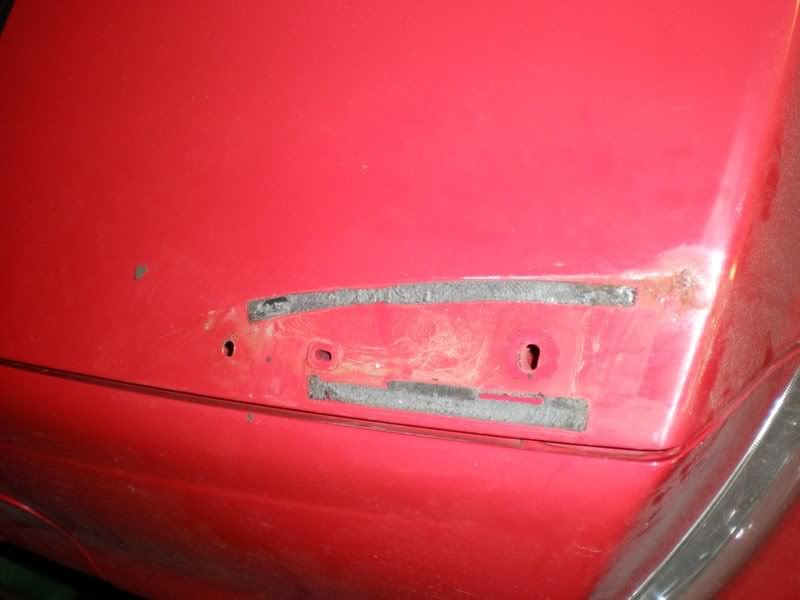
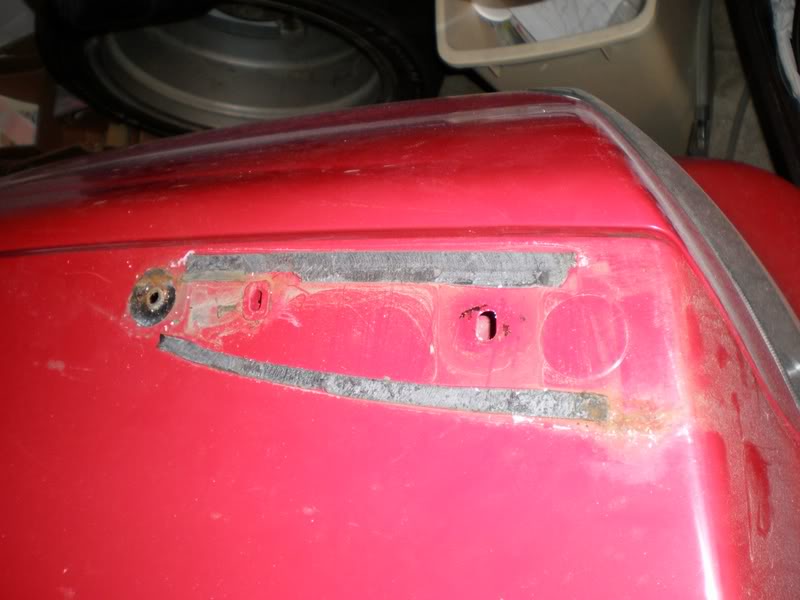
As you can see in the trunk pics, as a reward for my hard work, Mitsu gave me two rust spots under my wing, nice. I have to believe that the rusted out brackets inside the wing are the source of this. I want to replace the brackets, but I can't find them anywhere, so I will have to clean them up and try to rustproof them before putting it back together.
Since I have to get my trunk rust fixed, I am not finished yet, but hopefully I will be soon.
ENJOY
My wing is peeling and want to refinish it... interestied in redoing the outer peices also... figure it's near impossible to remove paint from wing with wing and side peices attached... try to find info on here... no luck... though there is a rumor of the wing being held together with velcro(hard to believe)... decide to take wing apart to find out for once and for all.
Well, getting the wing off the trunk was a chore in itself, but eventually it came off. It took less time to get the damn thing off the trunk than it took to get the damn adhesive off the trunk. I did use goo-gone, but it was still a PITA.
There are four rivets in the bottom that need to be drilled out, two hold the metal bracket to the CF upright and two hold the side piece to the CF upright.
The side pieces are actually glued to the CF uprights along the sides and the bottom, there ARE velcro strips at the top of the side pieces.
I started with the bottom, prying the two pieces apart.
THESE ARE SERIOUSLY GLUED TOGETHER, AND YOU WILL PROBABLY F-UP YOUR WING(I was lucky and did not), SO BE WARNED, THIS IS A SLOW AND EASY(ok,not easy) PROCESS, BE CAREFUL.
I am posting 36 pictures(=36,000 words) so you can see for yourself.
As you can see in the trunk pics, as a reward for my hard work, Mitsu gave me two rust spots under my wing, nice. I have to believe that the rusted out brackets inside the wing are the source of this. I want to replace the brackets, but I can't find them anywhere, so I will have to clean them up and try to rustproof them before putting it back together.
Since I have to get my trunk rust fixed, I am not finished yet, but hopefully I will be soon.
ENJOY
Last edited by klink5; Mar 16, 2008 at 12:22 AM.


 Mar 16, 2008, 07:28 AM
#5
Evolved Member
The '03 service manual says the wing is adjustable and it tells how to do it. So, did any of these adjustable wings ever make it to America. Do they even exist?


 Mar 16, 2008, 10:49 AM
#8
Evolved Member
Cool pic. When I got hold of the '03 service manual there was this section on adjusting the wing. So, I wanted to mess with it. I was a little torqued when I found my car without this feature. Do you have any idea why it got dropped from the offering?
Mar 16, 2008, 11:09 AM
#9
Evolving Member
iTrader: (1)

Join Date: Oct 2003
Location: Longview tx
Posts: 263
Likes: 0
Received 0 Likes
on
0 Posts
Man i have pried n pulled on the side. And I don't want to crack it. Got the bottom to lift up. Just wondering if i could wire or take my longknife. (windshield razor blade knife) and cut up side without 2 much damage. Then attempt to tackle the velcro. Does this sound like a ok approach....
Mar 5, 2010, 08:22 PM
#13
I pulled the sides off by hand without damaging anything. The trick is to pry the sides, starting with the velcro end first, with a firm rocking motion. You will hear the glue coming apart, sounding like a loud crackling. The center piece is friggin' thick, and there shouldn't be any worries about breaking it. I've already assembled mine and it's back on the car, or I would try to make a vid of taking it apart. Hope this finally stops all the non-believers saying that the wing can't be taken apart. This thread is proof!
Mar 5, 2010, 08:27 PM
#14
I pulled the sides off by hand without damaging anything. The trick is to pry the sides, starting with the velcro end first, with a firm rocking motion. You will hear the glue coming apart, sounding like a loud crackling. The center piece is friggin' thick, and there shouldn't be any worries about breaking it. I've already assembled mine and it's back on the car, or I would try to make a vid of taking it apart. Hope this finally stops all the non-believers saying that the wing can't be taken apart. This thread is proof!
I knew I was not crazy or senile and they had Velcro. Now I just have to get the darn sides off. I need some super finger strength or something. It is like they super glued my stuff together.
Raistlin
Mar 5, 2010, 09:00 PM
#15
Evolving Member
iTrader: (1)
Join Date: Feb 2007
Location: inSANeDIEGO
Posts: 161
Likes: 0
Received 0 Likes
on
0 Posts
thanks for this thread! now i can tell, the thieves in the bodyshop that i took my car into, how they took my carbon fiber piece and replaced it with a scratched up one 
Last edited by evolutong; Mar 6, 2010 at 06:21 AM. Reason: Correction