
How to monitor A/F using Greddy InforMeter Touch
 Jul 14, 2010, 04:54 PM
#1
Evolving Member
Thread Starter
iTrader: (3)
Join Date: Jul 2009
Location: Orange, CA
Posts: 105
Likes: 0
Received 0 Likes
on
0 Posts
How to monitor A/F using Greddy InforMeter Touch
For those of you that don't care how we installed it in our Evo, the wiring diagram and InforMeter setup is at the bottom 
We at Plan B Motorsports saw a few requests for a “how-to” on hooking up a wideband O2 sensor to GReddy’s InforMeter Touch Monitoring unit. We found that the capability of this unit exceeded our expectations. It has allowed us to have full monitoring ability in our Evo X without the cumbersome look of a gauge pod. And it's semi stealth since it looks like an aftermarket navi on the dash

Have your Wideband and InforMeter Touch Instructions handy
In this installation, we used the AEM inline UEGO wideband unit (PN: 30-2310). We used this unit for its affordability and self calibration feature. We have also used the Innovate Motorsports unit, and the installation is very similar.
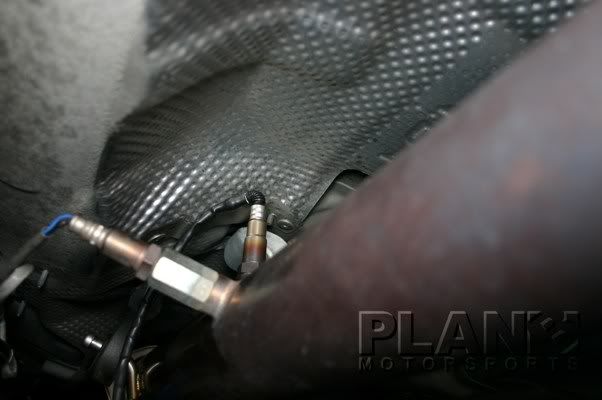
You will need to have the supplied o2 bung installed at the proper location per the instructions of your wideband unit. Installation of the o2 sensor is self explanatory, but make sure you confirm lengths so the loom doesn't come up short.
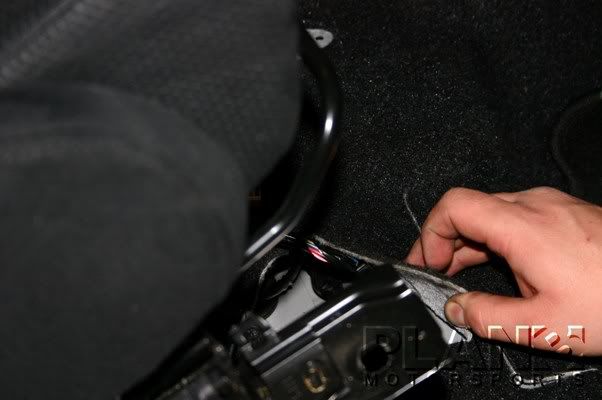
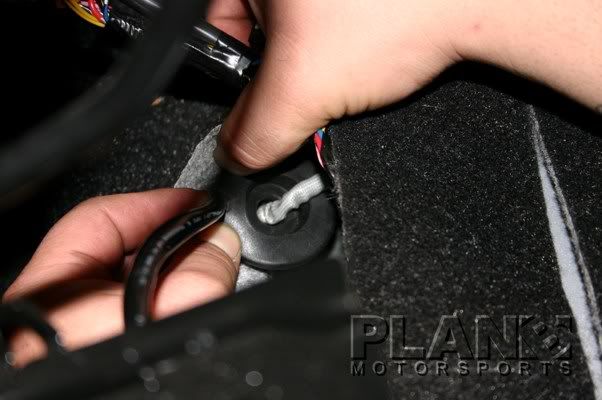
Wiring the W/B O2 was easy. We decided to remove the seat bracket bolts so we could move the seat to get to the grommet. We ran the o2 side of the harness through the grommet under the carpet of the seat, which the stock O2 harness shares. You have to pull out the grommet and run the male connector from the unit through the hole (pics below). We notched the side of the grommet to fit the loom since the connector is to large to fit through the center of it.
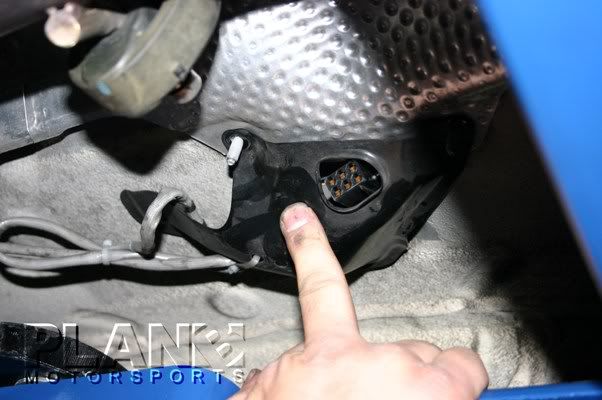
Under the seat turns out to be a perfect location for the AEM control unit since the access panel in the carpet is there as well. This allows the 2 status lights to be easily monitored at anytime by lifting the carpet flap seen under my palm below.
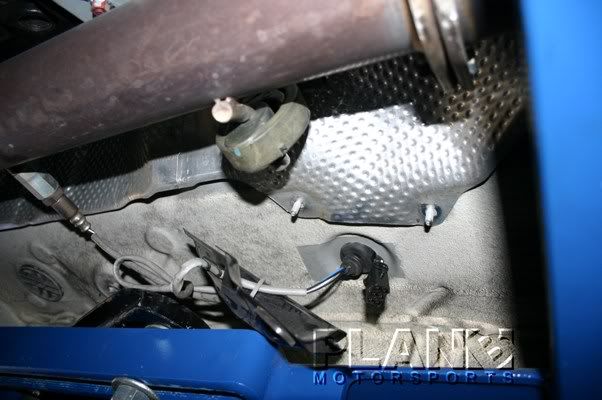
Here is a view from the underside where you can see the grommet and sheild that will house the o2 connector.
Now for the InforMeter and W/B Wiring. This may vary depending on where your InforMeter is installed. Ours in on the left side of the dash. We removed the center console since we decided to pass the loom through there to get to the dash for a clean look:
From the inside of the car, we ran the remaining harness under the carpet torwards the center console until it poked out.
We ran the power harness through the center console and zip tied the loom, making sure we did not obstruct the movement of the shifter assembly. Here is where the red and black wires were tapped into a switched/fused power source (such as the cig lighter where we used power and ground)
From the center console, we ran the rest of the loom (grey, white, brown wires) under the dash to our Informeter Touch. We grounded the brown wire (analog ground) to the chassis, then spliced the white wire (lambda input) to the pink wire of the InfoTouch. The grey is used to view data on a laptop/pc. If you wont be using this feature, leave it alone.
Replace any screws and panels you removed, plug in the o2 sensor, and you’re done with the install.
In order to program the Informeter Touch to read the signal that is being sent from the W/B, you must know the voltage range of your controller/sensor, and how it correlates to the AFR. According to AEM’s information, the sensor reads from 0.5v at 8.5:1 AFR, and 4.5v at 18.0:1 AFR. (For Innovate Users: 0v = 7.35:1 AFR; 5v = 22.39)
From the InfoTouch display:
-Press the screen
-select and press “SETTING”
-press “ANALOG V”
-press “ITEM”
-press “A/F”
There will be two buttons, “CONVERSION 0V” and “CONVERSION 5V”. What this is asking for is what AFR the O2 sensor reads at a particular voltage (in this case, 0 volts and 5 volts); the InfoTouch will then convert these voltages into meaningful AFR values. AEM users will need to put in 7 for ”CONVERSION 0V” since that is the closest value according to their equation 2.375(V)+7.3125. “CONVERSION 5V” will be 19. (Innovate Users: 7 and 22 respectively)
WIRING:
Red - 12V Switched Power Source / 5A Fused
Black - Ground
White - Pink from InforMeter
Brown - Ground
Grey - Not used for InforMeter
We at Plan B Motorsports saw a few requests for a “how-to” on hooking up a wideband O2 sensor to GReddy’s InforMeter Touch Monitoring unit. We found that the capability of this unit exceeded our expectations. It has allowed us to have full monitoring ability in our Evo X without the cumbersome look of a gauge pod. And it's semi stealth since it looks like an aftermarket navi on the dash
Have your Wideband and InforMeter Touch Instructions handy
In this installation, we used the AEM inline UEGO wideband unit (PN: 30-2310). We used this unit for its affordability and self calibration feature. We have also used the Innovate Motorsports unit, and the installation is very similar.
You will need to have the supplied o2 bung installed at the proper location per the instructions of your wideband unit. Installation of the o2 sensor is self explanatory, but make sure you confirm lengths so the loom doesn't come up short.
Wiring the W/B O2 was easy. We decided to remove the seat bracket bolts so we could move the seat to get to the grommet. We ran the o2 side of the harness through the grommet under the carpet of the seat, which the stock O2 harness shares. You have to pull out the grommet and run the male connector from the unit through the hole (pics below). We notched the side of the grommet to fit the loom since the connector is to large to fit through the center of it.
Under the seat turns out to be a perfect location for the AEM control unit since the access panel in the carpet is there as well. This allows the 2 status lights to be easily monitored at anytime by lifting the carpet flap seen under my palm below.
Here is a view from the underside where you can see the grommet and sheild that will house the o2 connector.
Now for the InforMeter and W/B Wiring. This may vary depending on where your InforMeter is installed. Ours in on the left side of the dash. We removed the center console since we decided to pass the loom through there to get to the dash for a clean look:
From the inside of the car, we ran the remaining harness under the carpet torwards the center console until it poked out.
We ran the power harness through the center console and zip tied the loom, making sure we did not obstruct the movement of the shifter assembly. Here is where the red and black wires were tapped into a switched/fused power source (such as the cig lighter where we used power and ground)
From the center console, we ran the rest of the loom (grey, white, brown wires) under the dash to our Informeter Touch. We grounded the brown wire (analog ground) to the chassis, then spliced the white wire (lambda input) to the pink wire of the InfoTouch. The grey is used to view data on a laptop/pc. If you wont be using this feature, leave it alone.
Replace any screws and panels you removed, plug in the o2 sensor, and you’re done with the install.
In order to program the Informeter Touch to read the signal that is being sent from the W/B, you must know the voltage range of your controller/sensor, and how it correlates to the AFR. According to AEM’s information, the sensor reads from 0.5v at 8.5:1 AFR, and 4.5v at 18.0:1 AFR. (For Innovate Users: 0v = 7.35:1 AFR; 5v = 22.39)
From the InfoTouch display:
-Press the screen
-select and press “SETTING”
-press “ANALOG V”
-press “ITEM”
-press “A/F”
There will be two buttons, “CONVERSION 0V” and “CONVERSION 5V”. What this is asking for is what AFR the O2 sensor reads at a particular voltage (in this case, 0 volts and 5 volts); the InfoTouch will then convert these voltages into meaningful AFR values. AEM users will need to put in 7 for ”CONVERSION 0V” since that is the closest value according to their equation 2.375(V)+7.3125. “CONVERSION 5V” will be 19. (Innovate Users: 7 and 22 respectively)
WIRING:
Red - 12V Switched Power Source / 5A Fused
Black - Ground
White - Pink from InforMeter
Brown - Ground
Grey - Not used for InforMeter
Last edited by plan:b; Jul 15, 2010 at 01:04 PM.


Thread
Thread Starter
Forum
Replies
Last Post
Charlienofun
Evo X Electrical / Audio / Security
58
Mar 10, 2023 03:33 PM
psphinx81
For Sale - Cars For Sale
5
Sep 20, 2010 07:21 AM
Steve_P
Vendor Service / Parts / Tuning Review
5
Feb 28, 2010 04:37 PM