How to: Hardwired power inverter
 Dec 4, 2010, 01:31 AM
#1
Newbie
Thread Starter
iTrader: (13)

Join Date: Jul 2010
Location: CA
Posts: 67
Likes: 0
Received 0 Likes
on
0 Posts
How to: Hardwired power inverter
A little background: I have been tuning my car recently and my laptop battery is toast giving me a 15 minute tuning session in before it dies. I picked up a power inverter off the newegg on black friday to remedy the problem. To keep it as clean as possible I decided to hardwire it in.

Materials:
- Power Inverter (I picked a Rosewill RCP-511F for $18 shipped on newegg)
- 10 Gauge Wire (8ft) - $6
- 14 Gauge Wire (20ft) - $6
- 10 Gauge Fuse Holder - $4
- Shrink Wrap (various sizes) - $5
- Lighted Switch - $5
- Relay + Harness - $8
- 3 Ringed Terminals
- 3 Female Wire Connector Terminals
- Solder
- Soldering Iron
- Hot Glue
- Screw Driver
- Electrical Tape
- Razor Blade
- Drill
Part A - Installation/Mounting
I started by disassembling the power inverter


There was hot glue securing the plug into the face plate so I removed that with a screw driver and razor blade. I found it easier to just remove the face plate from the unit by cutting the wires first in order to remove the glue. This has to be done anyways so you might as well do it now. Make sure to either remember or mark down what wire connects to what.

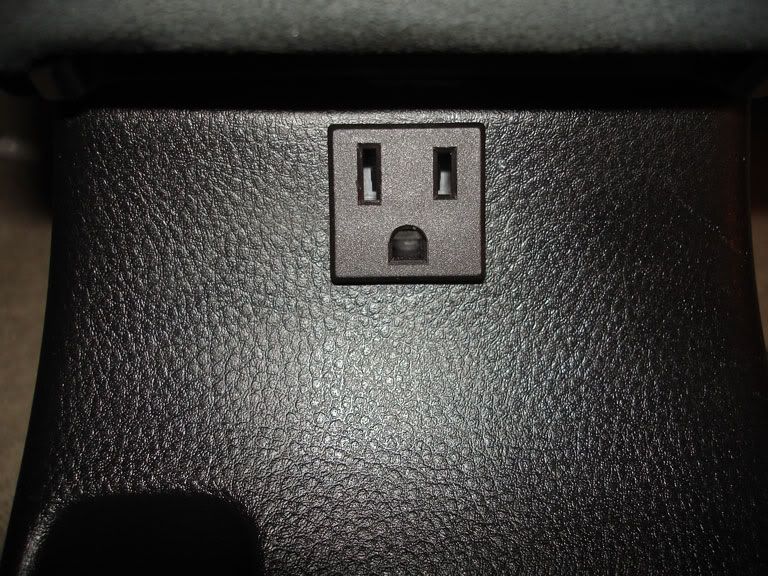
I used the face plate to trace out a template of where I would be cutting the center console to mount the socket. This one is on the rear of the console below the ash try.

I used the razor blade to cut out the hole. You can probably use a dremel to cut it out as well.

Mock up

Since there were two outlets on the inverter I chose to mount one on the front.

Front test fit. I recommend if you decide to mount yours here as well that you mount it slightly lower as I had to shave down the piece that latches the center console box.


Finally drill the hole for the switch using the drill (in my case a 7/8" drill bit was used and I used a file to notch the hole for the switch alignment)

Part B - Electrical
Refer back to the inverter unit:
I chose to remove the switch that allows you to turn the unit on and off because it would be redundant to have two switches both controlling the same thing.
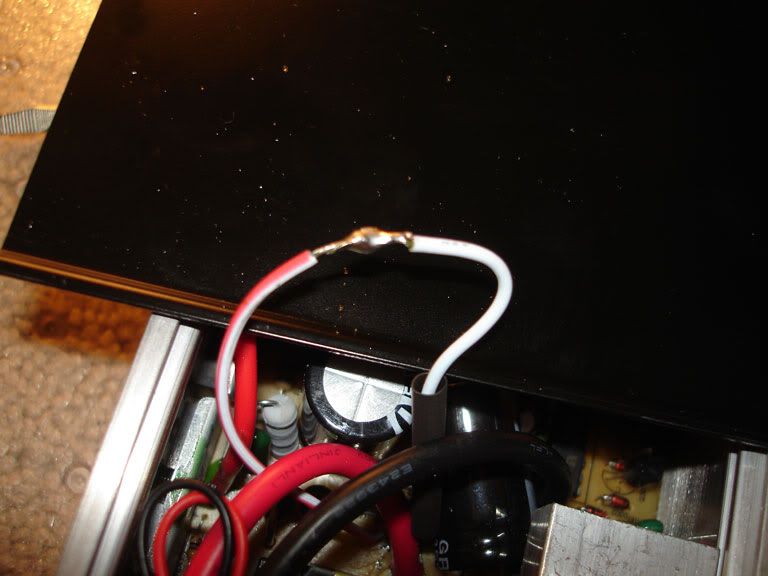

Next, each of the wires that previously went to the outlets must be extended. I extended each wire approximately 18-20"s to give me enough slack for easy wiring.

Run the wires through the face plate with the outlets removed. Its a good idea to put a zip tie right behind the face plate so the wires don't get pulled out of the unit on accident. Its a good idea to mark what wire goes to what color and position as well unless you are using different color wires.

Run each wire to the proper opening.
Each wire goes back to its original position, only it's now lengthened. I used solder and heat shrink on each connection.


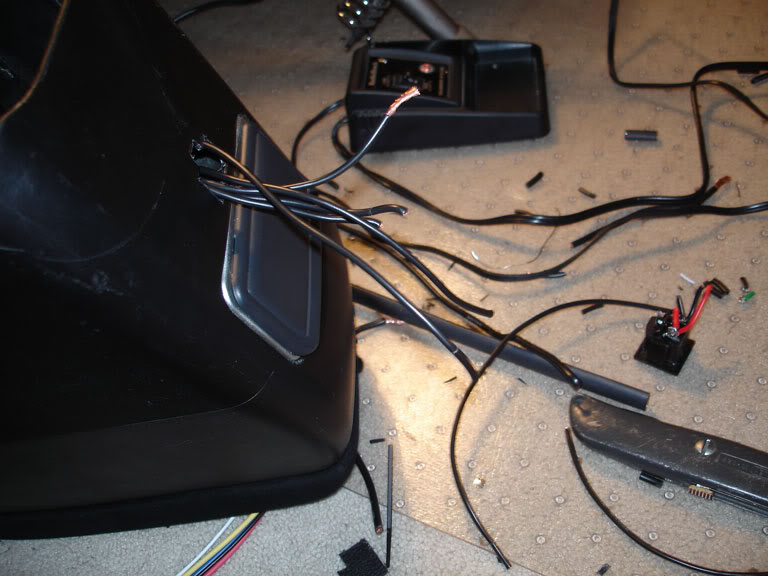
I loomed the wires with electrical tape to keep them neat.

I mounted the inverter to the section in between the center console compartment and the cup holders.

Next the relay must be wired in.


Power is taken from the cigarette lighter for the arming switch to activate the relay.

Wire in the rest of the sections according to the diagram above


Test the switch to ensure that it activates the power inverter before putting the center console back together.
Enjoy the two outlets for pretty much anything


Materials:
- Power Inverter (I picked a Rosewill RCP-511F for $18 shipped on newegg)
- 10 Gauge Wire (8ft) - $6
- 14 Gauge Wire (20ft) - $6
- 10 Gauge Fuse Holder - $4
- Shrink Wrap (various sizes) - $5
- Lighted Switch - $5
- Relay + Harness - $8
- 3 Ringed Terminals
- 3 Female Wire Connector Terminals
- Solder
- Soldering Iron
- Hot Glue
- Screw Driver
- Electrical Tape
- Razor Blade
- Drill
Part A - Installation/Mounting
I started by disassembling the power inverter
There was hot glue securing the plug into the face plate so I removed that with a screw driver and razor blade. I found it easier to just remove the face plate from the unit by cutting the wires first in order to remove the glue. This has to be done anyways so you might as well do it now. Make sure to either remember or mark down what wire connects to what.
I used the face plate to trace out a template of where I would be cutting the center console to mount the socket. This one is on the rear of the console below the ash try.
I used the razor blade to cut out the hole. You can probably use a dremel to cut it out as well.
Mock up
Since there were two outlets on the inverter I chose to mount one on the front.
Front test fit. I recommend if you decide to mount yours here as well that you mount it slightly lower as I had to shave down the piece that latches the center console box.
Finally drill the hole for the switch using the drill (in my case a 7/8" drill bit was used and I used a file to notch the hole for the switch alignment)
Part B - Electrical
Refer back to the inverter unit:
I chose to remove the switch that allows you to turn the unit on and off because it would be redundant to have two switches both controlling the same thing.
Next, each of the wires that previously went to the outlets must be extended. I extended each wire approximately 18-20"s to give me enough slack for easy wiring.
Run the wires through the face plate with the outlets removed. Its a good idea to put a zip tie right behind the face plate so the wires don't get pulled out of the unit on accident. Its a good idea to mark what wire goes to what color and position as well unless you are using different color wires.
Run each wire to the proper opening.
Each wire goes back to its original position, only it's now lengthened. I used solder and heat shrink on each connection.
I loomed the wires with electrical tape to keep them neat.
I mounted the inverter to the section in between the center console compartment and the cup holders.
Next the relay must be wired in.
Power is taken from the cigarette lighter for the arming switch to activate the relay.
Wire in the rest of the sections according to the diagram above
Test the switch to ensure that it activates the power inverter before putting the center console back together.
Enjoy the two outlets for pretty much anything
Last edited by concept11253; Dec 4, 2010 at 01:34 AM.
 Dec 4, 2010, 06:14 AM
#2
Newbie
iTrader: (2)
Join Date: Oct 2010
Location: Evansville, IN
Posts: 52
Likes: 0
Received 0 Likes
on
0 Posts
Decent,
The work you did sinking the switch and outlets into the plastic looks really good they are just in spots that I wouldn't have picked.
I might have hidden the front outlet under the the passenger side dash/glovebox or in the the bottom of the center console so you have to open to access.
You could have also mounted the inverter under one of the two front seats and tucked the cable under the the console.
Not trying to be overly critical.
Ben
Dec 4, 2010, 11:03 AM
#3
Newbie
Thread Starter
iTrader: (13)
Join Date: Jul 2010
Location: CA
Posts: 67
Likes: 0
Received 0 Likes
on
0 Posts
Decent,
The work you did sinking the switch and outlets into the plastic looks really good they are just in spots that I wouldn't have picked.
I might have hidden the front outlet under the the passenger side dash/glovebox or in the the bottom of the center console so you have to open to access.
You could have also mounted the inverter under one of the two front seats and tucked the cable under the the console.
Not trying to be overly critical.
Ben
The work you did sinking the switch and outlets into the plastic looks really good they are just in spots that I wouldn't have picked.
I might have hidden the front outlet under the the passenger side dash/glovebox or in the the bottom of the center console so you have to open to access.
You could have also mounted the inverter under one of the two front seats and tucked the cable under the the console.
Not trying to be overly critical.
Ben
Jan 16, 2011, 07:28 AM
#7
great idea bro... i have one that sits in my cup holder and its size and shape make it awkward to store so this would be a great idea.
as for your idea on place.... thats not bad.. probably a cleaner/stealthier install but it would make it difficult to remove the interior panels if something should have to be installed or replaced... just my two cents...
Decent,
I might have hidden the front outlet under the the passenger side dash/glovebox or in the the bottom of the center console so you have to open to access.
You could have also mounted the inverter under one of the two front seats and tucked the cable under the the console.
Ben
I might have hidden the front outlet under the the passenger side dash/glovebox or in the the bottom of the center console so you have to open to access.
You could have also mounted the inverter under one of the two front seats and tucked the cable under the the console.
Ben


