
My 35R build
 Feb 22, 2010, 12:03 AM
#1
Evolving Member
Thread Starter
iTrader: (6)
Join Date: Jul 2008
Location: Sucktown, MO
Posts: 352
Likes: 0
Received 0 Likes
on
0 Posts
My 35R build
I'll start by sharing a bit of a back-story on my car with you guys. January of 2009 I was heading out with some friends on a Saturday morning and as we're pulling into a grocery store to get a couple things my car dies. I tried every trick I knew to get it running again but it simply wouldn't start back up. Towed it home, thought it was flooded, changed the oil, threw some new plugs in it, ran great for about 20 miles, got into boost and boom it died again. This time for good. Spark plugs were getting hit by the pistons causing the gap to close because they were a bit deformed due to detonation. Well since I wasn't working at the time and just going to school I got a job, bought some Buschur JE Spec pistons to rebuild it, among a few other toys and E85 and had her back on the road around late July.
Decided to throw out my SAFC2, despite my better judgment, and go with an email tuner and do the ECU Flash thing. Decided to go with a popular tuner who was suggested to me by a couple of local Evo guys and the tuner will remain nameless, not looking to start anything over the internet. I spent the next month or so trying to straighten out issues with the tuning software, with making sure o2 sensors, spark plugs, vacuum lines, and the most annoying problem of all was the serial cable to log my AFRs. Contact with the tuner was also difficult because our schedules never seemed to work together. He also had a problem remembering what was done to my car and after having issues with running extremely lean when building any amount of boost whatsoever we discovered that it was because he forgot I was running E85.. I drove around for a while on, what I was told, was a safe tune for driving and just not to race anyone, which I never did. The first night after two weeks of safe tune driving, that we were able to do WOT tuning pulls on the highway my car spun a bearing after just a few 30psi pulls on E85. What was weird was there wasn't an unusual amount of knock; however, the timing was pulled to -10 and the AFRs pegged the 10:1 side of my wideband.
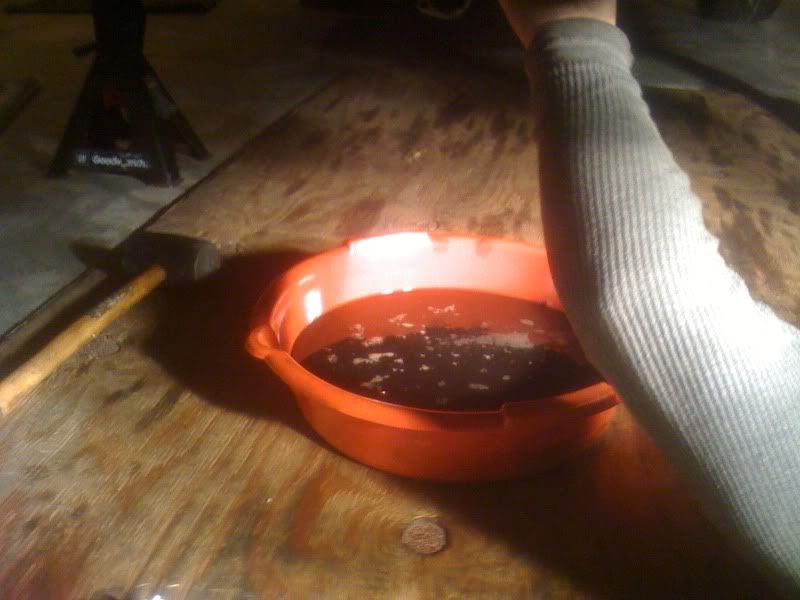
When I pulled the spark plugs they smelled thick with ethanol. Pulled the oil pan and the evidence of too much fuel in the oil was overly apparent and what was even more astonishing is the fact that I had only had the oil in the motor for about 300 miles or less. There were a total of 1,500 miles on my motor after the rebuild.
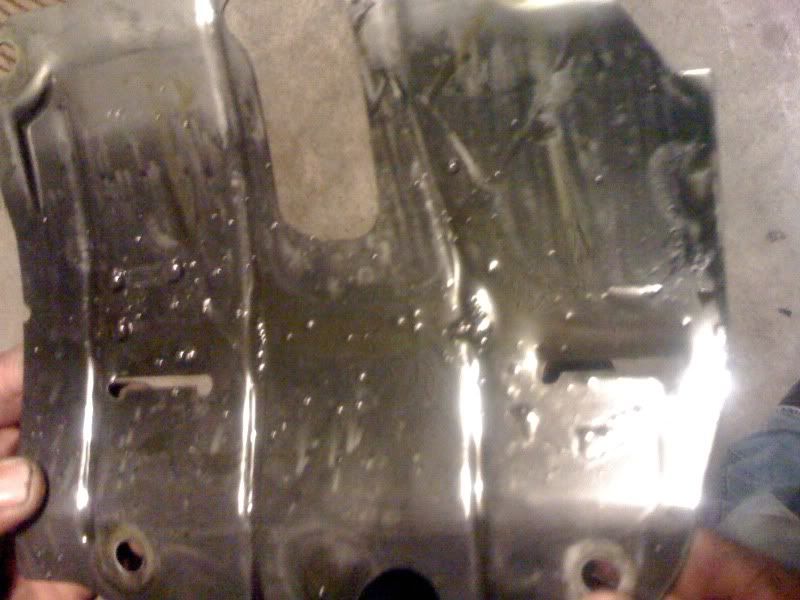
Bubbles from the fuel buildup
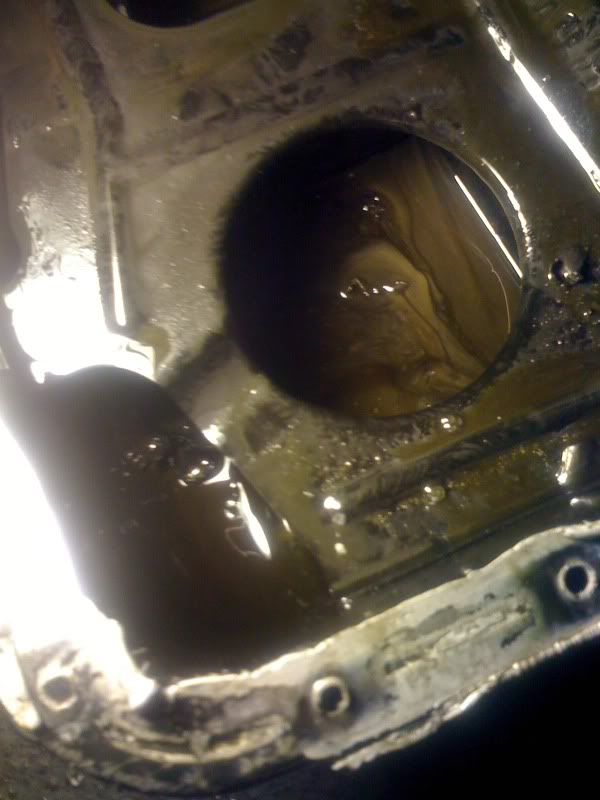
Bearing material and fuel mixed with oil..
Buschur JE Specs Pistons (BEFORE)

(AFTER)

All but one of the rods were black and blue from the heat. You can tell which one spun the bearing.

Good Rod Cap (LEFT) Bad Rod Cap (Right) Definitely got hot in there! lol

DIAGNOSIS: Car was tuned way too rich, caused the oil to become diluted in fuel, created too much friction, friction created heat, caused one of the rod cap nuts to expand and back off the stud, spinning the bearing.
This happened in September 2009. I was now faced with the decision to either sell it for what I could get out of it and be done with it or keep it and rebuild it. Well I couldn't see myself getting rid of this car yet and there was nothing for the price that I would rather have. So I decided to not only rebuild it but to improve what I could afford to in an effort to not only make it safer but also worth a little more. I didn't want to put $2-3,000 into a full rebuild of the motor just for it to not be worth anything more afterwards.
So, I began my rebuild. I started selling parts on here and working as much as I could when I wasn't in school to help save. Since I live at home the only real thing I had to pay for was my car payment, so saving didn't take as long as I thought it would for a build like this on just above minimum wage lol.
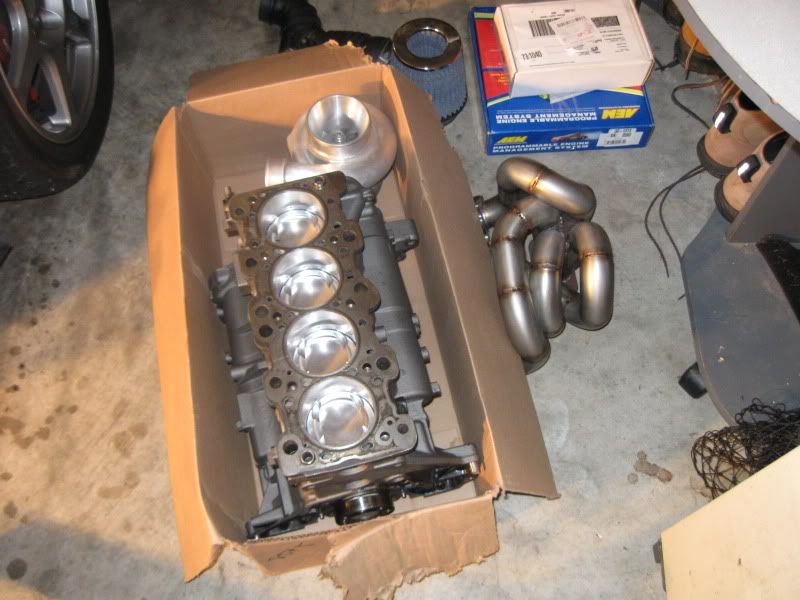
BUILD LIST:
2.0L bored .020 shortblock, Wiseco 1400HD pistons 10:1CR, Manley Turbo Tuff Long Rods +6mm, ARP mains, ACL race bearings, factory crank.
Garret GT35R .82ar
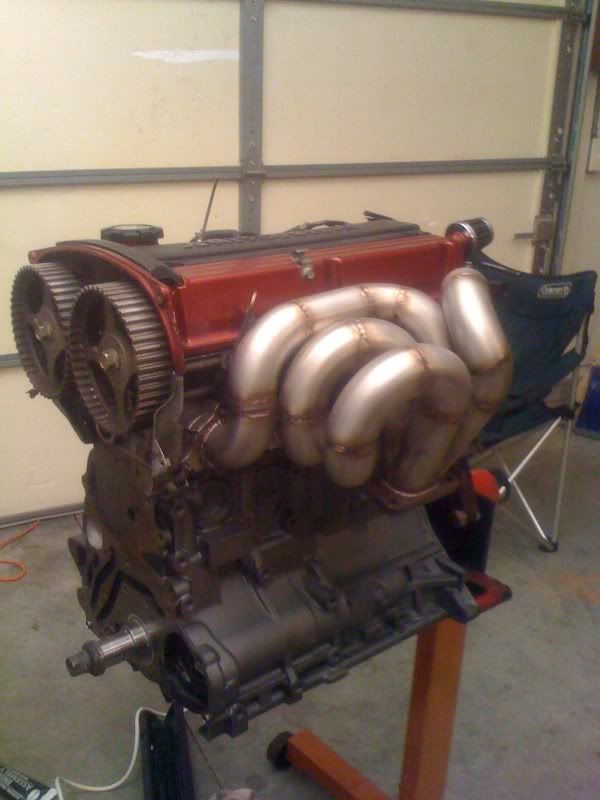
AWD Motorsports T3 Tubular Manifold
Tial 44mm Wastegate
AEM EMS w/ 5bar MAP sensor
Precision 1600cc injectors
BC 272 cams (which I already had and are getting changed out for Kelford 280s and valvetrain in April)
Custom Stainless Steel Downpipe, Lower IC pipe and Dumptube
And lots of little accessories.. that add up fast!

NOTE: Couple of things to know about the AWD Motorsports T3 Manifold that I have..
You need a custom LICP to be made if you're going to be running this manifold as well as a halfsize/slimline radiator as the stocker is too big for the manifold and a 44mm tial wastegate can't fit due to the upper radiator hose and the A/C fan. The manifold itself also touches the radiator as you can see below.. granted I didn't have the manifold bolted down tightly.

Overall I love the way this manifold looks compared to most and for the price it's hard to beat and a big thanks to Mike@AWD Motorsports for being so helpful and patient with some of my questions!
Decided to throw out my SAFC2, despite my better judgment, and go with an email tuner and do the ECU Flash thing. Decided to go with a popular tuner who was suggested to me by a couple of local Evo guys and the tuner will remain nameless, not looking to start anything over the internet. I spent the next month or so trying to straighten out issues with the tuning software, with making sure o2 sensors, spark plugs, vacuum lines, and the most annoying problem of all was the serial cable to log my AFRs. Contact with the tuner was also difficult because our schedules never seemed to work together. He also had a problem remembering what was done to my car and after having issues with running extremely lean when building any amount of boost whatsoever we discovered that it was because he forgot I was running E85.. I drove around for a while on, what I was told, was a safe tune for driving and just not to race anyone, which I never did. The first night after two weeks of safe tune driving, that we were able to do WOT tuning pulls on the highway my car spun a bearing after just a few 30psi pulls on E85. What was weird was there wasn't an unusual amount of knock; however, the timing was pulled to -10 and the AFRs pegged the 10:1 side of my wideband.
When I pulled the spark plugs they smelled thick with ethanol. Pulled the oil pan and the evidence of too much fuel in the oil was overly apparent and what was even more astonishing is the fact that I had only had the oil in the motor for about 300 miles or less. There were a total of 1,500 miles on my motor after the rebuild.
Bubbles from the fuel buildup
Bearing material and fuel mixed with oil..
Buschur JE Specs Pistons (BEFORE)
(AFTER)
All but one of the rods were black and blue from the heat. You can tell which one spun the bearing.
Good Rod Cap (LEFT) Bad Rod Cap (Right) Definitely got hot in there! lol
DIAGNOSIS: Car was tuned way too rich, caused the oil to become diluted in fuel, created too much friction, friction created heat, caused one of the rod cap nuts to expand and back off the stud, spinning the bearing.
This happened in September 2009. I was now faced with the decision to either sell it for what I could get out of it and be done with it or keep it and rebuild it. Well I couldn't see myself getting rid of this car yet and there was nothing for the price that I would rather have. So I decided to not only rebuild it but to improve what I could afford to in an effort to not only make it safer but also worth a little more. I didn't want to put $2-3,000 into a full rebuild of the motor just for it to not be worth anything more afterwards.
So, I began my rebuild. I started selling parts on here and working as much as I could when I wasn't in school to help save. Since I live at home the only real thing I had to pay for was my car payment, so saving didn't take as long as I thought it would for a build like this on just above minimum wage lol.
BUILD LIST:
2.0L bored .020 shortblock, Wiseco 1400HD pistons 10:1CR, Manley Turbo Tuff Long Rods +6mm, ARP mains, ACL race bearings, factory crank.
Garret GT35R .82ar
AWD Motorsports T3 Tubular Manifold
Tial 44mm Wastegate
AEM EMS w/ 5bar MAP sensor
Precision 1600cc injectors
BC 272 cams (which I already had and are getting changed out for Kelford 280s and valvetrain in April)
Custom Stainless Steel Downpipe, Lower IC pipe and Dumptube
And lots of little accessories.. that add up fast!
NOTE: Couple of things to know about the AWD Motorsports T3 Manifold that I have..
You need a custom LICP to be made if you're going to be running this manifold as well as a halfsize/slimline radiator as the stocker is too big for the manifold and a 44mm tial wastegate can't fit due to the upper radiator hose and the A/C fan. The manifold itself also touches the radiator as you can see below.. granted I didn't have the manifold bolted down tightly.
Overall I love the way this manifold looks compared to most and for the price it's hard to beat and a big thanks to Mike@AWD Motorsports for being so helpful and patient with some of my questions!
Last edited by whitepwr; Feb 22, 2010 at 12:47 AM.
 Feb 22, 2010, 12:35 AM
#3
Evolving Member
Thread Starter
iTrader: (6)
Join Date: Jul 2008
Location: Sucktown, MO
Posts: 352
Likes: 0
Received 0 Likes
on
0 Posts
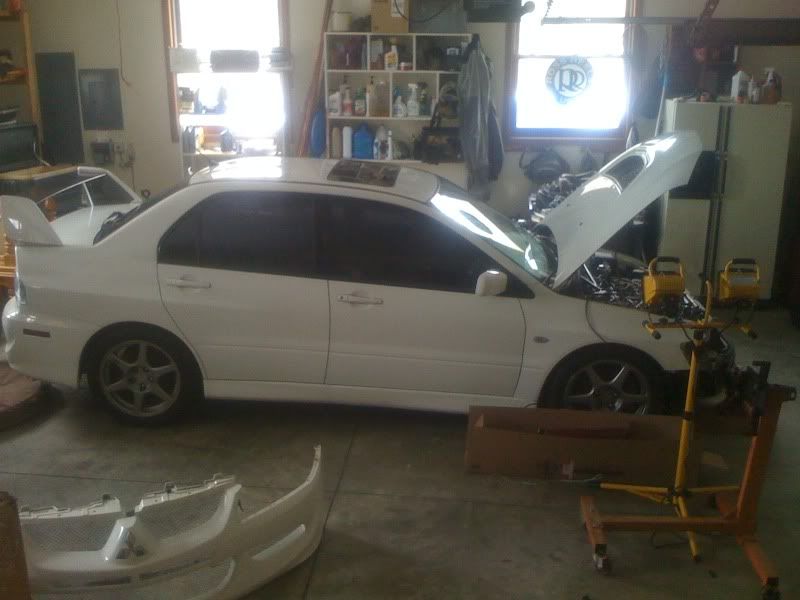
So last weekend I finally got the rest of my parts ordered and since all of the little pieces would be arriving shortly, I decided to start pulling everything apart and starting on my build.

DAY#1: Got the garage ready for me and the work I'd be doing over the next couple weeks.
Since the hardest part is removing the transmission, I decided to start there.
Drained all the remaining fluids.
Then removed the axle bolts and unbolting the shocks from the bottom.

Then we worked on prying the axles out from the diff and working them out of the rotors.

Got the axles out. Pretty simple.

Then worked on removing the clutch line and shifter linkage from the tranny.

..that was about all the time we had that day to work on the car.
DAY#2: Got a couple buddies over to help/keep me company and we began on unbolting the tranny and the diff. Just FYI for those of you wanting to tackle removing the tranny on your own in the future, there are "6" bolts holding the diff in and one tranny bolt that you can't remove until the diff is off lol.
Once the diff is pry'd apart from the tranny/t-case it's a good idea to hold it back with bungie chords.. like soo..

Then it was time to remove the motor mounts and disengage the TOB, which I have a pretty sick video of from my friends phone which has a small video camera and light on it that I used as a screen to see whether or not the TOB was disengaging as I couldn't see it just by trying to shine a light in one of the holes on the tranny. I'll upload this as soon as I can to share with you guys.
Got the tranny out finally!

Had to borrow the hoist brackets from my friends car as mine have been removed/lost and my brother removed his as well.

Got the motor pulled!
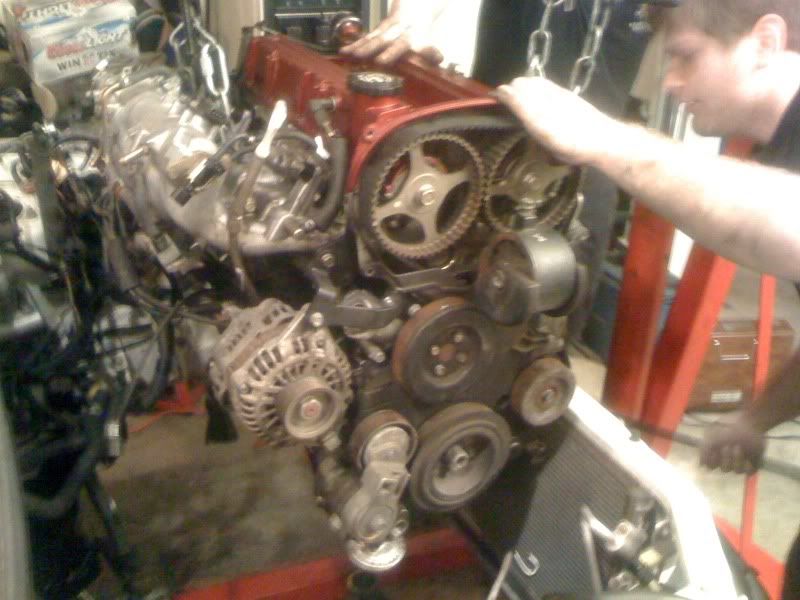
Now my engine bay is an empty canvas, ready for a cleaning and a brand new motor!

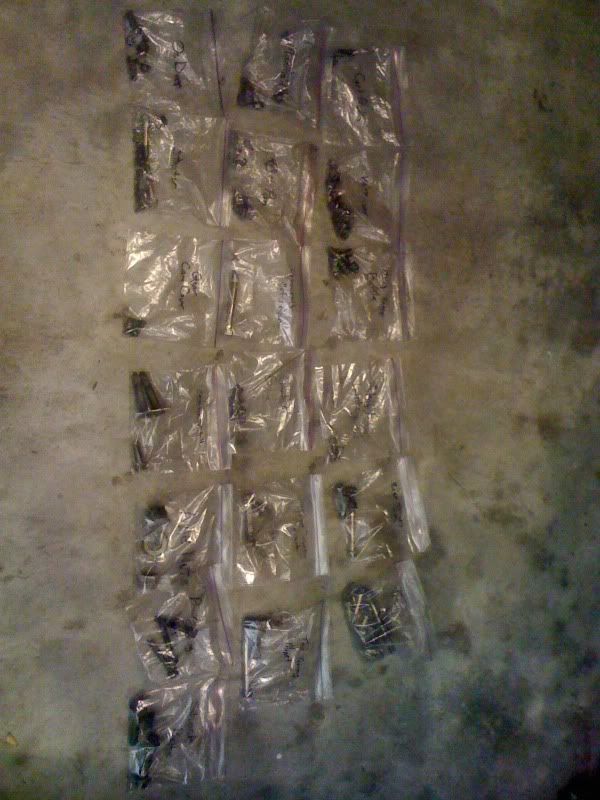
Here are all of my zip lock bags containing just about every damn bolt that I had to remove in order to get the motor out. They are all labeled and organized! If I didn't do this I would probably never be able to get my motor back together..
Then we completely tore down the block and headed to waffle house to satisfy our late night hunger! Thus, concluding Day#2 of work.
TODAY: Wasn't planning to work on the car; however, I got off work really early and thought it'd be a waste if I didn't get some more work done on the car.
Started with cleaning the engine bay a bit, using some simple green, a couple of rags, a tooth brush and special detail brush. I'll get pics later probably but just imagine an engine bay without dirt. Something like David Buschurs BadBish comes to mind lol.
Then I decided to go run some errands. Got a single scroll T3 gasket for the turbo from a buddy who has a motorsport shop here in town. Got some bolts from a hardware store, got a new serpentine belt, and ordered an oil pump gasket, along with got some grocery shopping done.
When I got home I got to work. Bolted up the head, the exhaust manifold and the turbo, and got the turbo housing readjusted downward in an optimal position for my custom LICP.


Next chance I'll have to do any work on the car is probably Wednesday night as work and school keep me more than busy during the week. I'll update this thread as much as possible and hopefully I'll have this build nearing completion in about a week or two; however, with cars there's always something keeping you from meeting your personal goals..
DAY#1: Got the garage ready for me and the work I'd be doing over the next couple weeks.
Since the hardest part is removing the transmission, I decided to start there.
Drained all the remaining fluids.
Then removed the axle bolts and unbolting the shocks from the bottom.
Then we worked on prying the axles out from the diff and working them out of the rotors.
Got the axles out. Pretty simple.
Then worked on removing the clutch line and shifter linkage from the tranny.
..that was about all the time we had that day to work on the car.
DAY#2: Got a couple buddies over to help/keep me company and we began on unbolting the tranny and the diff. Just FYI for those of you wanting to tackle removing the tranny on your own in the future, there are "6" bolts holding the diff in and one tranny bolt that you can't remove until the diff is off lol.
Once the diff is pry'd apart from the tranny/t-case it's a good idea to hold it back with bungie chords.. like soo..
Then it was time to remove the motor mounts and disengage the TOB, which I have a pretty sick video of from my friends phone which has a small video camera and light on it that I used as a screen to see whether or not the TOB was disengaging as I couldn't see it just by trying to shine a light in one of the holes on the tranny. I'll upload this as soon as I can to share with you guys.
Got the tranny out finally!
Had to borrow the hoist brackets from my friends car as mine have been removed/lost and my brother removed his as well.
Got the motor pulled!
Now my engine bay is an empty canvas, ready for a cleaning and a brand new motor!
Here are all of my zip lock bags containing just about every damn bolt that I had to remove in order to get the motor out. They are all labeled and organized! If I didn't do this I would probably never be able to get my motor back together..
Then we completely tore down the block and headed to waffle house to satisfy our late night hunger! Thus, concluding Day#2 of work.
TODAY: Wasn't planning to work on the car; however, I got off work really early and thought it'd be a waste if I didn't get some more work done on the car.
Started with cleaning the engine bay a bit, using some simple green, a couple of rags, a tooth brush and special detail brush. I'll get pics later probably but just imagine an engine bay without dirt. Something like David Buschurs BadBish comes to mind lol.
Then I decided to go run some errands. Got a single scroll T3 gasket for the turbo from a buddy who has a motorsport shop here in town. Got some bolts from a hardware store, got a new serpentine belt, and ordered an oil pump gasket, along with got some grocery shopping done.
When I got home I got to work. Bolted up the head, the exhaust manifold and the turbo, and got the turbo housing readjusted downward in an optimal position for my custom LICP.
Next chance I'll have to do any work on the car is probably Wednesday night as work and school keep me more than busy during the week. I'll update this thread as much as possible and hopefully I'll have this build nearing completion in about a week or two; however, with cars there's always something keeping you from meeting your personal goals..
Feb 22, 2010, 07:20 AM
#4
this thing looks GREAT! congrats on the determination on the build, must not be easy on such a tight budget and good to see your rents are letting you steal the garage for the time being. Im sure this thing will make some serious power when you are done. What are your goals with the stuff you are putting on? Any guesses?
Feb 22, 2010, 07:43 AM
#6
Evolving Member
Thread Starter
iTrader: (6)
Join Date: Jul 2008
Location: Sucktown, MO
Posts: 352
Likes: 0
Received 0 Likes
on
0 Posts
Im really just hoping to hit 500whp on E85. My ACT 3200 clutch probably wont handle this setup maxed out and Id like for it to last at least a couple months so I can save for an Exedy Twin.
Trending Topics
Feb 22, 2010, 08:30 AM
#8
Evolving Member
Thread Starter
iTrader: (6)
Join Date: Jul 2008
Location: Sucktown, MO
Posts: 352
Likes: 0
Received 0 Likes
on
0 Posts
Haha, ya me and my buddies have definitely enjoyed working on this thing. I wish I could just work on it nonstop everyday but I cant. : ( I can definitely see why people do this for a living. It's an amazing feeling to get to take something like this apart, learn and understand how it all works and then put it all back together. Lol.
Feb 22, 2010, 09:52 AM
#12
Evolved Member
iTrader: (62)
Join Date: Feb 2004
Location: Redmond - Lake Tapps ,WA
Posts: 3,336
Likes: 0
Received 6 Likes
on
6 Posts
- You'll need to take the manifold and turbo off to get the engine back in the car, you probably know this though.
- Why were your spark plugs being hit by the pistons? You say detonation, and that the pressure wave deformed them? If that is the case, your bearings took a major beating there. Did you just reuse the stock bearings with the drop-in pistons?
Best of luck with the new stuff. Tuning is not that hard - read some threads and learn to do it yourself.

