
Whiteline Roll Center Correction kit--need some help

 Why would you want to do that? If you're worried about dust & dirt, grease will attract more of it. Really you don't need to add any thing.

 Apr 3, 2008, 10:03 PM
#50
What did you guys use to press the damn boot on? I guess a pipe would be ideal. Argh.. another trip to the hardware store.
Damn, this job turned into much more of a PITA than anticipated. I had to sand down the upper surface of the LCA cuz i just couldn't get the snap ring fully onto the ball joint housing.
Damn, this job turned into much more of a PITA than anticipated. I had to sand down the upper surface of the LCA cuz i just couldn't get the snap ring fully onto the ball joint housing.
Apr 6, 2008, 10:27 AM
#52
Thanks for the tip.  Having that ball joint service kit helped a lot.
Here are a few pics/notes I took during the install that were not covered in the instructions and could be of help to people taking on this project in the future. It could potentially save people a lot of trouble and time.
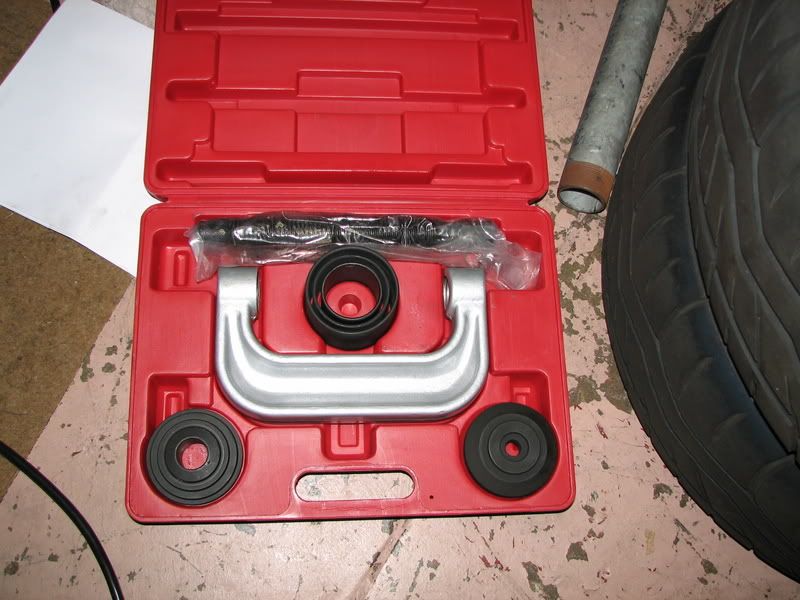
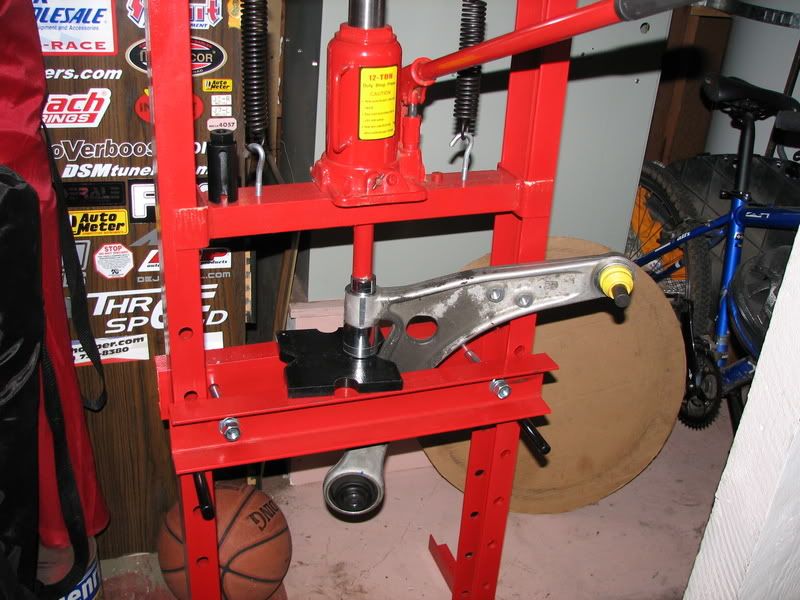
1) I thought just using the arbor plates on my press would be sufficient for pressing out the old ball joints. Nope.. it was a total PITA trying to get the LCA perfectly flat when using the press on it. Rent the ball joint service kit from your local auto parts store! It'll save you a ton of time and trouble! It is also used to press the boot onto the ball joint later.

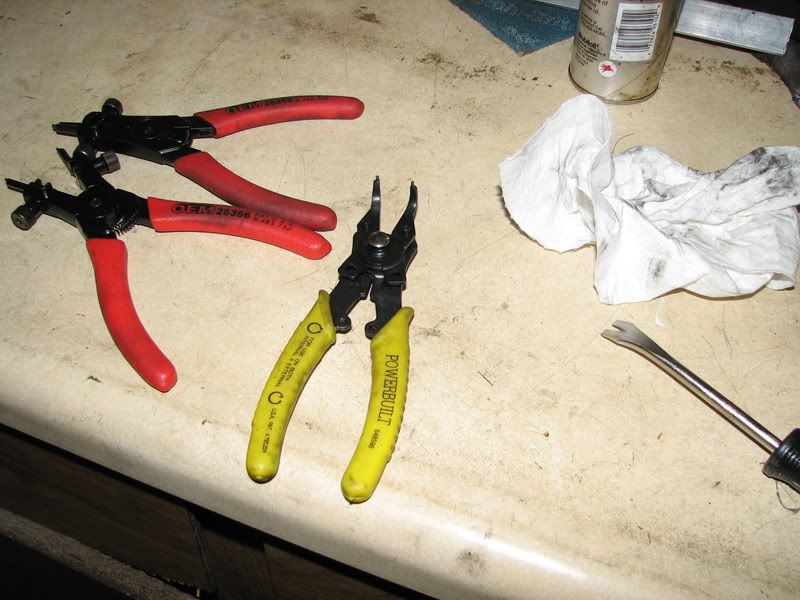
2) Have a GOOD pair of snap ring pliers. I had a set of cheap ones (yellow) and ended up picking up another set (red) which made life MUCH easier.
***IMPORTANT***
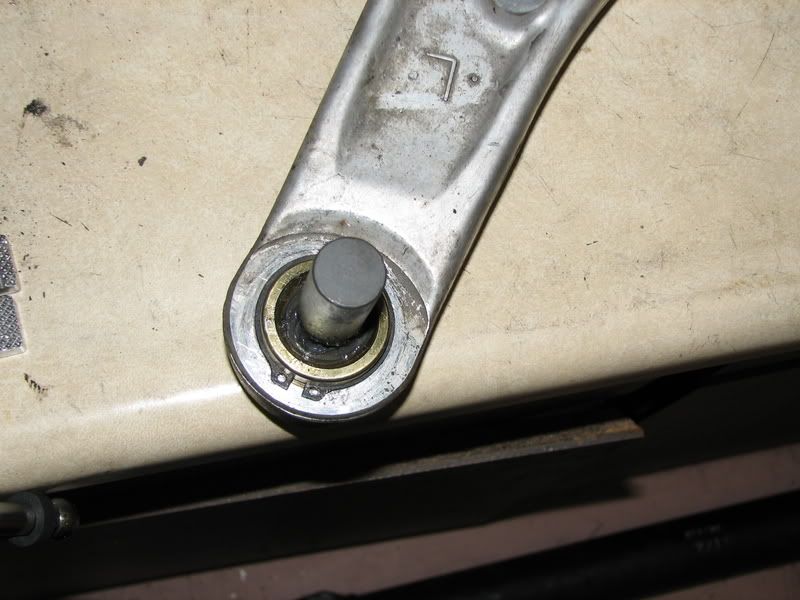
3) This is how the snap ring is supposed to look when properly installed. I could not get one the snap rings to properly seat on one of my LCAs, so I ended up sanding the top surface of the LCA to get it to snap onto the ball joint completely. This is critical to get right. The last thing you want is this thing to come loose when you're cornering at 100+mph.
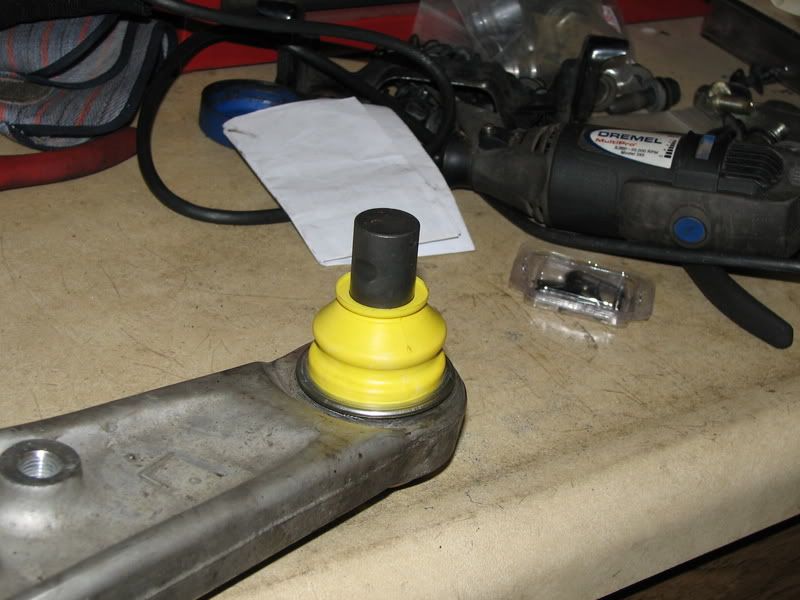
4) There's a notch on the ball joint stub for the hub bolt. Make sure the notch is oriented this way when you reinstall the LCA. You can use a pair of pliers to twist the stub and reorient it.
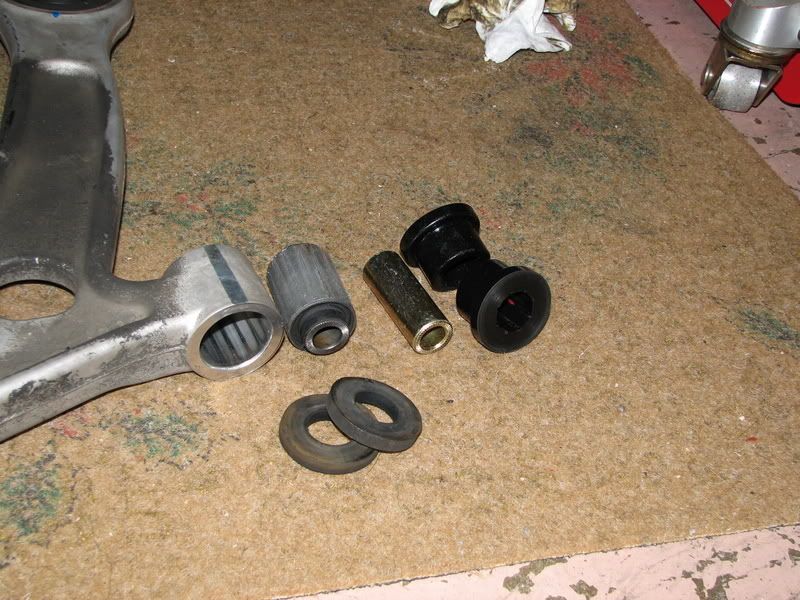
5) With the front LCA out, this may be a good opportunity to install the front bushings.
6) I had to take my oil filter off to get the passenger side LCA front bolt out. The filter would have gotten too beat up if I tried to take the bolt out with it in place.
Having that ball joint service kit helped a lot.Here are a few pics/notes I took during the install that were not covered in the instructions and could be of help to people taking on this project in the future. It could potentially save people a lot of trouble and time.
1) I thought just using the arbor plates on my press would be sufficient for pressing out the old ball joints. Nope.. it was a total PITA trying to get the LCA perfectly flat when using the press on it. Rent the ball joint service kit from your local auto parts store! It'll save you a ton of time and trouble! It is also used to press the boot onto the ball joint later.
2) Have a GOOD pair of snap ring pliers. I had a set of cheap ones (yellow) and ended up picking up another set (red) which made life MUCH easier.
***IMPORTANT***
3) This is how the snap ring is supposed to look when properly installed. I could not get one the snap rings to properly seat on one of my LCAs, so I ended up sanding the top surface of the LCA to get it to snap onto the ball joint completely. This is critical to get right. The last thing you want is this thing to come loose when you're cornering at 100+mph.
4) There's a notch on the ball joint stub for the hub bolt. Make sure the notch is oriented this way when you reinstall the LCA. You can use a pair of pliers to twist the stub and reorient it.
5) With the front LCA out, this may be a good opportunity to install the front bushings.
6) I had to take my oil filter off to get the passenger side LCA front bolt out. The filter would have gotten too beat up if I tried to take the bolt out with it in place.
Last edited by marksae; Apr 7, 2008 at 08:53 AM.
Jan 28, 2011, 09:25 AM
#53
Newbie

Join Date: Nov 2010
Posts: 1
Likes: 0
Received 0 Likes
on
0 Posts
you push it downwards - yeah, mine were seized in pretty good too. Also, they sit at an angle, so you need to put pressure at an angle....
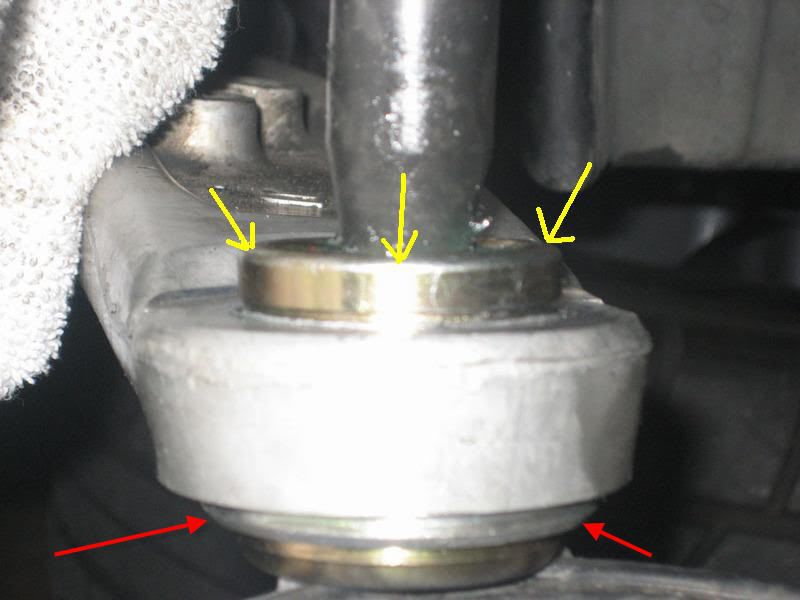
Yeah, when you put the RCA balljoint in, you'll see that lip is sorta useless, it probably keeps dust and such from getting in, I plan on adding some grease to mine or heck even a bead of caulking that will come off easily, if need be!
Yeah, when you put the RCA balljoint in, you'll see that lip is sorta useless, it probably keeps dust and such from getting in, I plan on adding some grease to mine or heck even a bead of caulking that will come off easily, if need be!
Is the lip you guys are referring to marked in RED arrows below (disregard yellow)?
Lastly, for those that used the following kit, did you use the smallest receiving tube? It seems to fit just perfectly on the aluminum flare. And since others mention of the aluminum flare ripping out, would the small receiving tube prevent that...?
 Jan 28, 2011, 10:06 AM
#55
I just pressed mine out and that ring didn't break off on either arm. None of the parts in the standard kit fit very well. Checker/O'Rileys has an "AWD Balljoint" kit that you use with that standard kit. Had perfect sized pieces for the EVO.
I couldn't get mine out by hand though with that C-clamp setup. I had to use a 10 ton press with that kit to get them out. It came with a very loud and disturbing "BANG!" when they finally let go.
I couldn't get mine out by hand though with that C-clamp setup. I had to use a 10 ton press with that kit to get them out. It came with a very loud and disturbing "BANG!" when they finally let go.


Thread
Thread Starter
Forum
Replies
Last Post
EGbeater
Evo How Tos / Installations
107
Aug 6, 2021 05:47 AM
binky
Evo Tires / Wheels / Brakes / Suspension
34
Jun 25, 2017 06:53 PM
mr.almeida
Evo Engine / Turbo / Drivetrain
4
Apr 19, 2010 10:10 AM