
Seibon grill Installation


 Jul 12, 2010, 04:55 PM
#2
Evolved Member
iTrader: (8)
Join Date: Dec 2007
Location: Boise, ID ->>> Concord, CA
Posts: 1,218
Likes: 0
Received 2 Likes
on
2 Posts
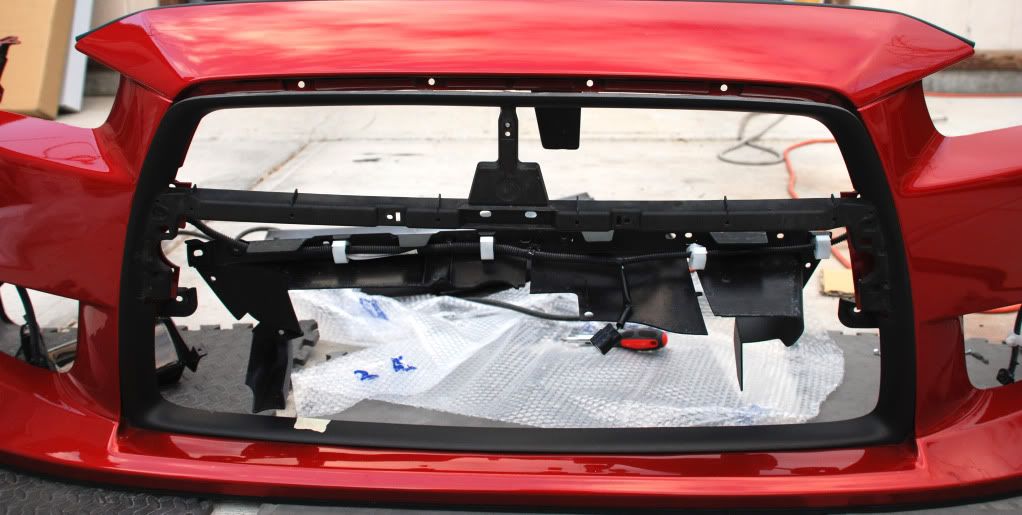
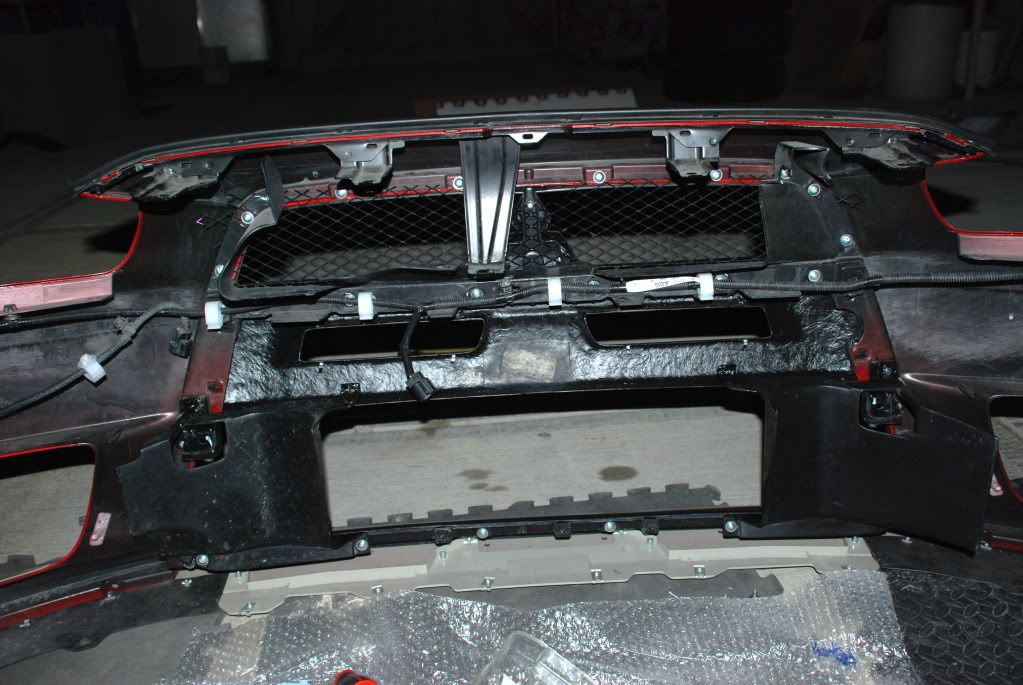
It's very easy. I have the APR piece, which is similar. You need to take the front bumper off & unscrew the intercooler guides, as well as other screws & several speed nuts behind the stock piece. It's easy to figure out. You may also need to buy new speed nuts, since I snapped all of mine when during install, lol.
Jul 12, 2010, 10:10 PM
#5
Evolved Member
iTrader: (1)
Join Date: Apr 2009
Location: Ohio
Posts: 617
Likes: 0
Received 0 Likes
on
0 Posts
I'd love to help, but I got mine used so if it doesn't come pre-drilled than the previous owner drilled the holes.
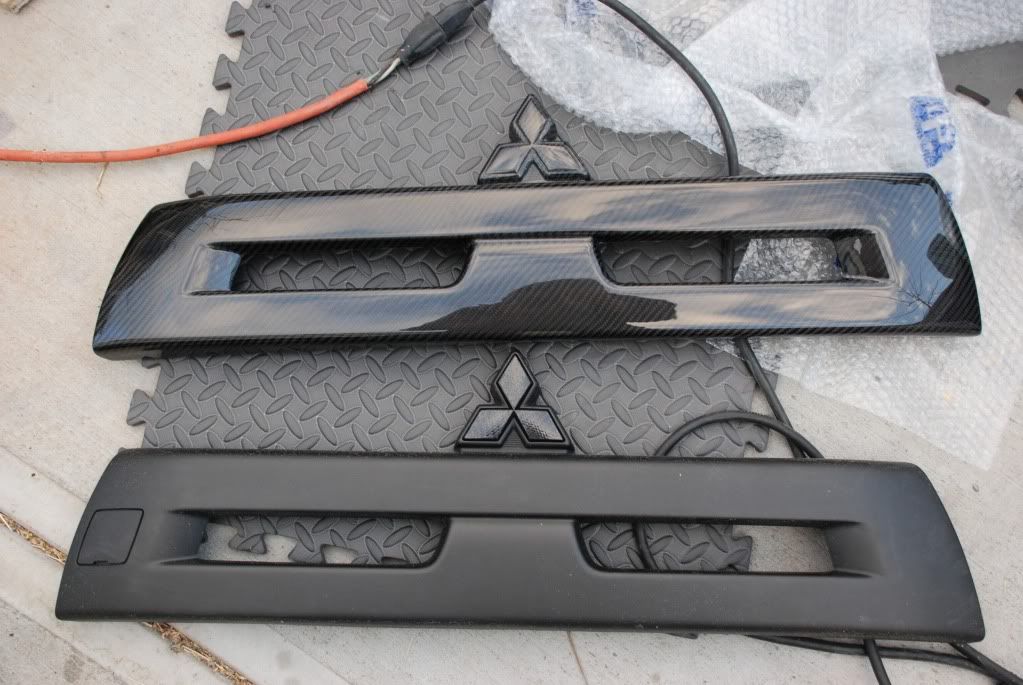
From my experience this is it. There's a ton of screws that come off. Then take off the factory plastic one and put the seibon one on its place. Then screw everything back on. It takes a while and some patience, but it'll go on.
From my experience this is it. There's a ton of screws that come off. Then take off the factory plastic one and put the seibon one on its place. Then screw everything back on. It takes a while and some patience, but it'll go on.
Trending Topics
 Oct 8, 2010, 08:32 AM
#9
OK... IMO this is one of the worst aftermarket pieces I have ever worked with. Because of the issues I had with this piece on my car, I will NEVER buy another Seibon part again. On top of that, their rudeness over the phone will further lead me to never recommend them to anyone again. Seibon should be ashamed for releasing this part.
These are the steps I had to go through to get mine installed (and it still didn't look right).
1) Pre drill holes
- I knew about these pins snapping off, so I was extra careful. I went to a machine shop and crafted a pilot hole slip cover. Basically a hollowed out metal dowel with a hole in the middle to line up correctly. I then pre-drilled each hole. But each dowel was a different width / height. So pre-drilling them was a challenge in itself.
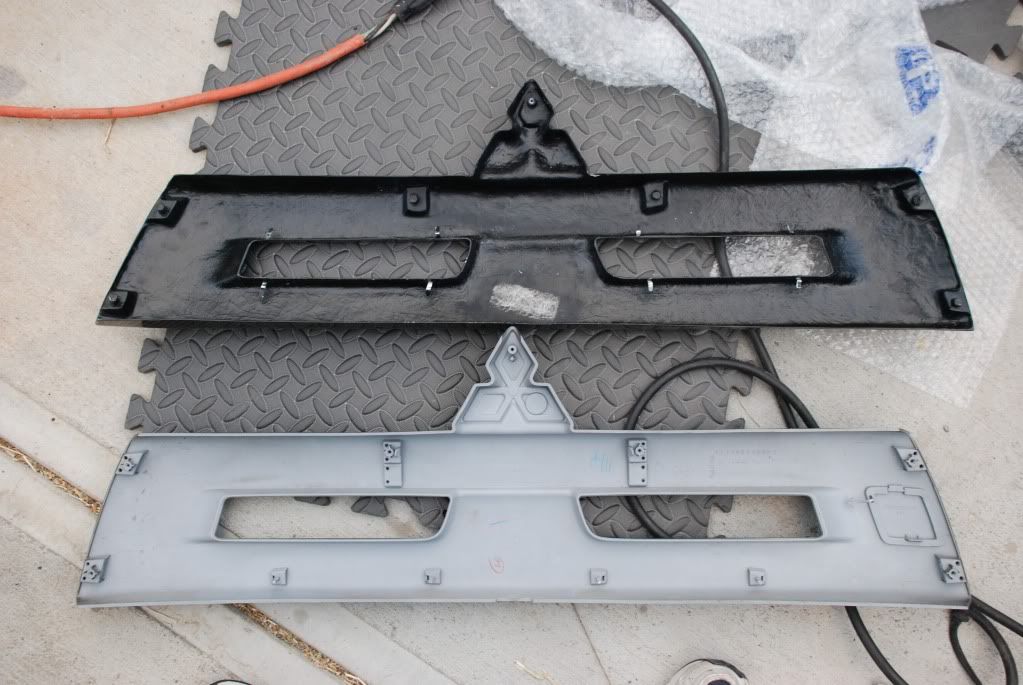
2) Hollow out the connecting holes in the grille frame that it screws to
- I took a drill and tried to bolt up the grille. Marking where the holes weren't even close. I had to use a drill to hollow out the holes so it would line up correct. (I hate seibon did I mention that?)
3) Grind down the dowel studs so it goes flush up against the grille frame
- This is the part that was absolutely unnecessary, and Seibon should be ashamed for even making you do this. If I didn't grind down these dowels, I had 1/4" gaps on the sides. So I took a dremel with a grinding wheel and went to town. I ground these dowels down until it fit up correctly. This took a lot of time.
I say send the part back, and get a different brand. I wish I had.
These are the steps I had to go through to get mine installed (and it still didn't look right).
1) Pre drill holes
- I knew about these pins snapping off, so I was extra careful. I went to a machine shop and crafted a pilot hole slip cover. Basically a hollowed out metal dowel with a hole in the middle to line up correctly. I then pre-drilled each hole. But each dowel was a different width / height. So pre-drilling them was a challenge in itself.
2) Hollow out the connecting holes in the grille frame that it screws to
- I took a drill and tried to bolt up the grille. Marking where the holes weren't even close. I had to use a drill to hollow out the holes so it would line up correct. (I hate seibon did I mention that?)
3) Grind down the dowel studs so it goes flush up against the grille frame
- This is the part that was absolutely unnecessary, and Seibon should be ashamed for even making you do this. If I didn't grind down these dowels, I had 1/4" gaps on the sides. So I took a dremel with a grinding wheel and went to town. I ground these dowels down until it fit up correctly. This took a lot of time.
I say send the part back, and get a different brand. I wish I had.
The following users liked this post:
Lightsaber (May 26, 2017)
Oct 8, 2010, 01:31 PM
#10
Evolving Member
iTrader: (5)
Join Date: May 2008
Location: Orem, UT
Posts: 201
Likes: 0
Received 0 Likes
on
0 Posts
OK... IMO this is one of the worst aftermarket pieces I have ever worked with. Because of the issues I had with this piece on my car, I will NEVER buy another Seibon part again. On top of that, their rudeness over the phone will further lead me to never recommend them to anyone again. Seibon should be ashamed for releasing this part.
These are the steps I had to go through to get mine installed (and it still didn't look right).
1) Pre drill holes
- I knew about these pins snapping off, so I was extra careful. I went to a machine shop and crafted a pilot hole slip cover. Basically a hollowed out metal dowel with a hole in the middle to line up correctly. I then pre-drilled each hole. But each dowel was a different width / height. So pre-drilling them was a challenge in itself.
2) Hollow out the connecting holes in the grille frame that it screws to
- I took a drill and tried to bolt up the grille. Marking where the holes weren't even close. I had to use a drill to hollow out the holes so it would line up correct. (I hate seibon did I mention that?)
3) Grind down the dowel studs so it goes flush up against the grille frame
- This is the part that was absolutely unnecessary, and Seibon should be ashamed for even making you do this. If I didn't grind down these dowels, I had 1/4" gaps on the sides. So I took a dremel with a grinding wheel and went to town. I ground these dowels down until it fit up correctly. This took a lot of time.
I say send the part back, and get a different brand. I wish I had.
Wow someone is angry at Seibon

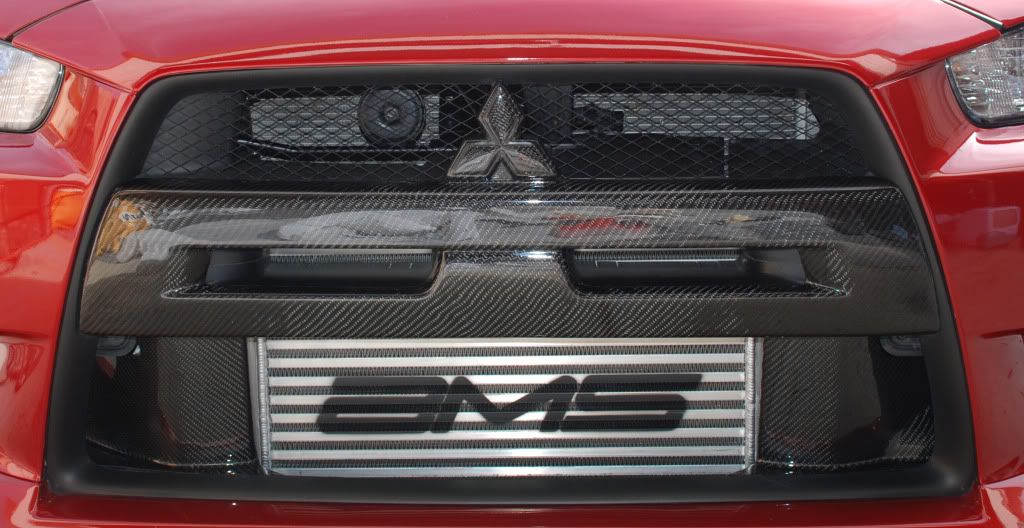
I can't lie, Seibon could do a little better on their parts since they are not cheap. I installed this grill at the same time I installed the Seibon CF rear diffuser, fender side vents and the Rexpeed cooling side panels. I gave myself a good week to install all of this, and I'm glad I did. I encountered many problems during the install but was able to get it to look/fit just right. I have to add that I have some experience doing this and had to use my head to make sure the parts fit just right. This is not for the faint of heart and do not expect any Seibon, or aftermarket part for that matter, to just bolt right up. If you want it to fit/look right you will most likely have to do some work
 Oct 8, 2010, 05:27 PM
#12
Evolved Member
iTrader: (9)

Join Date: May 2007
Location: VANCOUVER BC
Posts: 1,837
Likes: 0
Received 0 Likes
on
0 Posts
I will have to agree with you on this one. Seibon parts are terrible to work with. I have voltex and rexspeed stuff and they are much easier to work with.