
My True DIY 03 Evo 8 Build, Lots of detail with Many pictures.

 Apr 26, 2012, 05:58 PM
#17
Newbie
Thread Starter
LOL. I have no idea what to do. I am way overwhelmed. I guess I need to focus my concerns in another direction.
My next step is to get the body work done IE body Polished undercoat/bed lined, urethane bushings installed, powder coating, rear diff service and painted/ cleaned... maybe more. To do this properly I need to get the body off the suspension I have a lift but not sure how to get it from, the lift onto the trailer without the carriage/cradle, tires ect. Anyone have any ideas? Also wile I'm there what else should I do? I'm very mechanical literate.
Thanks,
Apr 29, 2012, 09:00 PM
#18
Newbie
Thread Starter
Hey Evolutionm
I Haven't gotten much done, I'm waiting for parts at the moment so the only thing i could do was make a plate to go over the wiring harness hole, to mount my Mil-Spec Bulk head connector. Here are some pictures. 12 gauge recycled aluminum (0.1046 inches) I will eventually be powder coating it Super Mirror Black as soon as I get the bulkhead in from PRS
Steven,
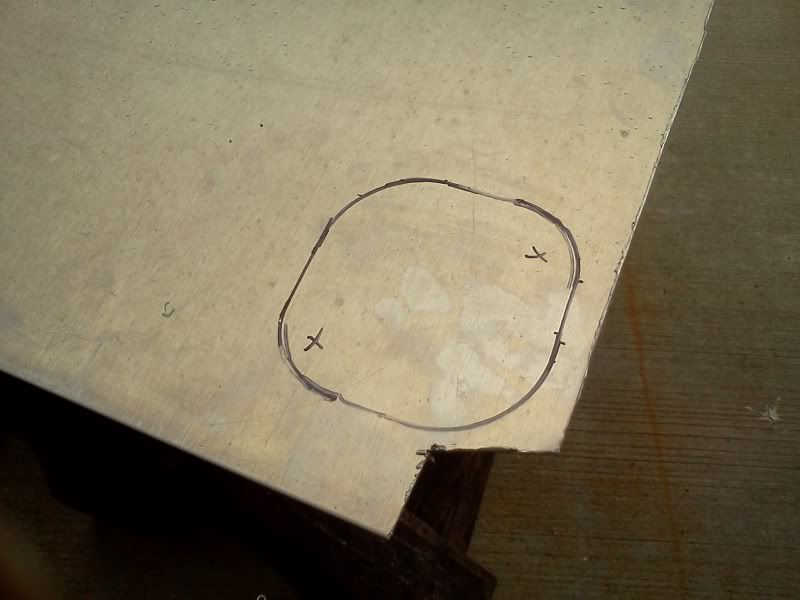
Last edited by s240ka24t; Apr 30, 2012 at 02:11 PM.
Apr 30, 2012, 11:23 AM
#19
Newbie
Thread Starter
Hey,
This weekend I made my cover/mount for my bulk head Mil-spec connector/harness (Saturday) On Sunday I made a spark plug cover seen below in 1/8" aluminum. After thinking about it I though it would look better as "bolt-less" flush mounted. I was thinking of using magnetic bolt heads. The only problem is It's recycled aluminum and aluminum is not magnetic.
Now sometimes recycled aluminum dose have some other metals in it that can cause it to be slightly magnetic. The reason I chose recycled aluminum is it's very cheap, but just as good. Recycled aluminum is harder to polish do to impertinent within materials and though the smelting it all infuses together. process of the plate or to use a different material and use this one as a template. The only way to use sheer aluminum or recycled is to mount a small magnet on the underside of the plate or use a different material such as steel. Though steel is heavier I could use a thinner sheet to compensate the weight. In the end The finished item will more then likely be Powder Coated.
Let me know some thoughts Here are some pictures... keep in mind this is not a finished project. I bought a used valve cover and ground down the lines for a cleaner flush appearance to match the Spark plug cover.
I like working with materials and fabricating. Let me know what are some cosmetic items you would like to see produced and at more reasonable price then competitors. (what items, what finishes, What prices...) I will be starting a thread on this I will post link shortly. Anyway here are the pics as well as a pic of the magnetic bolt heads...
Thanks,
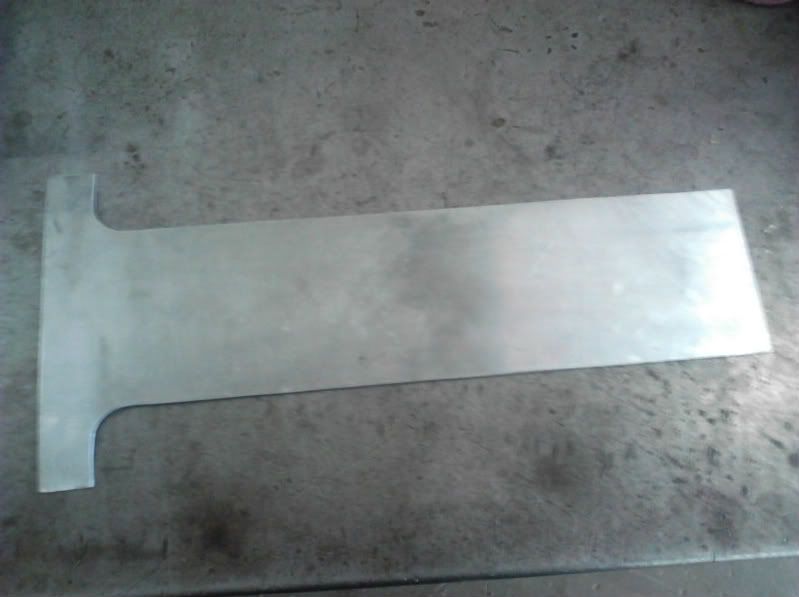
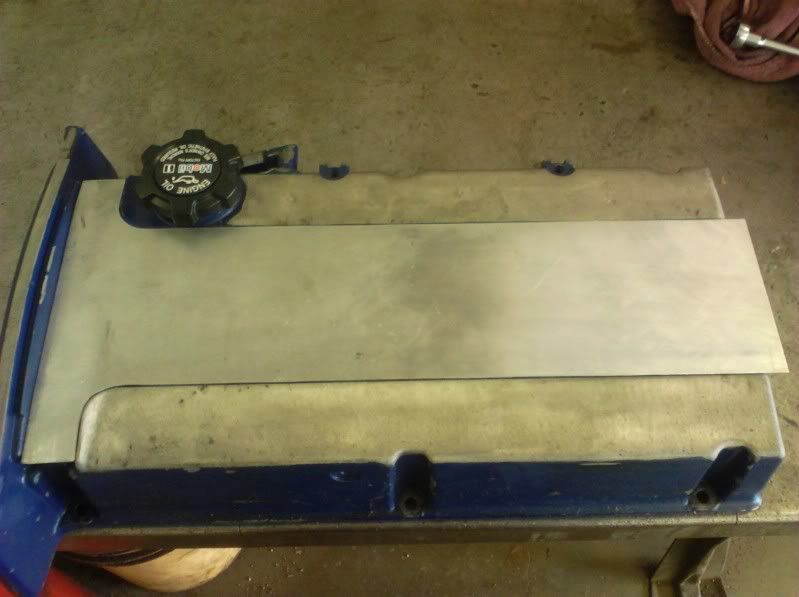
Last edited by s240ka24t; Apr 30, 2012 at 12:39 PM.
May 3, 2012, 07:48 PM
#20
Newbie
Thread Starter
Welcome Back!
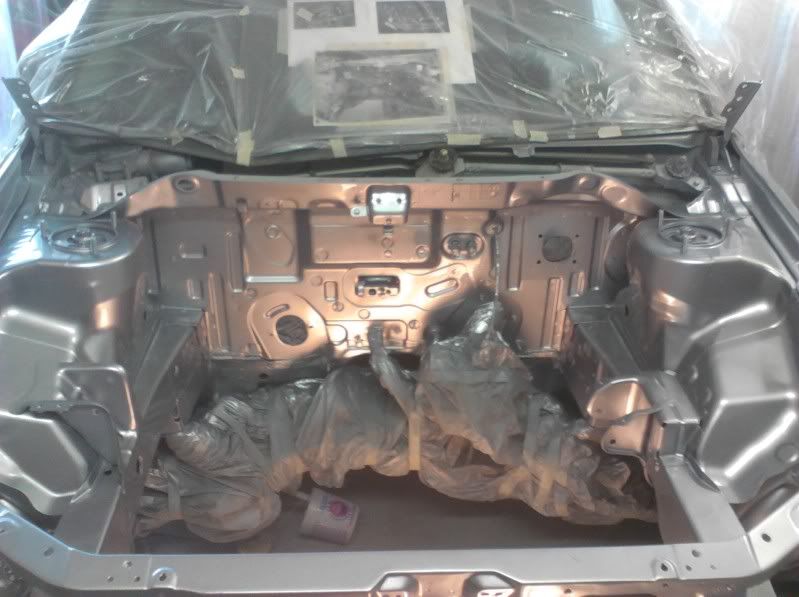
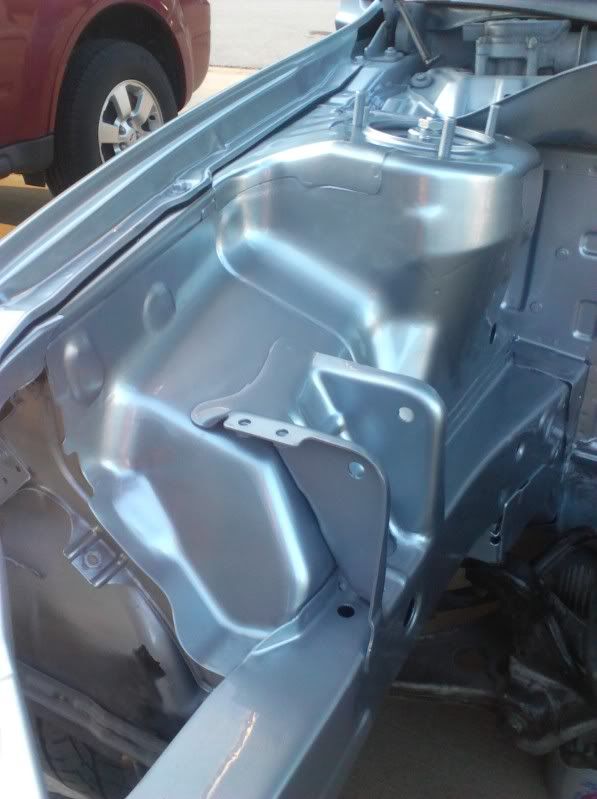
Ok... so my work schedule changed so i'll be able to make more progress on the Evo Today I was able to get the rest of the Engine Bay paint process finished up by wet-sanding and buffing it back out, Thanks to the helpful hand of my friend Ryan... Who is a master at Detailing polishing ect... Looks Great.
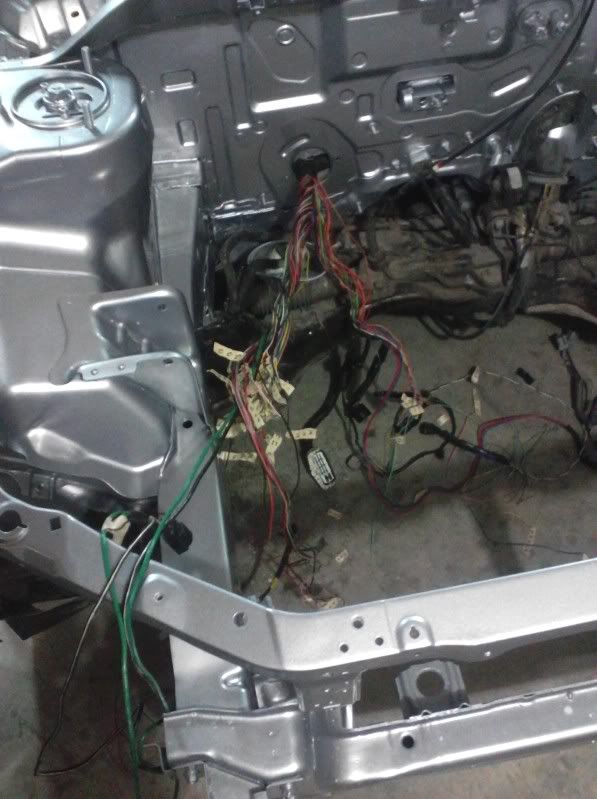
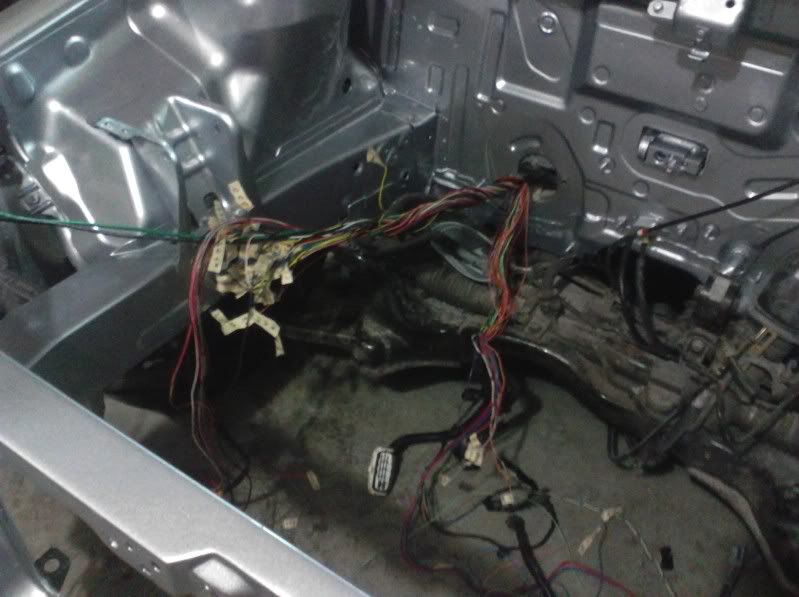
I then pulled the bulk wiring back through the firewall. I began to separate the strands as much as possible untangling and was able to separate into 2 big strands to help manage this mess... I had to clip all the wires at some place to help untangle so I can begin to run them in hidden manners to their required locations.
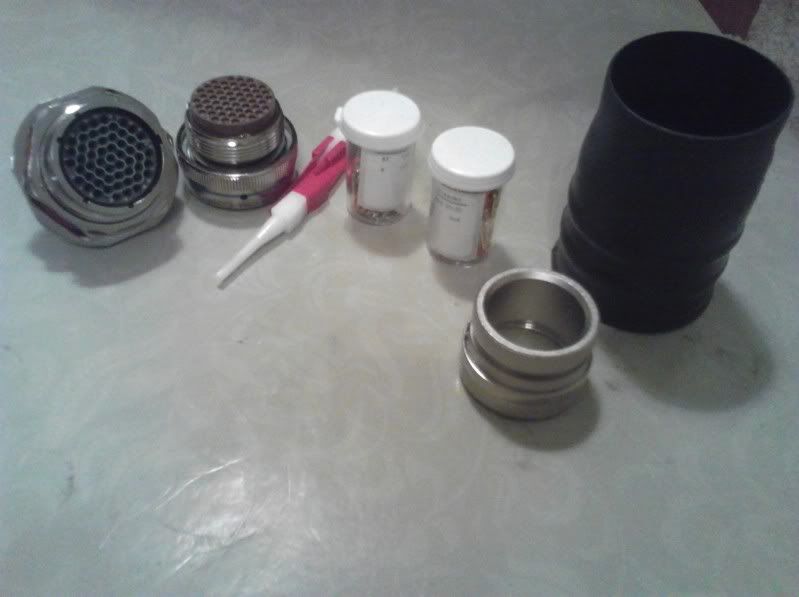
I received my Bulk head / Mil-Spec connector from P-R-S.com Very helpful there shipment was fast and a breeze to order. I will keep up to date on this. Here are some pics.
Stay Tuned...
Thanks,
Steven
Ok... so my work schedule changed so i'll be able to make more progress on the Evo Today I was able to get the rest of the Engine Bay paint process finished up by wet-sanding and buffing it back out, Thanks to the helpful hand of my friend Ryan... Who is a master at Detailing polishing ect... Looks Great.
I then pulled the bulk wiring back through the firewall. I began to separate the strands as much as possible untangling and was able to separate into 2 big strands to help manage this mess... I had to clip all the wires at some place to help untangle so I can begin to run them in hidden manners to their required locations.
I received my Bulk head / Mil-Spec connector from P-R-S.com Very helpful there shipment was fast and a breeze to order. I will keep up to date on this. Here are some pics.
Stay Tuned...
Thanks,
Steven
Last edited by s240ka24t; May 5, 2012 at 12:41 PM.
May 17, 2012, 07:25 PM
#21
Newbie
iTrader: (1)
Join Date: Oct 2008
Location: New York
Posts: 101
Likes: 0
Received 0 Likes
on
0 Posts
have you made any more progress on this? also are you air aircraft structural maintenance mechanic? lol i thought i saw some pre alodined aluminum for you wiring harness blocking plate. i am using your project for ideas on the wire tuck for my evo, i really like what i see so far!
May 28, 2012, 07:26 PM
#22
Newbie
Thread Starter
have you made any more progress on this? also are you air aircraft structural maintenance mechanic? lol i thought i saw some pre alodined aluminum for you wiring harness blocking plate. i am using your project for ideas on the wire tuck for my evo, i really like what i see so far!
Dusty ... The materiel used it's actually just recycled aluminum it's a lot cheaper, and It is just as strong. The only bad thing about is, it is not easy to polish and sometimes it dose carry continuity an electrical currents. It dose have some contaminates sometimes in it as a result of the remelting process when it is bought back to a sheet materiel / Stock. The pieces I made will eventually be powder coated
I'm defiantly not a aircraft structural mechanic but. I do know a little about some of it. my father is into building experimental aircraft. I would love to get into something like that but I lack the mental capacity for something of great magnitude such as that.
I do know about finishes paints powders anodized ect. Acid etching and using alodine are great ways to prep / finish raw materials In preparation for primer and further finishes. It can be very expensive though.
Sorry It's been a wile didn't seem that anyone was really interested in this. I haven't made a whole lot of progress lately but I will be updating this week. Stay Tuned! Made some changes in my planning.
Thanks,

Last edited by s240ka24t; May 28, 2012 at 08:00 PM.


 Sep 2, 2012, 10:39 AM
#26
Newbie
Thread Starter
Hey EvolutionM
Long time since last post Been really busy with work and personal life changes... The car is located at a buddies house now and it's heard to get to it and get work done It looks as though it will be brought to my residence soon and will be able to get it finished and will be updating this daily so stay tuned
For those who are following thank you and I'm sorry i haven't made any movement on this in a wile but keep checked in it will be moving soon.
Thanks,
Steven
Nov 15, 2012, 08:26 AM
#27
Newbie
Thread Starter
Thanks,
Hey Forum,
Sorry this has been a wile Just getting things settled got a lot of personal life stuff going on. I did manage to get some work done but was not in relation to the custom harness.
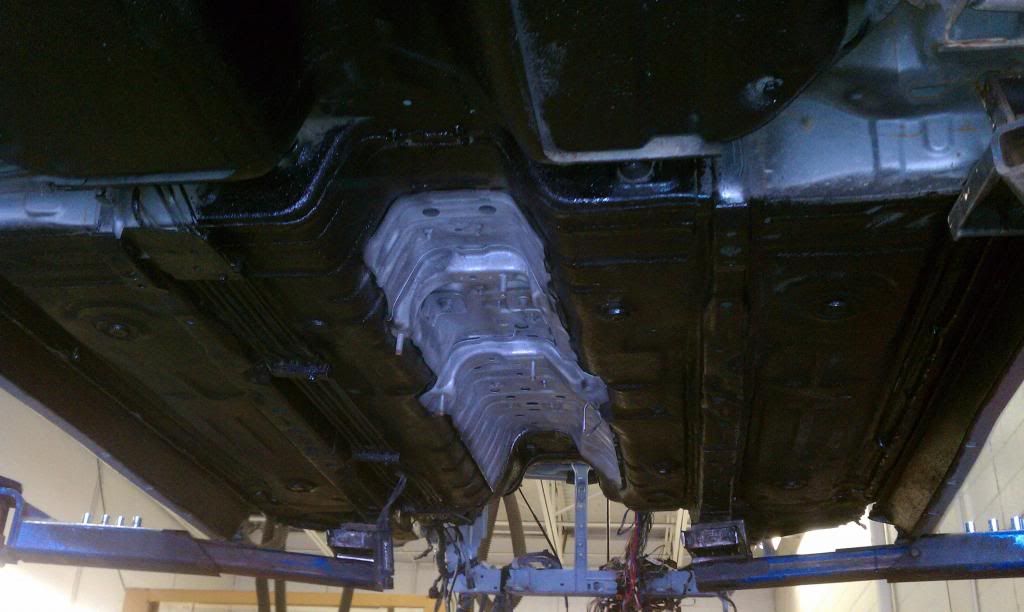
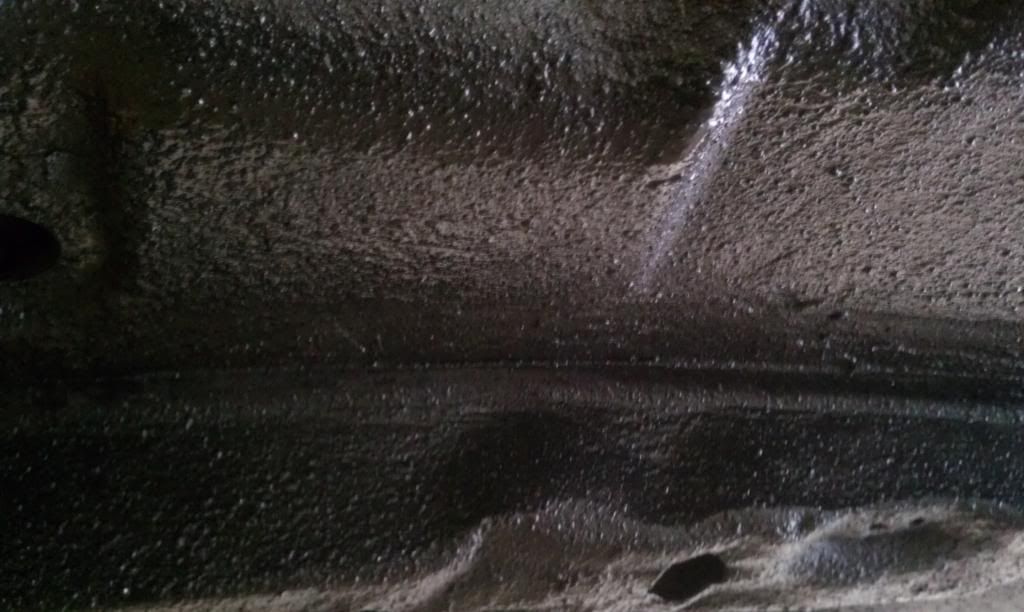
I was able to get the car to the stop and pull the front cradle, Strip and coat a portion of the car's underside (pics Below) I used Herculiner rather then the sound deadening rubberized undercoating we are all familiar with. I stripped as much as possible Primed adhesive promoted then rolled the bed lining materiel (herculiner)
I decided to use the bed lining cause it drys to a hard solid surface it also seals and protects. Many of you you are wondering why did I do this it adds weight. Yes it will add a little weight but I have shaved more off other places. then i just put back on. now with the harder materiel coated on the underside I can run a bottom Blast (Carwash) and thoroughly clean the underside of salts dirt other solvents picked up that the rubberized undercoating usually holds in. Anyone who has undercoating on their car I'm sure knows its hard to get that stuff cleaned out.
Run your finders across your undercoating and you might notice debris dirt salt or solvents falling out of the coating. Now I'm sure some undercoating is applied better and may not have the Issues and concerns i have seen and have with mine. It would depend on the applier and material quality I'm sure. Mine on the other hand was not done very well.
Here are some pics I know their not all that good but gets the basic idea. This was only after 1 coat i will be pulling the rear cradle / suspension diff ect. next week and coating the rear portion of the car as well as doing more coats the the front.
Thoughts and Opinions Welcome as well as Ideas I do want to ad that this material wend down very easy and had very good adhesion a little bit wend a long way. Stay tuned

Hey Forum,
Sorry this has been a wile Just getting things settled got a lot of personal life stuff going on. I did manage to get some work done but was not in relation to the custom harness.
I was able to get the car to the stop and pull the front cradle, Strip and coat a portion of the car's underside (pics Below) I used Herculiner rather then the sound deadening rubberized undercoating we are all familiar with. I stripped as much as possible Primed adhesive promoted then rolled the bed lining materiel (herculiner)
I decided to use the bed lining cause it drys to a hard solid surface it also seals and protects. Many of you you are wondering why did I do this it adds weight. Yes it will add a little weight but I have shaved more off other places. then i just put back on. now with the harder materiel coated on the underside I can run a bottom Blast (Carwash) and thoroughly clean the underside of salts dirt other solvents picked up that the rubberized undercoating usually holds in. Anyone who has undercoating on their car I'm sure knows its hard to get that stuff cleaned out.
Run your finders across your undercoating and you might notice debris dirt salt or solvents falling out of the coating. Now I'm sure some undercoating is applied better and may not have the Issues and concerns i have seen and have with mine. It would depend on the applier and material quality I'm sure. Mine on the other hand was not done very well.
Here are some pics I know their not all that good but gets the basic idea. This was only after 1 coat i will be pulling the rear cradle / suspension diff ect. next week and coating the rear portion of the car as well as doing more coats the the front.
Thoughts and Opinions Welcome as well as Ideas I do want to ad that this material wend down very easy and had very good adhesion a little bit wend a long way. Stay tuned
Last edited by s240ka24t; Nov 15, 2012 at 04:48 PM.
Nov 15, 2012, 08:25 PM
#28
Newbie

Join Date: Nov 2012
Location: everywhere
Posts: 5
Likes: 0
Received 0 Likes
on
0 Posts
Welcome
Hello, my name is Steven. I outside Lee's Summit Missouri (KC MO Area). I have a Apex Silver EVO VIII. I Owned the car since Oct. 2009 only put 4,000 miles on it since then. The total millage 57k. When I bought the car it had megan manifold and Kelford 272 cams. 7 days after I purchased the car the Transfer case split evidently there was a previous crack in the case and was missing bolts. Modified by KC looked at it and installed a Stage 2 Shep T-case. Wile the car was in the shop i had them do the following; 60k tuneup,
1000cc RC injectors, 255 Fuel Pump, Electric boost control, Innovate Wideband, T-Case, ACT heavy duty clutch, (6 punk), Jackson Auto Machine Lifters, FpGreen .73 HTA, and Tune, Eibach Springs Cusco TI Strut Bar I think that's it.
Shortly after the tune, the first track day I noticed symptoms of a head gasket gone bad. It wend bad at the track but didn't notice symptoms till after the 3rd run my 60fts to 1.9, Bogged of the line, overheating, rough idle, missing coolant After divorce and tight budget i rebuild the evo witht he following. below. After running the car for about 500 miles for some reason the Thrust Washers wend! Some say due to ACT's Clutch not sure.... never the less it happend. It destroyed the bearing in the FP Green and I have been working on it little by little, So back out came the motor. Here is the current mod list.
Block
Wiesco Pistons 9.3:1
Manely Rods
ARP Mains
Acl Bearings
Reground polished OEM Crank (Jackson Auto Machine)
Head
Cometic Head gasket
Brian Crower std valves,
Brian Crower Springs
Ferrea Valve Guides and Seals
Jackson Auto Lifters
Kelford 272 Cams
ARP Head Studs
Fuel/Induction System
1000cc RC injectors
Walbro 255
Fp Green .73 HTA (Bad Needs Rebuild)
AEM Intake
Paerrin Front mount W/piping.
Greedy Type RS Bov
Driveline
ACT heavy duty (Street disk now not 6 punk)
Shep 2 T-Case
New ACT throw out bearing
Parrent Short throw (whole assembly bushings ect.)
Electronics
Defi Gauges
Innovate Wideband
Electric BC Solenoid
Suspension
Eibach Drop Springs
Cusco TI Strut bar
I think that's it might be missing couple things but the just of it.
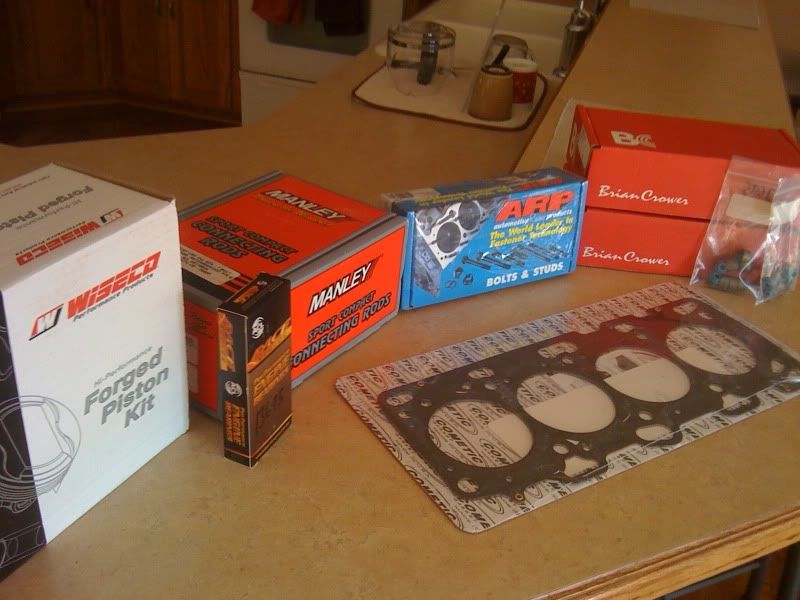
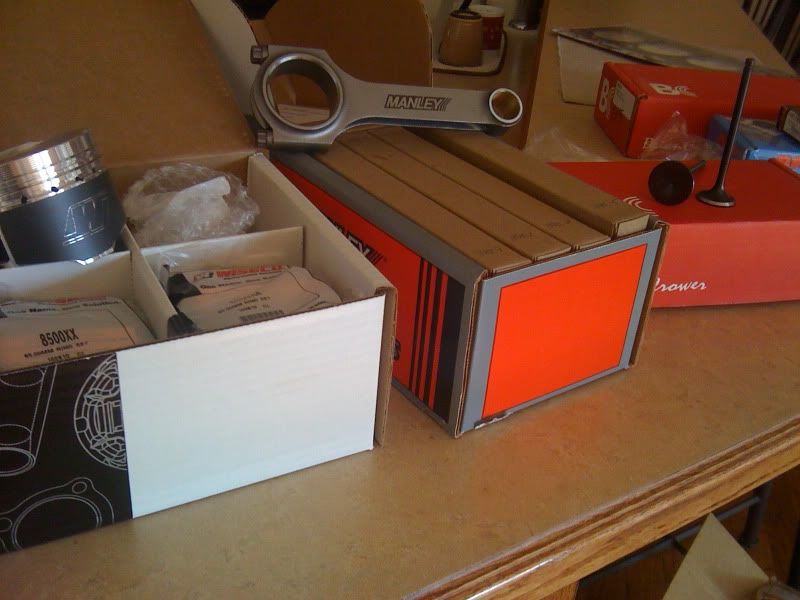
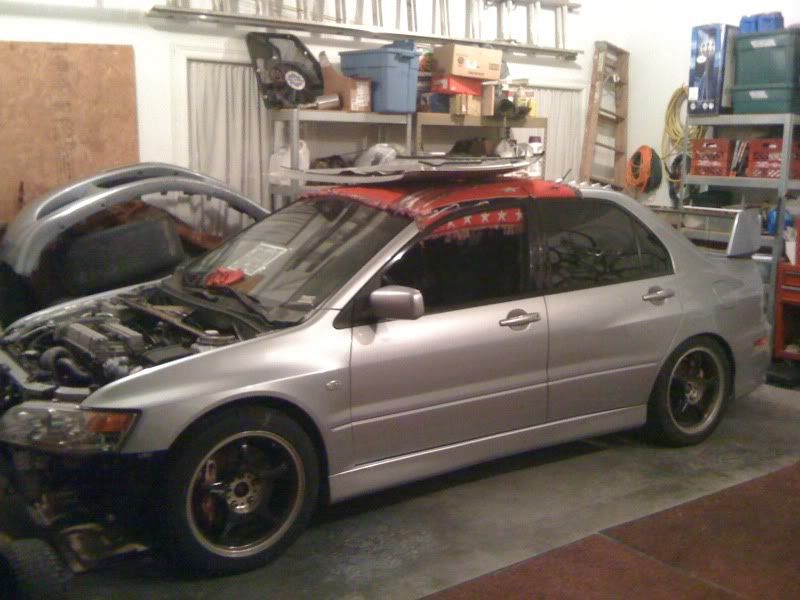
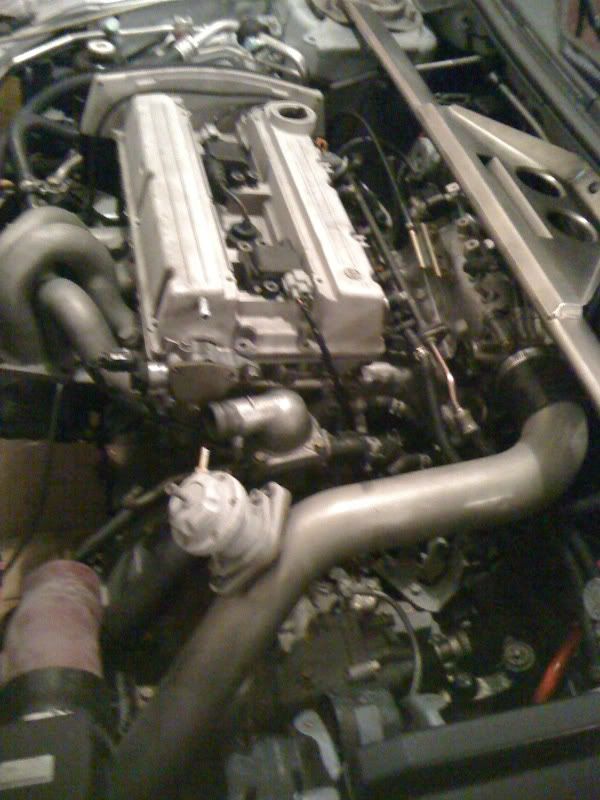
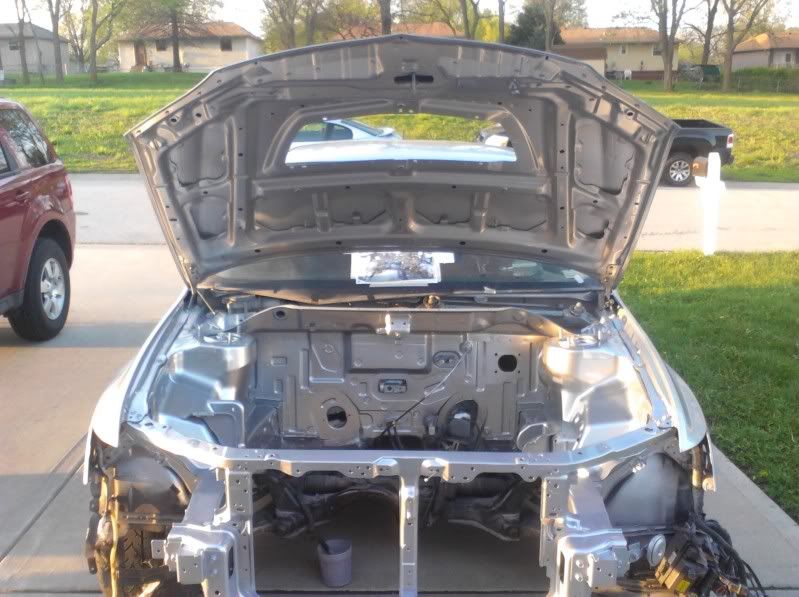
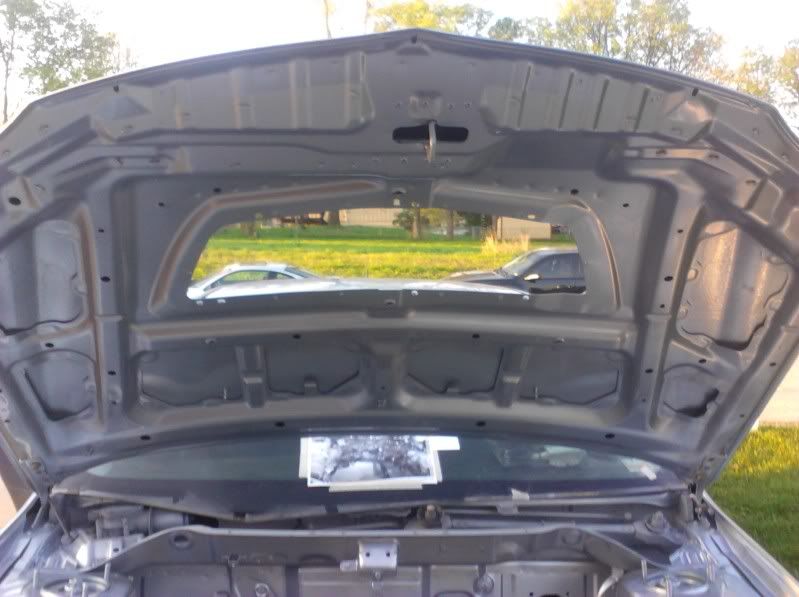
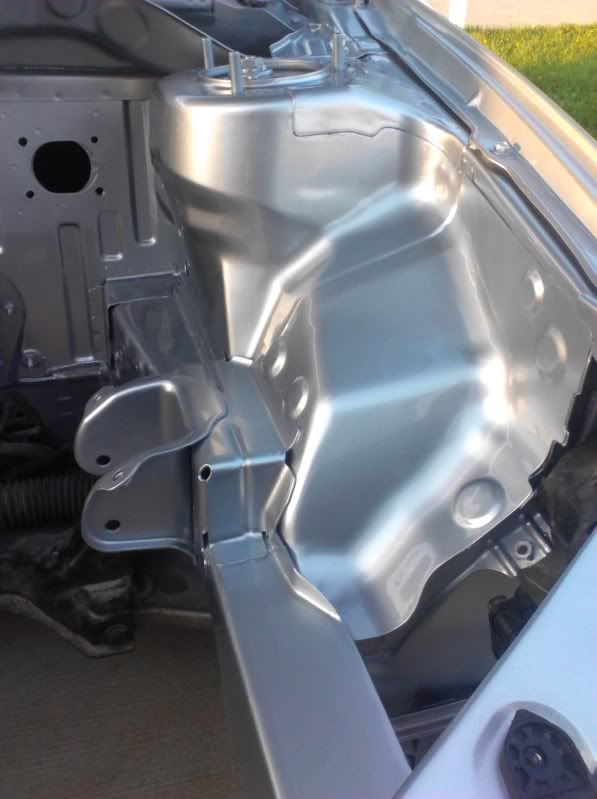
Here is the my current status up to date! Still waiting on some head work, I have removed A/C deleting ABS and Brake Booster. Intend to use Chase bays Brake Master and Proportion valve assembly. (stay tuned) The engine is out and I have welded and cut unnecessary holes/ bolts in firewall ect. Filled Primed using Epoxy Primer 3 coats of A31(Apex Silver) base 3 coats clear of. I have some wet sanding to do. before Re installation of Power plant and driveline. I will be installing w/out head at the moment as I will be runnin new PS lines, and assembling my own Mil-Spec Harness (bulkhead) and rerouting wires cleanly and tightly. I will also be doing a Battery Relocate and FuseBox Relocate as well. I envision a clean build primarly stock appearing but visualy appealing. (clean) I don't want it to look like a Show piece or "Riced Out"
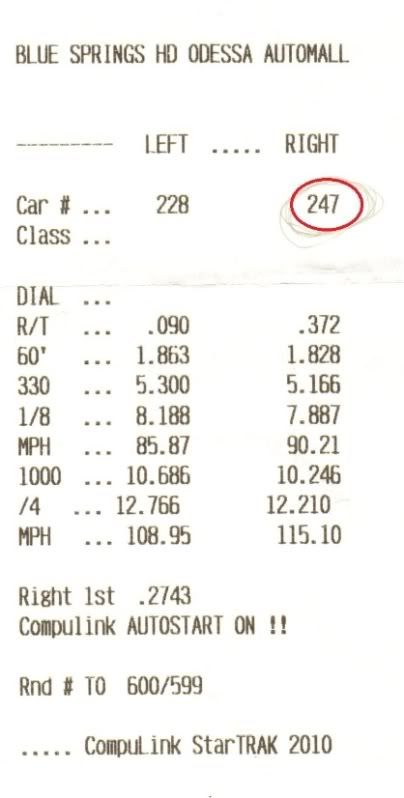
These 2 Pictures Are Just After Purchase and Setup #1 With the FpGreen Before headgasket issue

This is Dyno Of The Setup Prior to Head gasket Issue

This IS Run # 3 When I Frist Noticed the 60's Dropped Due to Head Gasket
This Is 2 Pics Of Products To Install for New Setup.
This Trial Fitment Of The First Wire Tuck After Engine Build Setup Before Thrust Washer Failure

This Is After Taring it back down for new setup This Is it's Current condition, After bay Work paint welding ect, and the way it sits today
THIS SHOULD BRING EVERYTHING UP TO SPEED CURRENT STATUS
Hello, my name is Steven. I outside Lee's Summit Missouri (KC MO Area). I have a Apex Silver EVO VIII. I Owned the car since Oct. 2009 only put 4,000 miles on it since then. The total millage 57k. When I bought the car it had megan manifold and Kelford 272 cams. 7 days after I purchased the car the Transfer case split evidently there was a previous crack in the case and was missing bolts. Modified by KC looked at it and installed a Stage 2 Shep T-case. Wile the car was in the shop i had them do the following; 60k tuneup,
1000cc RC injectors, 255 Fuel Pump, Electric boost control, Innovate Wideband, T-Case, ACT heavy duty clutch, (6 punk), Jackson Auto Machine Lifters, FpGreen .73 HTA, and Tune, Eibach Springs Cusco TI Strut Bar I think that's it.
Shortly after the tune, the first track day I noticed symptoms of a head gasket gone bad. It wend bad at the track but didn't notice symptoms till after the 3rd run my 60fts to 1.9, Bogged of the line, overheating, rough idle, missing coolant After divorce and tight budget i rebuild the evo witht he following. below. After running the car for about 500 miles for some reason the Thrust Washers wend! Some say due to ACT's Clutch not sure.... never the less it happend. It destroyed the bearing in the FP Green and I have been working on it little by little, So back out came the motor. Here is the current mod list.
Block
Wiesco Pistons 9.3:1
Manely Rods
ARP Mains
Acl Bearings
Reground polished OEM Crank (Jackson Auto Machine)
Head
Cometic Head gasket
Brian Crower std valves,
Brian Crower Springs
Ferrea Valve Guides and Seals
Jackson Auto Lifters
Kelford 272 Cams
ARP Head Studs
Fuel/Induction System
1000cc RC injectors
Walbro 255
Fp Green .73 HTA (Bad Needs Rebuild)
AEM Intake
Paerrin Front mount W/piping.
Greedy Type RS Bov
Driveline
ACT heavy duty (Street disk now not 6 punk)
Shep 2 T-Case
New ACT throw out bearing
Parrent Short throw (whole assembly bushings ect.)
Electronics
Defi Gauges
Innovate Wideband
Electric BC Solenoid
Suspension
Eibach Drop Springs
Cusco TI Strut bar
I think that's it might be missing couple things but the just of it.
Here is the my current status up to date! Still waiting on some head work, I have removed A/C deleting ABS and Brake Booster. Intend to use Chase bays Brake Master and Proportion valve assembly. (stay tuned) The engine is out and I have welded and cut unnecessary holes/ bolts in firewall ect. Filled Primed using Epoxy Primer 3 coats of A31(Apex Silver) base 3 coats clear of. I have some wet sanding to do. before Re installation of Power plant and driveline. I will be installing w/out head at the moment as I will be runnin new PS lines, and assembling my own Mil-Spec Harness (bulkhead) and rerouting wires cleanly and tightly. I will also be doing a Battery Relocate and FuseBox Relocate as well. I envision a clean build primarly stock appearing but visualy appealing. (clean) I don't want it to look like a Show piece or "Riced Out"
These 2 Pictures Are Just After Purchase and Setup #1 With the FpGreen Before headgasket issue
This is Dyno Of The Setup Prior to Head gasket Issue
This IS Run # 3 When I Frist Noticed the 60's Dropped Due to Head Gasket
This Is 2 Pics Of Products To Install for New Setup.
This Trial Fitment Of The First Wire Tuck After Engine Build Setup Before Thrust Washer Failure
This Is After Taring it back down for new setup This Is it's Current condition, After bay Work paint welding ect, and the way it sits today
THIS SHOULD BRING EVERYTHING UP TO SPEED CURRENT STATUS
 Nov 16, 2012, 06:47 AM
#29
Newbie
Thread Starter
coolc
Thanks,
MY intentions this weekend is to finish up the Bulk head harness. That is if I can get out of work Saturday! I will try harder to keep this up but I need the forums comments and ideas opinions to keep me motivated!
Anything anyone would like to see done?
Thanks,
Steven
Thanks,
MY intentions this weekend is to finish up the Bulk head harness. That is if I can get out of work Saturday! I will try harder to keep this up but I need the forums comments and ideas opinions to keep me motivated!
Anything anyone would like to see done?
Thanks,
Steven
Last edited by s240ka24t; Nov 16, 2012 at 07:02 AM.
Dec 11, 2012, 02:20 PM
#30
Newbie
Thread Starter
Hey Evolutionm,
Ok so long awaited I've been very busy at work but I'm back to my project build. I have completed the de-pinning process and shrinking all strands on the harness. I am going to reinstall the engine and trans before i cut the wires in to the bulkhead this way i can properly route my wiring for cleanliness and most important functionality. I am going to replace the motor mounts with a Urethane (innovative) mounts during re-installation. Has anyone had experience with them or other brands? If so my question for people running, not just innovative but any urethane mount what are your running 30a 60a 95a? I want a worthy difference in torque response as well as mount longevity. I don't want is a lot of discomforting vibration at an idle or low rpm. I realize that this type of conversation was brought up in may of this year but I'm looking for input on the stiffness level rather than the quality of the product.
ALSO (UPDATE) I Am going to do a full energy suspension master kit (urethane) bushing install
Here are some spec in char form as to the properties of urethane. I have been studying properties as well as pressure incurred on the mounts by a mildly modded block... hard pressed to find people with reviews or specs regarding urethane motor mounts. So any input is good input.
Thanks,
Steven
Last edited by s240ka24t; Dec 11, 2012 at 02:37 PM.